Jul
29
2015
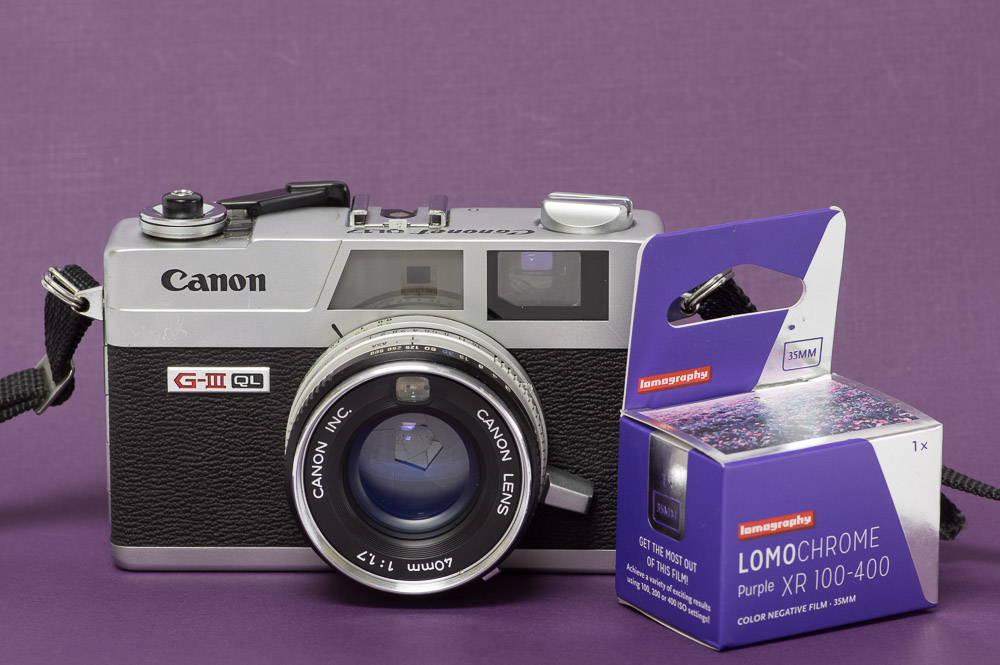
I have mixed feelings about Lomochrome Purple which matches the mixed results I’ve gotten. Perhaps my expectations of achieving a look along the lines of an infrared film are at fault but it’s also the fact that it doesn’t appear to shift in colour in quite the way Lomography suggests. You can see from the chart I did to go with my first post how the colours shift Lomochrome Purple. I like how deep blues turn cyan and yellows turn a pink but I’m frustrated by the lack of shift I have achieved with green the one colour I had the highest hope for. I will have to rethink the way I use this film if I do again. Choosing things that people know to be a certain colour are the most effective, something that could be green or purple isn’t going to have the same impact as say seeing a pink line down the middle of a road or a sunflower that looks like a shade of alizarin crimson.


On one side is a digital image from the same scene as the Lomochrome Purple version opposite.
2 comments | tags: film, Lomochrome | posted in Cameras, Photography
Jul
26
2015

I was kindly lent a Contax G1 and three lenses and took the opportunity to shoot four rolls of film with it. The first thing you notice on picking it up is that it is an absolute gem. The level of finish is exceptional it feels like it was milled out of a solid block of titanium. It does have a nice rubberized grip but is a little too heavy to easily use one-handed. The autofocus works well as long as you ensure that you set the center focus point on the subject. That’s fine for individual portraits but it caught me out a couple of times when it focused between two people despite my efforts. Additionally the focus is the loudest aspect of the camera drowning out the shutter and film advance although not really achieving objectionable levels. It’s too bad because even using manual focus doesn’t mitigate the noise as it works by ‘fly by wire’ and focuses to the distance you set on the top dial. Strangely when you change to manual focus rather than providing you an indication of the actual distance in the viewfinder as it does with autofocus it just gives an uncalibrated indication of whether you are setting focus in front or behind what the autofocus has determined. That and the fact that the manual focus dial is easily knocked inadvertently I would suggest that leaving it in AF mode is the order of the day. Moving on to the viewfinder there is good news and bad news. The good news is that it adjusts it’s field of view depending on the lens that is mounted. To achieve this though it would seem that it was necessary to engineer it much like the viewfinder you would see on a zoom point and shoot and the result is that it is a small viewfinder that is sometimes hard to bring quickly to the eye, like is possible with a fixed lens rangefinder, that’s the bad. Additionally on the good side of things the viewfinder automatically changes its masking to adjust for parallax and focus.
Okay that’s all well and good, it’s a beautiful piece of camera engineering but what about the lenses? Well if the camera is a gem the lenses are diamonds. The standard lens the Zeiss T* Planar 2/45 is perfectly matched and exquisitely built. With the camera I was also lent the 28mm f2 Biogon and 90mm f2 Sonnar two lenses equally as beautiful. The legendary Zeiss T* coating is evident on all the lenses. In the center of the lens barrel is the aperture ring with a nice solid detent for each setting. Because the manual focus is done at the body there are no other external moving parts to the lens. The lenses are as good optically as they are aesthetically pleasing. The rendering of out of focus areas (bokeh) is terrific giving the images a strong three dimensionality. Unfortunately the limited number of aperture blades shows in the background highlights as hexagonal shapes rather than nicely rounded as is possible with more or curved blades. All three lenses have exceptional sharpness from corner to corner they may very well be the best film camera lenses I’ve ever used.
A few other features of the camera are its top shutter speed of 1/2000 of a second it has +-2 EV exposure compensation and will do three frame bracketing. You do have to be careful if you override the DX reading system to set a manual ISO as it does not revert back, it can be very easy to accidentally leave it at an incorrect setting (Something to remember) Also it’s not impossible to forget to remove the lens cap although you will get a very wrong exposure as the metering is TTL which is another amazing piece of engineering. It actually uses the light reflected off the shutter curtain to determine exposure.
One thing about one camera: It was the first ever autofocus rangefinder camera
Here are some of my first sample images there are more to come after I develop more film
no comments | tags: Contax, film camera | posted in Cameras, Photography, Uncategorized
Jul
21
2015


The Ricoh TF500D is interesting in that it provides two focal lengths (35mm & 70mm) it does this by swinging a second set of lens elements into the optical path. This differs from a zoom lens of course where all the elements are used for all the focal lengths.
I certainly like that the Ricoh TF-500D provides a 35mm f2.8 lens but how useful is the 70mm f5.6 option? First off the lens is surprisingly good and gives nicely rendered out of focus backgrounds at 70mm. However deploying it is an aggressive noisy display with things whirring and clunking into place. It’s best not done while pointing the camera at someone. Even the movement of the lens for focusing is noisy but such is the price of using a camera that is around 25 years old. The LCD top panel is great for providing useful information such as the ISO and the number of frames remaining. The level of user control is very limited though, primarily being the +2EV backlight compensation and the two focal lengths. The D in the name of the camera denotes that it has a date function which will continue to be relevant until the end of 2019, at which point I will throw the camera into a recycling bin, take it apart or set it to 1985, at this point I’m not sure 4 years seems a long way off. All joking aside the camera surprised me with its fine results (factoring in the fact I used terrible outdated film). The 35mm lens alone is comprised of 4 elements with the 70mm adding an additional 4 elements behind the shutter. At 35mm the lens is as good or better than any of the alternatives from that time and the 70mm is actually usable too.
3 comments | posted in Cameras, Photography
Jul
16
2015
Here is an easy way to help determine whether you are taking a selfie or a self-portrait.

no comments | posted in Art observations, Photography
Jul
12
2015
Rather than my usual camera write up followed by a gallery of images I thought I would do this post differently. I will be posting the images in the body with text. I had the opportunity to take a stern wheeler tour from New Westminster to Steveston along the Fraser River. Paddlewheeler Riverboat Tours Never having seen the Fraser from anything but the shore I jumped at the chance.
The boat we took is the M.V. Native with it’s sole form of propulsion coming from its two paddle wheels. We started out at 9:30am briefly heading up river but turning around before the Skytrain bridge and leaving New Westminster behind. 
One of the first sights was the unloading of new vehicles onto Annacis island. Yes they are backing them off.
Continue reading
no comments | posted in Photography
Jul
10
2015


My Konica 1 rangefinder dates from around 1949, I doubt anyone 66 years gave any thought to it still being viable this far into the future. I can’t imagine any of my current digital cameras being useful beyond wedging a door open in half that length of time. But it is useful primarily because of its simplicity of design. Much like most folding medium format cameras the lens and shutter are autonomous in operation from the rest of the camera. A little island unto themselves. Because of this setting and tripping the shutter is independent of advancing the film. I use this fact to do multiple exposures and partial film advances. It seems to be a well suited niche for it. Without any type of built-in metering it is necessary to determine your exposure either with a light meter, guesstimating or my person favourite using a digital camera set to the same ISO as the film I am using. This not only can provide you with settings guidelines it allows a little bit of a compositional preview.
no comments | posted in Cameras, Photography
Jul
7
2015

Again with the Fuji DL mini? Yes again, I like this camera to the point that I think I will try to find another one that isn’t so beaten up. As I was going into Vancouver or as I always remember it as a kid ‘going downtown’ I grabbed a roll of expired drug store 400 ISO film and slipped the camera into a pocket. Yes the results match but that’s okay its actually the look I’m after. More about this camera here 28mm Verticals The Sardine Tin Fuji Dl Super Mini Fuji DL super Mini
no comments | tags: film, Fuji | posted in Cameras, Photography
Jul
4
2015

The Ricoh FF3 is one of those camera that neither offends or excites. Its 35mm 5 element lens isn’t the fastest at f3.2 or that free of distortion wide open. And it’s completely automatic exposure system gives no control over settings to minimize that. Given enough light thought the camera stops down the aperture and the lens is good enough. I do like that it takes regular AA batteries which are far easier to find and cheaper than lithium camera batteries. The film advance is noisy but functional. Speaking of noisy the self timer beep is more along the lines of an alarm clock leaving you feeling like it’s going to explode rather than take your picture “Smile”. The viewfinder provides some distracting bright sometimes flashing icons to indicate the focus distance and if flash should be used: Portrait,chest bump,plunging stock prices and lightning strike. The focus is easily fooled so be sure that the icon matches your expectations. It can focus in the dark though with its active beam AF system so that could be fun with flash “surprise!”

Despite its quintessential early 1980’s design with hard plastic edges it’s surprisingly nice ergonomically when used with two hands. With one hand your more likely to have your horizon at 45 degrees as all the weight is on the side away from the shutter button. In the end its a camera that’s more about the 1980’s look it portrays than the results you will get. There are far better cameras to choose.
1 comment | posted in Cameras, Photography
Jun
30
2015
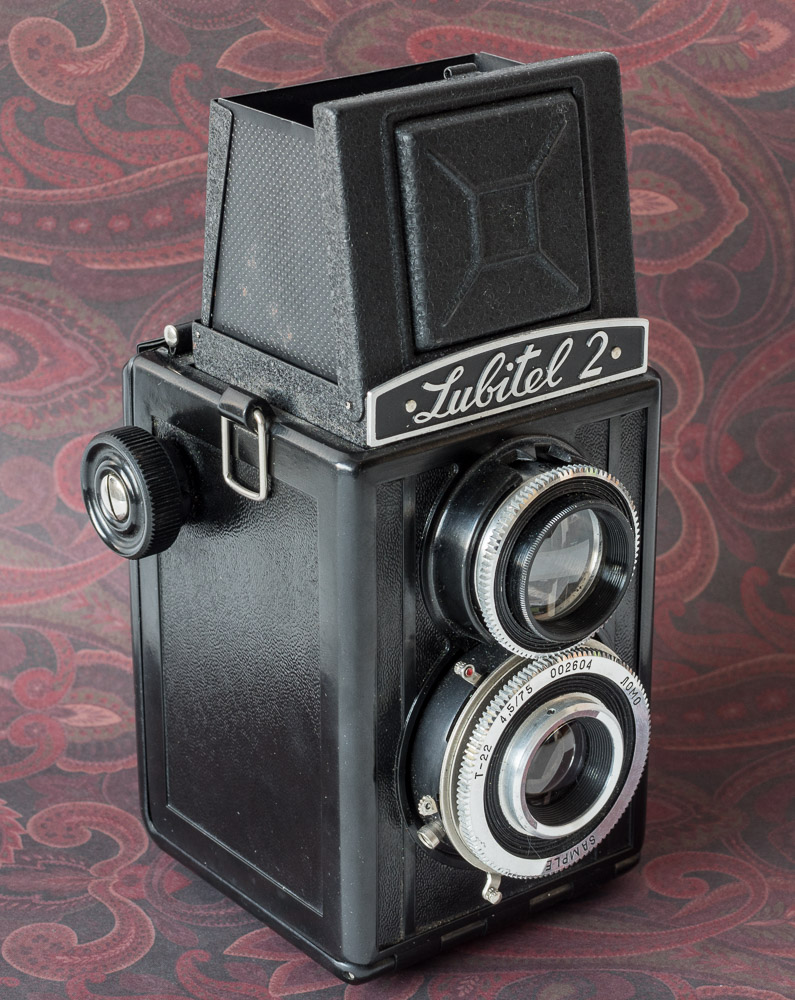
The 75mm f4.5 taking lens of the Lubetel 2 is made from only three glass elements know as a Cooke Triplet a design who’s variants date back to 1893. There are limitations to how much distortion this simple lens design can mitigate and it’s evident in the results. I actually consider it a ‘feature’ of this camera that can be exploited to effect. When focusing near to the camera and using a wide aperture the background is thrown into a swirling sea of distortion.
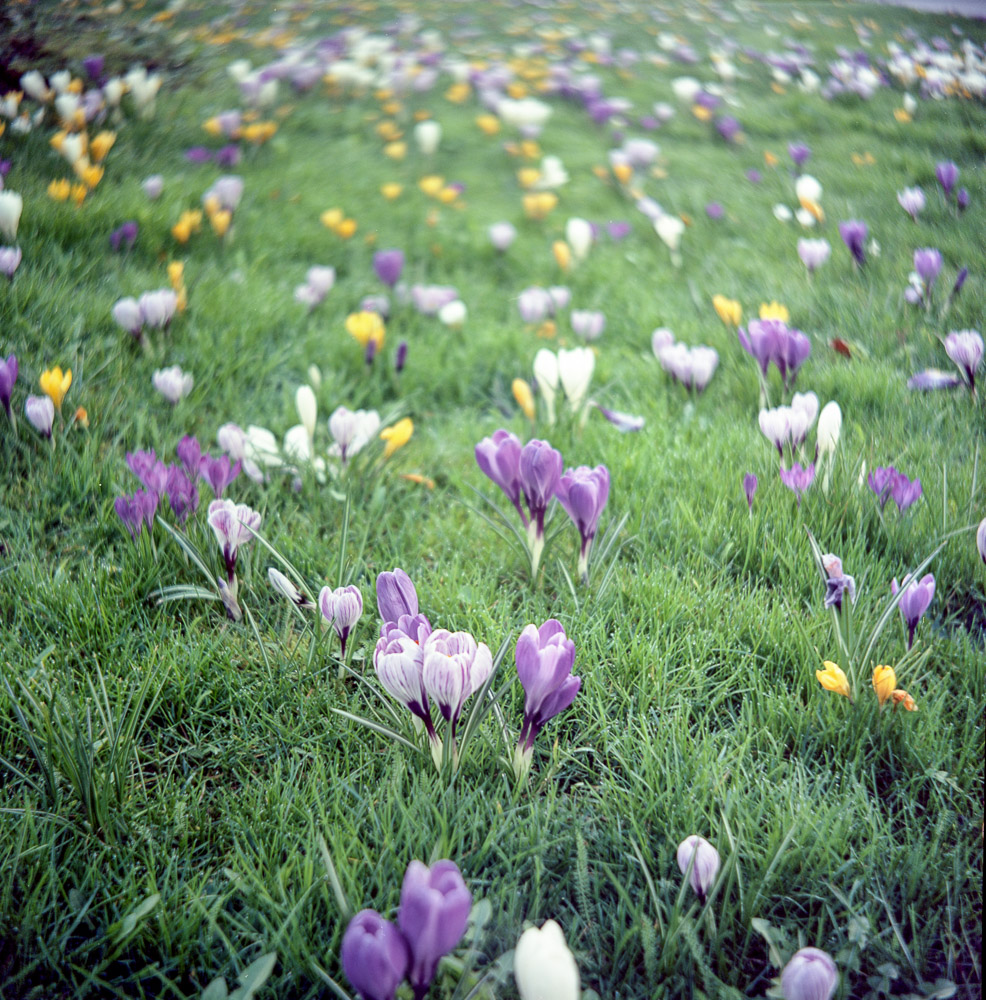
Paradoxically when focused further out and stopped down the camera can produce surprisingly good results.
Keeping these characteristics in mind you can use the Lubetel 2 to make images that look like they came from a cheap plastic lensed camera or one with far better optics just don’t forget which is which. Then there is the viewfinder which is more like looking through a cardboard tube than a viewfinder. It’s like one of those sidewalk chalk drawings that have to be viewed from one particular spot anywhere else and it doesn’t look right. The one spot where it does work is frustratingly just slightly out of arms reach unless you have orangutan arms. The shutter release is a tiny little lever that is situated perfectly so that your finger will impede the shutter cocking lever when you go to take the picture. The solution for this is to use a remote shutter cord with your third hand. All problems aside its an interesting looking camera with different textures and materials and my model has ‘MADE IN USSR’ on the side which amuses me.
More about the Lubitel 2 by searching my blog Search Lubitel 2
no comments | posted in Cameras, Photography
Jun
28
2015

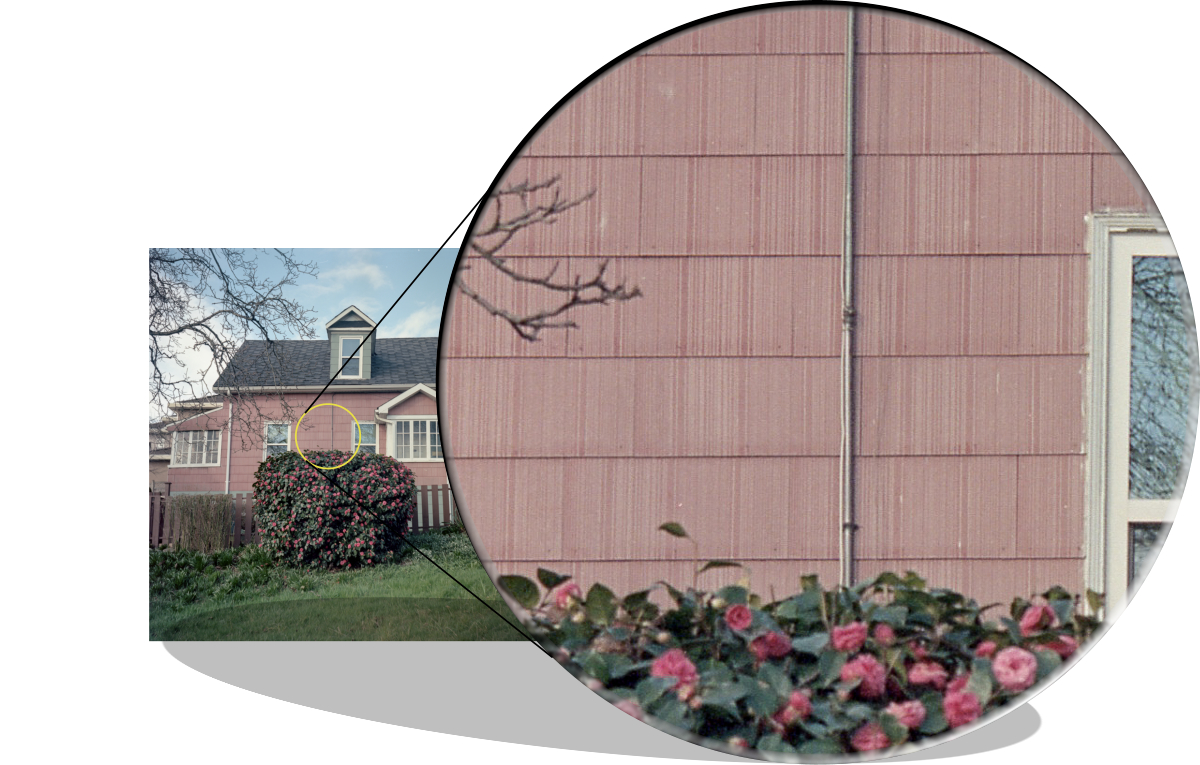
Kodak Ektar 100 was introduced in 2008 and shouldn’t be confused with the earlier Ektar that was available from 1989 to 1994. Kodak claims that Ektar is the finest grain colour negative film available and I have no doubt that it is. This is an example of the film shot at its native sensitivity of 100 ISO

While the image itself may not be the sharpest there is very little evidence of the film grain itself.
additionally I have found that Ektar has a great degree of exposure latitude that is it can capture a lot of detail both in image highlights and shadows without the need to sacrifice one or the other. This is a feature of film and it’s non linear exposure curve but especially so for Ektar 100.
With all this in mind ‘Fine Grain’,’great latitude’ and its scanability I thought I would try pushing it to 400 ISO as a test. What this entailed was changing from the default ISO of 100 to 400 on my camera which is the same as under exposing the film by 2 stops. Additionally I pushed the processing (Increased the development time) to account for this. The result is that you have a film that you can use for lower light conditions but what are the trade offs? Well the result is that the grain becomes more pronounced and there is an increase in contrast, additionally I found a loss of detail in the shadows and a colour shift towards magenta
So how does this compare to films with a native sensitivity of 400 such as Kodak Portra and Fuji Superia? Well I would say it doesn’t quite match up it’s more like using out of date Kodak 200. Not all of my testing results matched up because I found it necessary to under expose even a little more under the low light conditions that I had but when exposed properly at 400 ISO it’s a viable alternative in a pinch.
The following examples were taken with the Fujica ST801 and Kodak Ektar at 400ISO with a +2 stop push in development.
no comments | posted in Photography, Processing


