Dec 23 2017

Minolta Autopak 70

_K3_7821

There are a lot of terrible plastic cameras that find their way into thrift store bins but sometimes there is the odd gem.  The Minolta Autopak 70 falls  more in the interesting pebble you turned over with your foot category.  It has a 26mm f 3.5 4 element lens as well as a close up lens that slides in front.  I didn’t have much success with that though as you can see bellow.

Minolta_Autopak70_LomoTiger200_2016_024

Despite its age it came with a working battery which is good because its uses a K battery which is pretty much unattainable.  In the future I will need to build some type of replacement 4.5V  but for now I have one.

With its electronic shutter the Autopak 70 has a speed range of 10 seconds to 1/330 second.  If I had know this at the time I would definitely have tried a long exposure shot however doing that even with a tripod might be tricky as 110 cameras are mostly shaped like a rectangle with the shutter button on the far end for extra wobble when you press it.  When done right though it produces and image that would be on par with a digital point and shoot camera from around the year 2000 but in a much more fun package.


Dec 16 2017

Yashica MC

YashicaMC-1706

The Yashica MC is like a miniature version of an Electro 35 with nearly half the weight and twice the charm.  It has the same type of infinitely variable electronic shutter that goes from 1/500 second to 4 seconds as the larger variants and its 40mm f2.8 lens while not as fast is still a decent performer.

The electronic shutter shouldn’t be confused with the modern idea of integrated circuits and processors its still a very analog system that essentially opens the shutter mechanically which also energizes the shutter circuit.  An electromagnet holds the shutter open as long as current flows through one of the transistors but when the charge that is building up in a capacitor, controlled by the resistance of a CDS photo cell reaches a certain level another transistor turns on de-energizing the electromagnet and therefore closing the shutter and switching the circuit off again.  This is why without batteries Yashica’s like this default to their maximum shutter speed, there is nothing holding the shutter open.  There are other factors in the circuit as well such as the aperture which changes the resistance of another part of the circuit or the ISO setting.  Okay when I started typing I thought it was going to be a simple explanation.

To sum it up: Wind film ,Press shutter, light on CDS and aperture determine shutter time, repeat.

My Electro 35 MC is stamped with ‘Hong Kong’ on the bottom so I can only presume that is where it was assembled but the 40mm F2.8 4 element lens is labeled as made in Japan

You can see a previous post about the Yashica MC Sept 2015 here


Dec 10 2017

Jim Ellis Freeway Park – Seattle

Sometimes you don’t get what you expect when you go out taking pictures.  For a few years now I’ve been fascinated by the concept of Seattle’s Freeway park which has existed as a lid over the freeway since 1976.  Through out most of my life my only interaction was passing beneath it when travelling through Seattle, completely oblivious to its existence.  That all changed when I stumbled across it with Google maps.  The idea of this hard edged concrete park intrigued me enough that I decided to make a trip to photograph it.  I live several hours away in Canada so the easiest thing was to stay overnight in Seattle and then get up in the morning and photograph it.  A wrinkle in my early morning low light idea was that while I packed my tripod I managed to neglect taking any of my tripod plates to actually mount a camera to it.  As I write this I have only seen the digital photographs that I took the film remains undeveloped.  The park itself is around 5 acres splayed along the line of the freeway and abutting a number of buildings.  In this manner it seems less like a cohesive park and more like a number of similarly landscaped open courtyards.  There is one area near the southern end of the park that is different and the main feature.  This deep concrete canyon is the largest element and includes waterfalls.  However as I was visiting in February if the water features are still operational they were likely turned off for the winter.

_K3_8791-Edit


In the easily accessible public spaces the park was clean and well maintained but just as it serves as a lid over the freeway it also covers a separate living space for people on the edges of society.  I’m not sure how many people call the nooks and crannies beneath the park home but once you are looking there seems to be evidence everywhere.

Continue reading


Dec 2 2017

Baby Bessa

Voigtlander_Bessa-1

This is the eighth post I have done with the Voigtlander Bessa 46 which is roughly one per year that I’ve been blogging.  That seems about right as every so often I think to myself what camera haven’t I used in awhile that I want to use.  I think that the reasons I enjoy using the Baby Bessa as much as I do is that it allows the use of medium format film with more of the feel of using a 35mm camera because of its small size.

I also like the option of doing multiple exposures as seen here.

2009_Feb_Voigt_006

The bad thing about the ability to do multiple exposures of course is that you need to be careful not to do them when you don’t want them.

A search through old magazines shows that in 1939 the Baby Bessa cost $49.59 which may not sound like much but considering that earning $1 an hour back then would have been pretty good pay makes it something not everyone would have considered purchasing.


Nov 18 2017

Blacks Sassy

Blacks_Sassy-7809

Back when there were camera stores seemingly everywhere there was a chain of stores in Canada called Blacks which was taken from the family name of the founders.  In any case they were a large enough retailer to have cameras rebranded with their name from a variety of manufacturers.  In this case I think this is another one of the variations of a Matsushita that came as the Leica mini, The Minolta Freedom Escort, Olympus Trip AF and possibly others.  So despite having the same internals as its siblings the Sassy went all out for style.  And by style I mean what passed for style in 1992.

When all is said and done though the camera has a 35mm f3.5 lens and the usual flash control features and works despite looking like it never lifts a finger with that gold trim.  I loaded it up with some terribly out of date Konica 400 film which leaves me with a good excuse to try the camera again, if only I can find an early 1990’s themed costume party.


Nov 4 2017

SMC Pentax-A 50mm f1.2

_K3_7833

I wish that I had a full frame digital camera to test this lens with but film and APS-c sized digital will have to suffice.  The first thing you notice about this lens is the weight it is a lot of glass and its needed to achieve that fast f1.2 aperture.  As this is an older lens I didn’t have too high of expectations especially because my newer DFA 50 1.4 is quite soft wide open but to my surprise the SMC 50 1.2 was actually quite sharp, that is for what is in focus inside the razor thin depth of field provided at f1.2.  It also has very little vignetting and what there is is gone by f2.8.  Having a lens this fast is as they say, to a kid with a hammer everything is a nail.  However nailing focus wide open is not so easy even the slightest swaying of the photographer is enough to throw it off.  If you do get it right though it is a very unique look.  What follows are some film shots taken with my Pentax MZ-6 and the this lens on Kodak Ektar 100.  Back in the early 1980’s this lens cost around twice as much as a 50mm f1.4 and it still garners a similar premium on the second hand market.

On my Pentax K-3 DSLR the SMC Pentax-A 50mm f1.2 provides an angle of view more like a 75mm lens would on the film SLR making direct comparison difficult but also making it perhaps even better suited to portraiture.


_K3_8941

And some digital pictures taken with my Pentax K-3 and this lens.


Oct 25 2017

Olympus XA

OlyXA

The Olympus XA reached a certain cult status among film cameras and perhaps its not for just one reason but several.  If you start with the idea of what do you want from a camera and that turns out to be ‘packability’ then the XA meets that.  The clamshell design both protects the lens and makes it easy to slip into pockets and small spaces.  If you also want a quality lens in that small package the XA delivers that as well.  The lens design with 6 elements is unique and allows for the overall thinness of the camera.  Then there are the controls of the camera.  Focusing is performed with a small lever under the lens that both aligns the rangefinder patch and moves internal lens elements. XAFocus

Its finicky and can be difficult but it is manual and better than zone focusing.  The exposure system also allows user input in the form of aperture selection with a fully automatic electronic shutter.  Fortunately the exposures are accurate so fully manual adjustment isn’t often missed and for backlight situations you can select a +1.5 EV override.

All these various attributes together are what made the Olympus XA desirable back when it was available new and what continue to make it a desirable camera today.

I used expired generic drugstore ISO 400 film for the following images.


Oct 21 2017

Zeiss Ikonta 521/16

ZeissIkon-5553

Ikonta

One of the things I really like about old medium format folding cameras is how compact they are when closed.  The Zeiss Ikonta 521/16 is a great example taking up very little room in a camera bag although adding a hefty 565 grams   They were produced over many years and had different lenses and features.  This one has a 75mm f3.5 Novar Anastigmat lens and a shutter with 8 speeds up to 1/300 second.  It also has double exposure prevention with a nice little red dot indicator when the film has been advanced.   Using one of these cameras for ultimate image quality isn’t a great idea but using them for the unique experience and look is.  There is a certain pleasure from using a camera that despite being over 70 years old still does its job.


Oct 8 2017

Disposible film camera harvest

Dispossible_film-7861

Disposable cameras have their place but nestled inside them can be some fun random films.  I acquired a few similar disposable cameras of dubious quality so I decided to rip one open and pull out its heart.  Mentioned previously here Thrift Store DisposableDispossible_film-5387

The first thing you need to do though is get the film back into the canister.  The way that disposable cameras work is that rather than a separate rewind action all the film starts outside the canister and is wound back in as you advance the film.  I accomplished this, without taking unwanted pictures, by winding and tripping the shutter while the camera was inside my changing bag.  Any suitably dark sack will do or even a finger over the lens.

Dispossible_film-5389

With the expired Italian film recovered from the Chinese camera I put it into my Japanese Yashica GX and here is what I got shooting around my neck of the Canadian woods.

One last thing I found when taking the film out of the developing tank was that a short piece of dummy film was taped to the end presumably to maximize every piece of emulsion that gets exposed.

20170805_134732


Sep 24 2017

Medium format Panoramic Home brew

_K3_1714

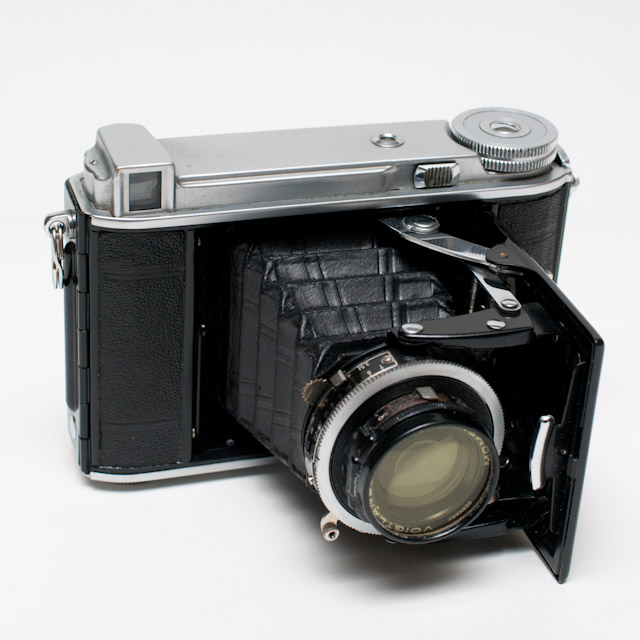
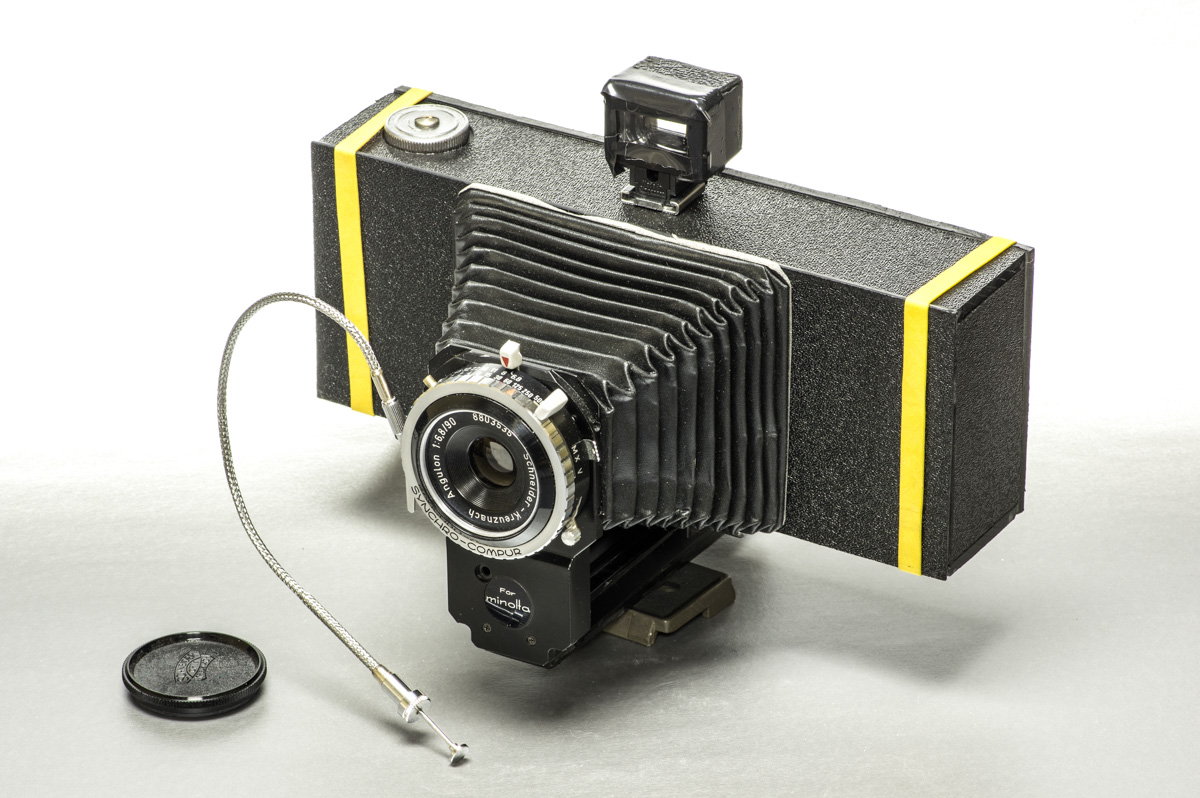
I really like the look of panoramic images and the way it forces you to think differently about composition.  So while I’ve had a few 35mm faux panoramic cameras I wanted a medium format one.  Rather than spending a lot of money I though why not make my own from what I had on hand.  The key component that even makes an idea like that feasible is that I was given a Schneider Kreuznach Angulon 90mm f6.8 lens and shutter a few years back.  Around this vital element I gathered my other parts.  There is a sliding rail from a Minolta macro bellows, the bellows from a Polaroid Pack camera I had altered into the Frankenroid , the film holders and winders and mask from a defunct Agfa Medium format camera, an empty pack of Polaroid Captiva film and a bunch of ABS plastic.

_K3_1715

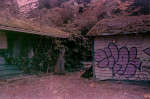
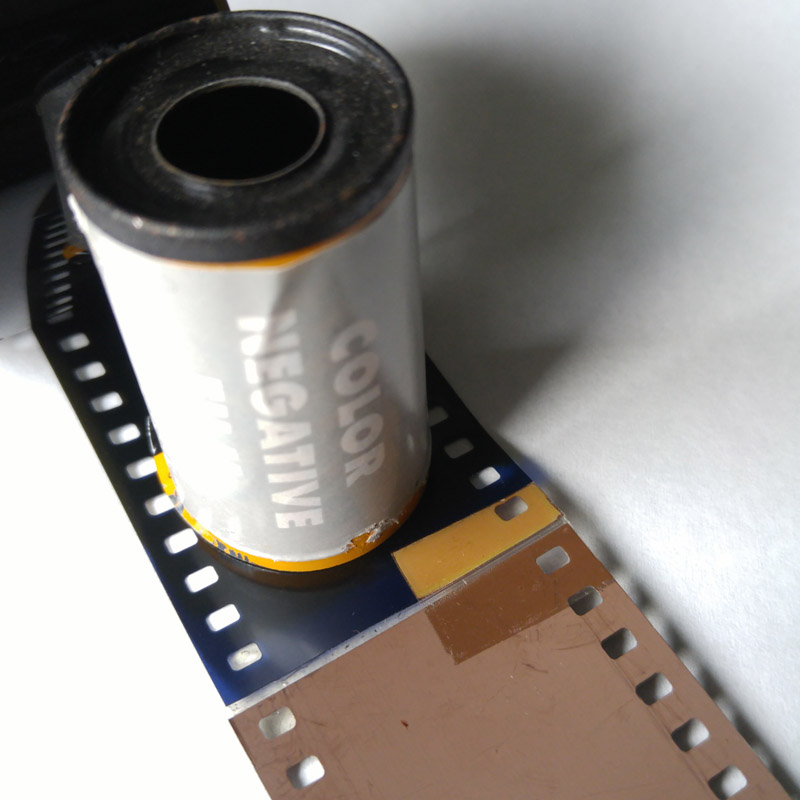
The other thing to the endeavor was that I was on a timeline, wanting it for a photography trip.  As it turned out the timeline was a little too tight and the camera was not so tight. The result was the film was mostly fogged by light leaks to the point of ‘unscanability’.  The other thing that happened was that in my haste I neglected to put a take up spool back in so when it came time to actually load the film there was nothing to wind it onto.  Fortunately necessity being the mother of invention I was able to make a take up spool from some copper wire and tape.

Takeup_001 Takeup_002

Its deceptively hard to bend copper wire into a meaningful shape at the ends.

Takeup_003

Going back to the construction of the camera, the pieces of abs plastic were cut from flat material of various thicknesses and then fused together using Methylene chloroide as the solvent.  I found that the easiest way to cut sheets of ABS was to score it on both sides with a xacto knife and then to break it along that seem.  Another little trick that I came up with centered around drilling small holes into the plastic without a drill that could hold such small bits.  I searched the internet for a solution but finding nothing that didn’t involve buying something expensive this was my solution.

Take the bit and wrap its base tightly with a rubber band making sure to keep it as even from side to side as possible.  When the band is almost all on twist the remaining amount once and then pop it over the end of the bit to stop it fom unraveling.  Now its just a matter of inserting it into the drill chuck and testing it for being centered.  It may take a couple attempts with loading it into the drill just spin it around until your satisfied that it runs true.

Small_drill

Because I built the camera in just over a week I didn’t record much of the figuring and work and its really a one off in any case but here are a few of the components that I had to make or alter.

bellowsThe end of the bellows was too thick to accept the lens so it was necessary to file it down by a considerable amount, a tedious process I did by hand with files.

lens_mount

I made this brass plate to mate the Polaroid bellows to the lens

Springs

The springs from the Captiva film pack with some slight modifications became the spring for the film pressure plate you can also see the hole for the film number indication.  Its position is such that you wind on odd numbers 1,3,5,7,9 as the area is double that of a 6×6 frame.

In order to determine how to set the focus of the camera I took it outside with a long tape measure and a flag to focus on.  I placed a piece of ground glass at the same plane as the film sits and started the process of moving the lens in and out to focus at various distances and then record the result to make a focus chart. focus001 focus002 focus003

Small changes in distance for the lens had huge effects on focus so it became clear that I needed to use an accurate method of measuring even in the field later.  For this I chose to use a digital micrometer.

Focus_Chart


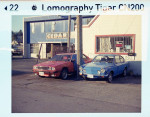
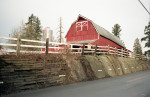
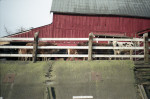
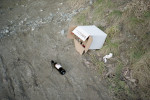
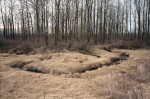
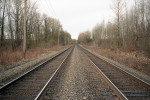
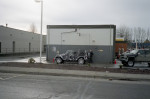
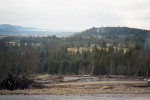
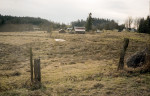
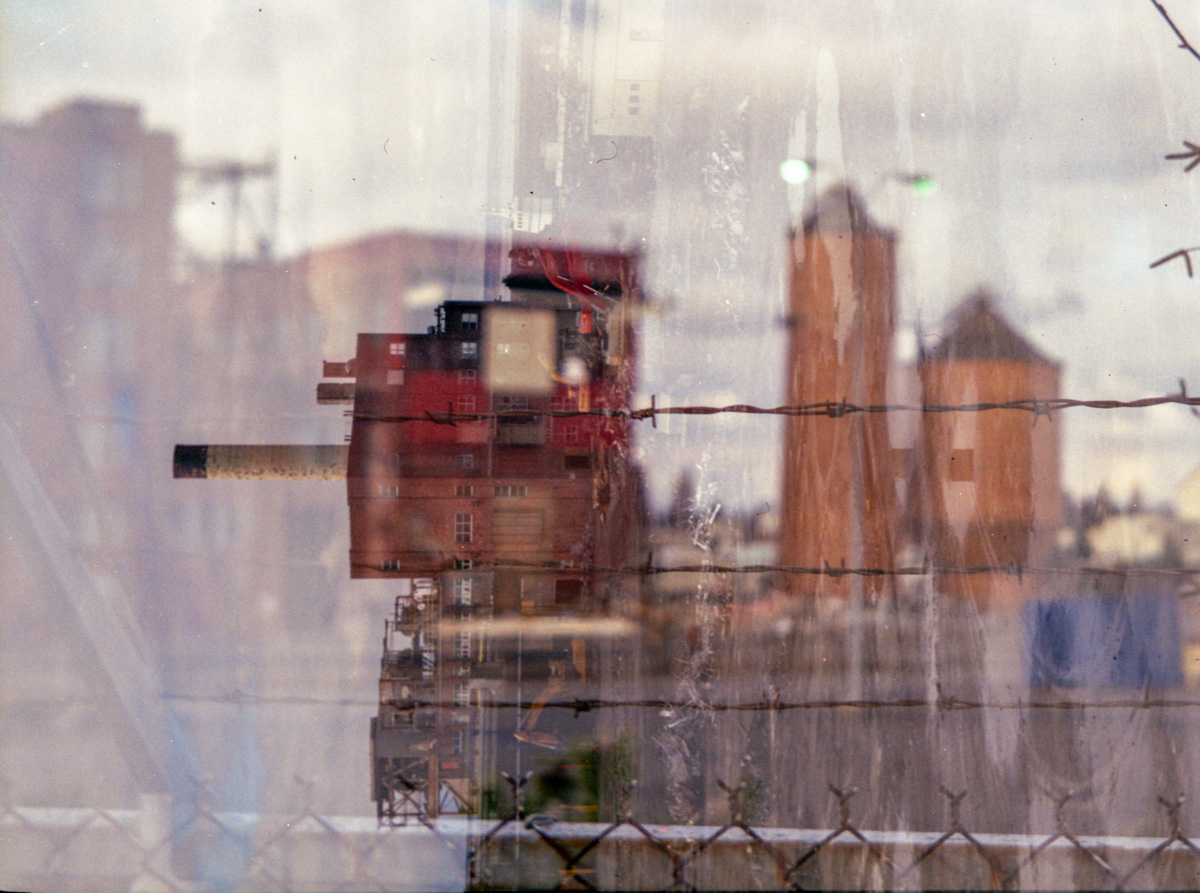
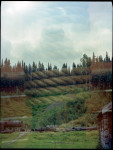
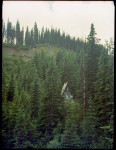
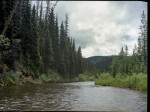
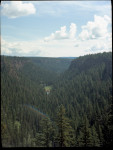
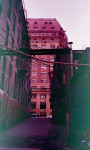
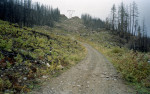
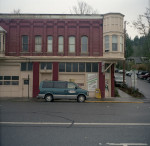
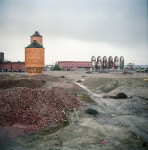
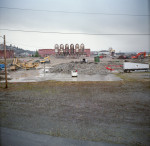
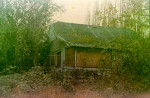
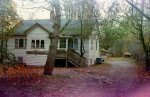
The viewfinder was a last minute addition made from the case of a broken flash and the viewfinder from a 28mm point and shoot camera and electrical tape.  It served its function.  By this time I had run out of time before it was time to go and try the camera.  It was with a little hope that I thought there was a possibility that the way the back was constructed with a lip that sat against a raised edge inside the camera  enough light would be kept out of the camera, nope.  Out of the entire roll I managed to recover one image that was discernable and that was likely because it was the first one before the full brightness of the day.

PanoramicW_2017_001

So the next step is to make the back of the camera light tight.  The rest of the camera is fine as I used a black silicone around any edges that could have any possibility of leaks.  And remember a take up spool that’s important too.