Cell phone buttons
Well pictures of buttons taken with a cell phone anyway.

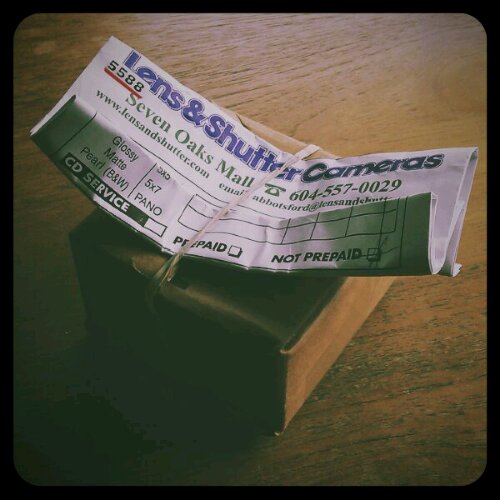
You never really know what’s inside. Just to re-enforce this notion Lens and Shutter has returned my processed film to me in this nice little hand made gift box. I can’t wait to open it.
So after creating the worlds thinnest pancake lens I thought I would try my hand at making a wide-angle lens. The first thing I should mention is that the image quality is on par with the cost and I think I spent about $5 total making this lens. This is possible because a certain percentage of the cameras that I acquire are dysfunctional so they end up being disassembled for their bits. It’s those bits that I use to make other things such as this lens. I did need to buy a $2.69 piece of ABC plumbing in order to make the body of the lens.
While I don’t know exactly where these lens elements came from, they are essentially the rear elements from two point and shoot cameras, one of them turned around to become the front group. Realistically your not going to be able to deal with most of the distortion when you do something like this so why fight it. This is the look of this lens take it or leave it. It turns out to be about a 15mm lens with horific yet wonderful barrel distortion. I haven’t determined the angle of view yet or the aperture which is always wide open in this version. Everything is rendered in a semi focused state no matter how near or far. Maybe there will be a Mark II version that performs a little better or maybe not as this is my digital Holga.
Oh no, my Pentax Espio Mini has developed a problem. The rewind motor is no longer rewinding the film all the way back after all the frames are exposed. The result is that I opened the back after the rewind only to find that the film was still there. I closed it quickly to limit the damage and then manually rewound the film in a dark bag (my backpack). So I think I lost about 4 frames near the beginning of the roll but more worrisom to me is the loss of my camera. I really like this little point and shoot and will have to begin a search for a replacement.
So what is so appealing about this camera? Well it’s extremely small, it has a fantastic 32mm f3.5 lens with three elements and has an accurate exposure system. The focus on this camera is very accurate with parallax correction in the viewfinder that allows framing when as close as the 12 inch minimum. I like that extra bit of view the 32mm gives over other cameras like the Olympus Stylus Epic /Konica Big Mini/Leica Mini or Yashica T3 with their 35mm lenses. And aside from the Olympus it is the smallest of the bunch.
And now for the images. These are from the previously mentioned light struck roll.
I’ve reached another milestone with my cell phone pictures on Mytubo I’ve garnered the support of 1000 people. What this means is that whenever I post an image these people have chosen to have it show up for them to see. 1000 may not seem like that much if you were using Instagram as the bench mark but within Mytubo that’s pretty good. Here is a zoomable sampling of some of my recent images. Unfortunately or not you don’t get to read my sometimes witty titles though.
I didn’t want to crowd the previous post about the Minolta V2 with a lot of images so I’m presenting them here separately. If you want to see the camera itself here is the first part Minolta V2 Part 1
The lens of the Minolta V2 has a focal length of 45mm which matches up nicely with the 42mm diagonal of the image formed on the film. It has a maximum aperture of F2.0 created from what I understand to be 6 elements with the shutter sandwiched somewhere in the middle. The aperture is formed via 8 blades and while they form an octagon it is nicely symmetrical. It creates a nice soft bokeh that isn’t at all busy.
Looking over the camera again I have to marvel at the design, there are so many edges and elements that exude quality and work together to create the whole. This camera even looks good from the side. I definetly need to use this camera more often and maybe try some portraits with it.
Here is a 100% crop from one of the images. This shows that stopped down from about f4 this lens is an excellent performer but with quite low contrast. Wide open it does have some distortion but it is part of it’s look.
This is one of my all time favorite cameras, it has that certain look that defines the fixed lens rangefinder form.
Every aspect of this camera is nicely done right down to the black band on the shutter release and film rewind that match the film advance leaver.
The defining technical detail of this camera must be it’s shutter which is capable of 1/2000 of a second. This was quite an achievement in 1958 with a leaf shutter. To reach this speed though the aperture is limited to maximum opening of f8. Both shutter and aperture control are on the lens with a small window providing the EV number for that combination. The same EV can be maintained will changing shutter and aperture by turning both dials together.
The viewfinder framelines automatically adjust for close focusing and the focus patch is a nice contrasty rectangle. Unfortunately my viewfinder frame is slightly askew which results in crooked horizons if you adhere to it as i did with my last roll of film.
In the second part I’ll show some sample images and discuss the camera some more.
I’m going to share with you a method I use to create a reasonably effective film grain look with digital files. Yes there is software that can do this and some of them do a pretty good job but not always and why not use what you have. Lightroom for instance provides the ability to add grain to an image but it does this across the entire image without regard to exposure which is not the way that film looks I’m sorry to say Adobe.
To begin with here is an image I shot at ISO 3200 with my Pentax K7 1/8000 sec and f2.8, even though the image has been down sampled you can still see the digital noise that will become our “film grain”.
I then take this file and use the in camera processing to make these adjustments.
Custom Image Monochrome/Filter Effect Red/No Toning/
High Low Key Adjustment (here you can effect the image’s overall brightness while maintaining the highlights and shadows)
Contrast +2 (the film I’m trying to mimic is more contrasty than the digital capture)
Highlight Contrast -3/Shadow Contrast -4 (Here we want to reduce some of that contrast we just added but only in the shadows and highlights)
Set sharpness to zero as we already have a grainy image and we don’t want to over emphasize this and create something unnatural.
We also want to ensure that High ISO noise reduction “NR” is turned all the way off just prior to processing the image.
And the resulting image made to mimic Kodak PX125 otherwise known as Plus-X
And a 100% crop (There will be some compression due to the reduction in file size for the internet)
This is just one example of what can be done but it all started with taking a RAW image shot at high ISO.
And a few more examples
and a detail from the above image shot at 1600 ISO and processed in a similar way.
One final note, you may have noticed that I mentioned I shot that first image at 1/8000 of a second at f2.8 at an ISO settingof 3200. As sensors improve there is less and less noise at higher ISOs so this technique may not work as well into the future. If for instance it took an ISO of 6400 to achieve this result I would already have to stop down the lens to F4 as my shutter is limited to 1/8000 of a second as are most high end DSLR’s. In this case I’ve created a situation where I’ve overridden the noise reduction technology but that too may not always possible. Have fun and experiment.
I used this technique back in December of 2009 to create this set of images Bellingham
The Ikonta M creates a square negative on 120 film, yeilding 12 images per roll. Advancing the film requires viewing the frame number through the window on the back as is common for cameras of this age. The shutter itself resides with the lens at the end of the bellows but there is a shutter button on the body that releases it through a linkage. The shutter button is locked out until you advance the film, mostly preventing double exposures. Did I or didn’t I advance the film already?
My favorite feature of this model though has to be it’s uncoupled rangefinder. By uncoupled I mean that it doesn’t actually change the focus, you have to remember to do that as well, but it indicates the distance on the rangefinder adjustment wheel.
The rangefinder view is a magnification of the center allowing for more precise focusing, while framing is done in a seperate viewfinder. This is as combersome as it sounds; Find the distance with the rangefinder, transfer that distance to the lens, frame the image with the viewfinder, hey where did everyone go? These quirks though are what makes a camera like this interesting, if I just wanted pictures I would use a DSLR and be done with it.