Medium format Panoramic Home brew
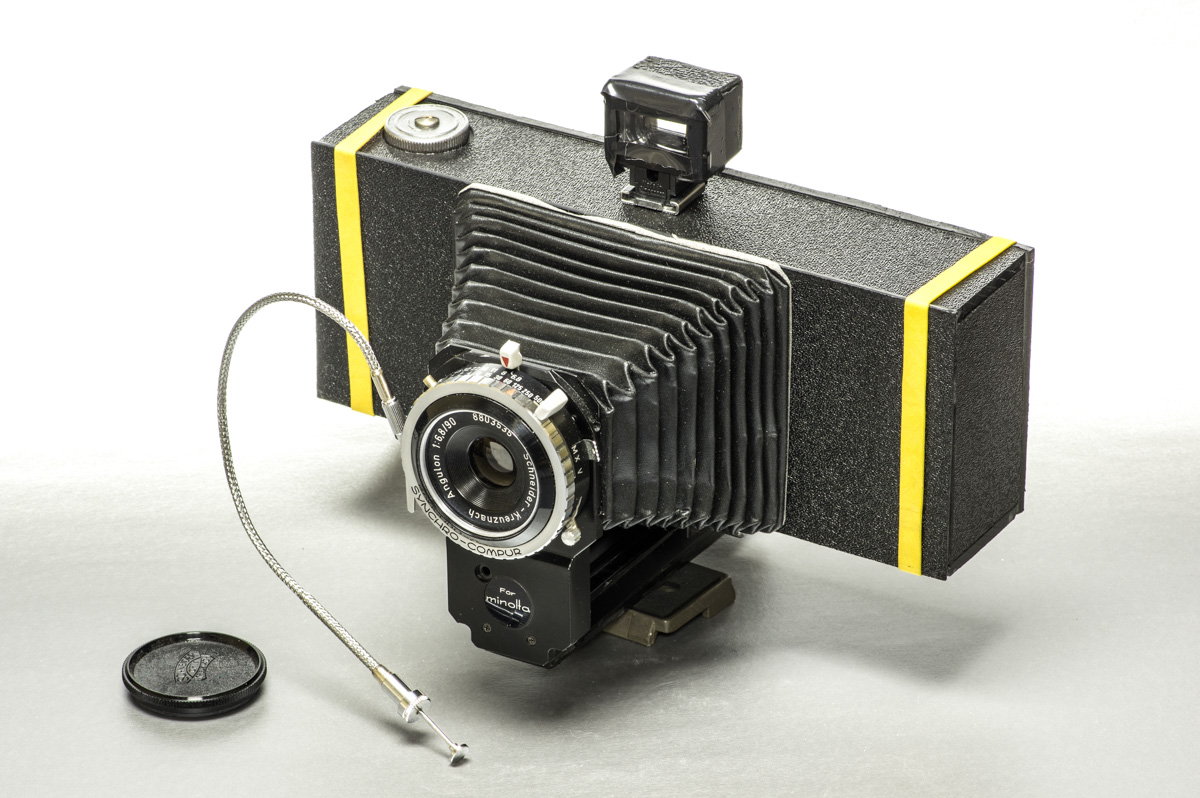
I really like the look of panoramic images and the way it forces you to think differently about composition. So while I’ve had a few 35mm faux panoramic cameras I wanted a medium format one. Rather than spending a lot of money I though why not make my own from what I had on hand. The key component that even makes an idea like that feasible is that I was given a Schneider Kreuznach Angulon 90mm f6.8 lens and shutter a few years back. Around this vital element I gathered my other parts. There is a sliding rail from a Minolta macro bellows, the bellows from a Polaroid Pack camera I had altered into the Frankenroid , the film holders and winders and mask from a defunct Agfa Medium format camera, an empty pack of Polaroid Captiva film and a bunch of ABS plastic.
The other thing to the endeavor was that I was on a timeline, wanting it for a photography trip. As it turned out the timeline was a little too tight and the camera was not so tight. The result was the film was mostly fogged by light leaks to the point of ‘unscanability’. The other thing that happened was that in my haste I neglected to put a take up spool back in so when it came time to actually load the film there was nothing to wind it onto. Fortunately necessity being the mother of invention I was able to make a take up spool from some copper wire and tape.
Its deceptively hard to bend copper wire into a meaningful shape at the ends.
Going back to the construction of the camera, the pieces of abs plastic were cut from flat material of various thicknesses and then fused together using Methylene chloroide as the solvent. I found that the easiest way to cut sheets of ABS was to score it on both sides with a xacto knife and then to break it along that seem. Another little trick that I came up with centered around drilling small holes into the plastic without a drill that could hold such small bits. I searched the internet for a solution but finding nothing that didn’t involve buying something expensive this was my solution.
Take the bit and wrap its base tightly with a rubber band making sure to keep it as even from side to side as possible. When the band is almost all on twist the remaining amount once and then pop it over the end of the bit to stop it fom unraveling. Now its just a matter of inserting it into the drill chuck and testing it for being centered. It may take a couple attempts with loading it into the drill just spin it around until your satisfied that it runs true.
Because I built the camera in just over a week I didn’t record much of the figuring and work and its really a one off in any case but here are a few of the components that I had to make or alter.
 The end of the bellows was too thick to accept the lens so it was necessary to file it down by a considerable amount, a tedious process I did by hand with files.
I made this brass plate to mate the Polaroid bellows to the lens
The springs from the Captiva film pack with some slight modifications became the spring for the film pressure plate you can also see the hole for the film number indication. Its position is such that you wind on odd numbers 1,3,5,7,9 as the area is double that of a 6×6 frame.
In order to determine how to set the focus of the camera I took it outside with a long tape measure and a flag to focus on. I placed a piece of ground glass at the same plane as the film sits and started the process of moving the lens in and out to focus at various distances and then record the result to make a focus chart. 


Small changes in distance for the lens had huge effects on focus so it became clear that I needed to use an accurate method of measuring even in the field later. For this I chose to use a digital micrometer.
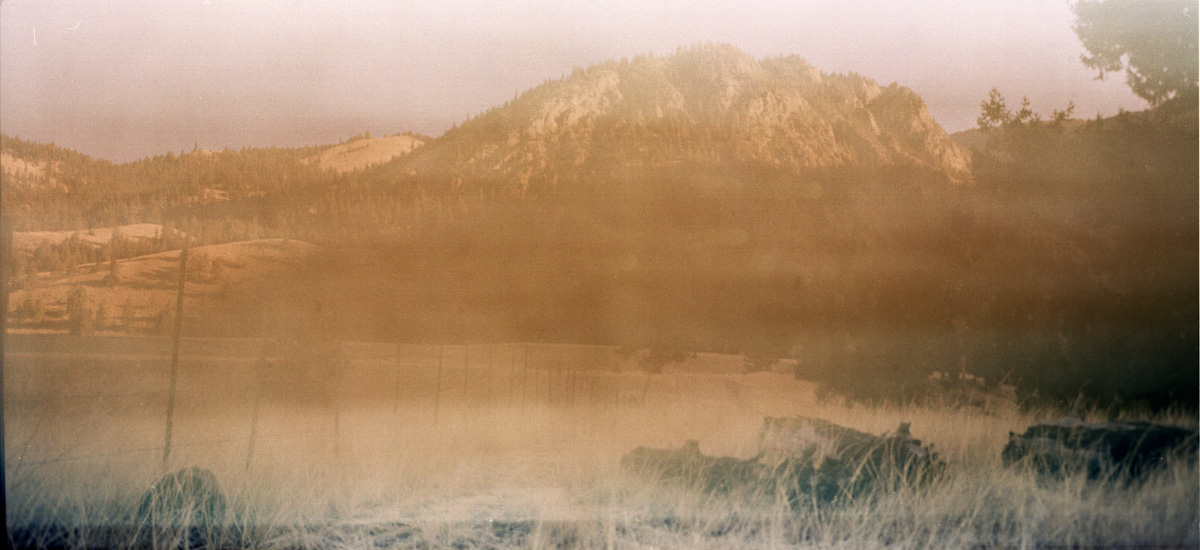
The viewfinder was a last minute addition made from the case of a broken flash and the viewfinder from a 28mm point and shoot camera and electrical tape. It served its function. By this time I had run out of time before it was time to go and try the camera. It was with a little hope that I thought there was a possibility that the way the back was constructed with a lip that sat against a raised edge inside the camera enough light would be kept out of the camera, nope. Out of the entire roll I managed to recover one image that was discernable and that was likely because it was the first one before the full brightness of the day.
So the next step is to make the back of the camera light tight. The rest of the camera is fine as I used a black silicone around any edges that could have any possibility of leaks. And remember a take up spool that’s important too.
