Home Developing C41
As a teen I converted the family camper into a darkroom and even did some colour printing from slides, that was a long time ago, but the closing of yet another camera store that handled my film has prompted me to begin developing my own C41. I’m glad camera stores havent determined that my stepping through their door is the harbinger of doom, but I digress.
After amassing 12 rolls of colour film, and all the necessary items I needed to process them, it was time. There was no more ‘Oh I just need this’ there were no more reasons to procrastinate. Here are a few things I learned.
- You really do need to have the temperature higher than you will process at when you mix your chemicals (The Blix powder did not dissolve easily at 102’F, I had been hoping that it would so that I only needed to use one temperature).
- Leaning into a tub for hours is hard on the back
- Squegeeing the film is necessary to reduce the chances of water spots
- Thermometers for film developing are slow to react to changes, the digital thermometer I also used allowed faster checks and setting the wash temperature.
- Be safe around electricity. All of this goes through a GFI outlet, the controller is fused and I have double sealed the heater because of its age.
- Developing your own film is time-consuming but awesome
What you don’t see in this picture is a critical component, my changing bag. The film needs to be put onto the reals and loaded into the tank in complete darkness of course.
The key thing that made this marathon developing session possible though is my modified aquarium heater controller. It works with a thermister that changes its resistance based on temperature. It’s an inverse relationship, the higher the temperature the lower the resistance. So to hack it to run at a fish cooking 102 degrees Fahrenheit I increased the resistance therefore changing the range it runs at. This kept a bath of water and the chemical bottles floating in it at the required temperature by turning on the heater any time the temperature dipped.
While I had plans to make an Android app to assist with the timing I ended up using Lab Timer on my iPad which allowed me to easily set up 4 timers for the major processes I needed to do.
Here is the distilled water I used for mixing my chemicals coming up to temperature
Here you can see the heater keeping everything at the right temp, for hours. As a side note it is plugged into a GFI outlet and I completely resealed the heater with new high temperature gasket goo for vehicles and topped it off with a silicone high temperature grease sealant. You can never be too careful around electricity and water.
After a few fumbles getting the film on the reels I managed to get pretty good at handling the film inside the bag… by the 12th roll.
Not having to worry about the temperature allowed me to concentrate solely on the timing so I was able to do all my agitation and chemical changes accurately and consistently. There was far more variation in the film that I had used than in the processing. The worst offender was some outdated Polaroid 400 that nearly turned my developer black.
To finish each pair of rolls I hung the film to dry in the shower, a very dust free location.
It was all well worth the effort and if you discount my time it was about half the price of the cheapest place I have available to me for developing. I also squeezed in one more roll of Ektar 120 film the next day pushing it from 100 ISO to 400 by increasing the development time. The chemistry may not be as exhausted as I was but I will start fresh the next time I have a pile of film. That shouldn’t be too long. Update: in the time since I first wrote this I’ve sucessfully processed another batch of 13 rolls.
I’m also planning to recover the silver so it doesn’t end up in the environment using the metallic replacement process outlined in Kodak j300 Environmental information from Kodak
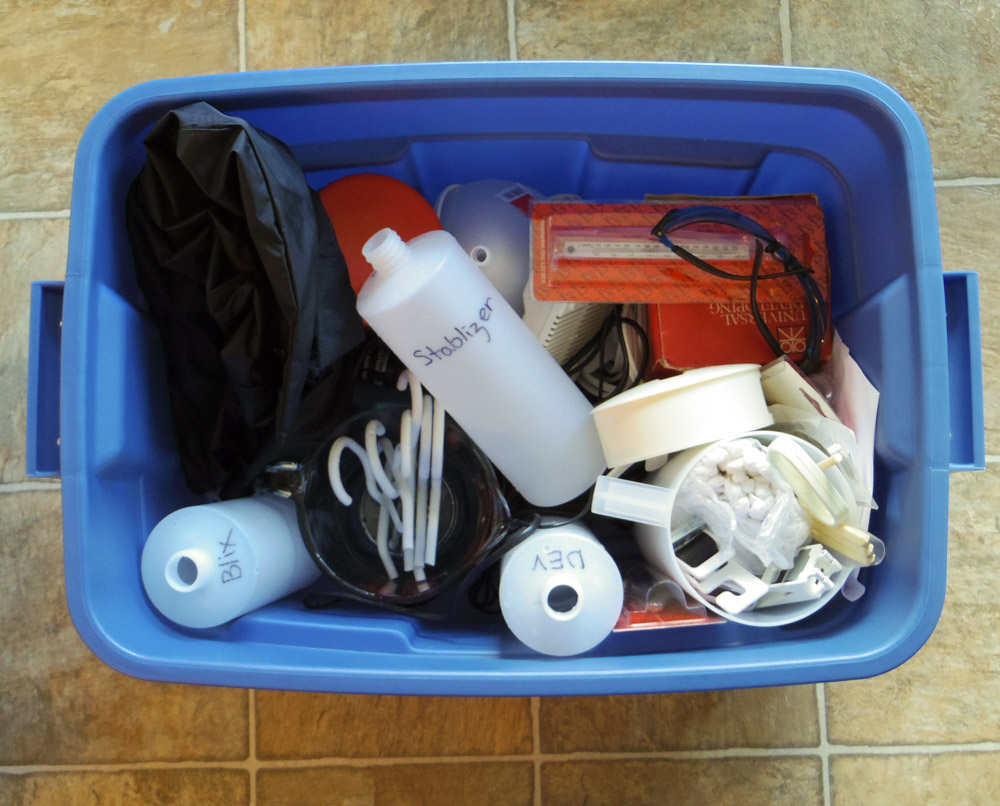
And everything fits in a Rubbermade container


