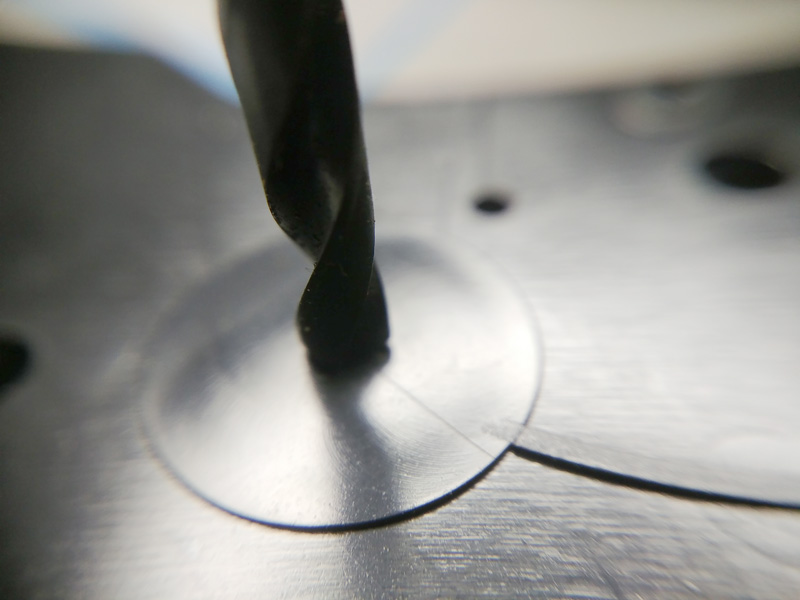
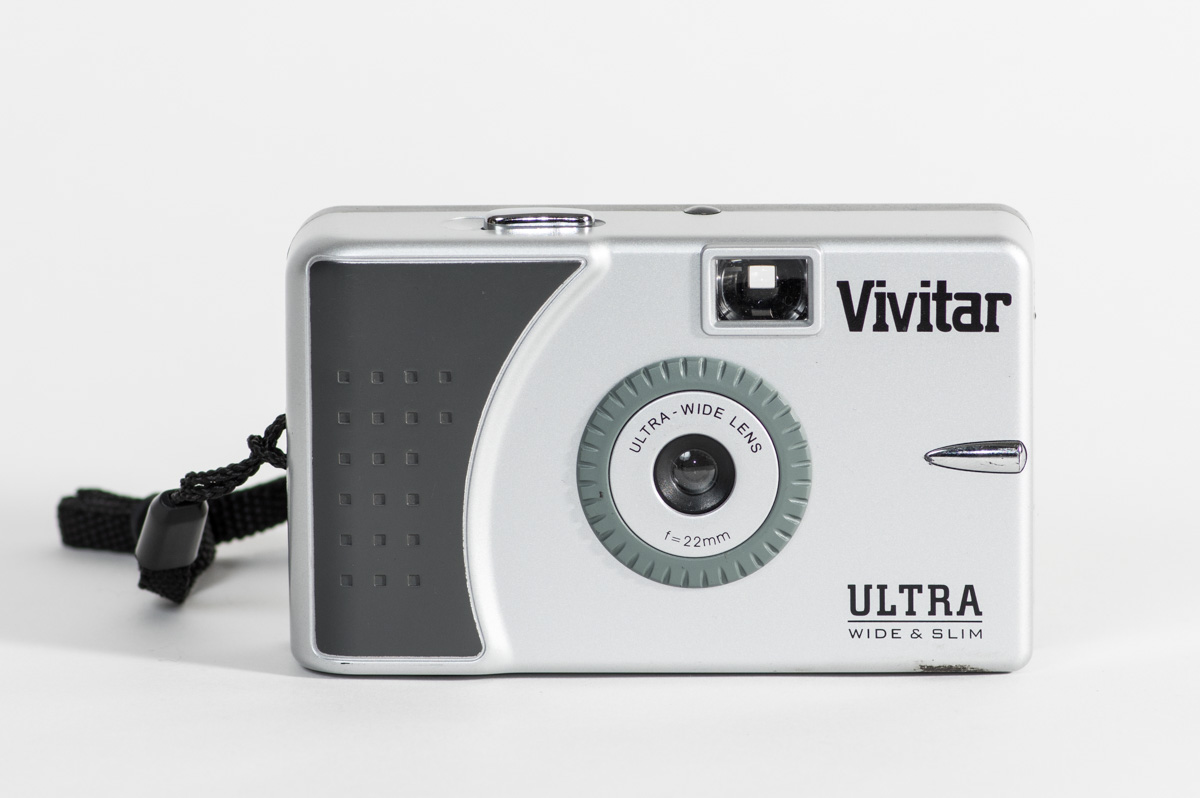
The Vivitar Ultrawide and slim is one of those rare plastic cameras that have achieved a status beyond what could have originally been conceived. This is of course due to its unique 22mm f11 lens. And to a lesser extent how thin the camera is. This is also because of the lens and its construction. Now I could have just left it as it was and it would have been fine but I wanted to see if I could “improve” things. And by improve I mean risk making the already poor image quality worse while making the lens faster. Technically what I did isn’t making the lens faster but if you consider the lens and fixed aperture as one I gave the entire system about 2 stops more light gathering ability. First a warning if you plan to do something similar there are springs inside that want to get out. The spring that tensions the shutter took a flying leap never to be seen again fortunately I have enough random bits that I was able to replace it.
So how do you go from f11 to f5.6 you might ask. First off apertures represent either the opening that light passing through a lens must go through or the light gathering ability of a lens. A large aperture represented by a smaller number such as f1.4 lets in more light than a small aperture represented by a larger numeric value such as f4 simple right? It is really I’m just trying to make it sound worse than it is. There is a standard scale of apertures each one representing twice the light gathering of the previous one. This list of full “f stops” go something like this f1.4,f2,f2.8,f4,f5.6,f8,f11,f16,f22. The area that we are interested in is f11 – f5.6 which we can see is a separation of 2 full stops along that scale. Again each stop represents twice the light gathering of the previous one. Because the physical aperture is circular it does not corollate to twice the diameter just twice the area for each stop and since the area is determined by the formula pi * radius squared I needed to double the radius to make the area 4 times as large. Anyhooo I measured the diameter of the hole with a micrometer at 1.4mm and drilled it out to 2.8mm which gives me four times the area and my f11 to f 5.6 alteration.
And the impact? Marginal it didn’t make the camera a low light monster. Granted I may have sped up the shutter speed with my spring replacement which would counter the aperture change but the image quality didn’t seem to suffer from allowing more of the lens to play a part in producing the images either. In the end with an aperture of f5.6 and a shutter speed somewhere around 1/125 second this Vivitar Ultrawide and Slim still craves light.
* the photographer may have definitely used expired film, side effects could include graininess rash and blocked shadows.
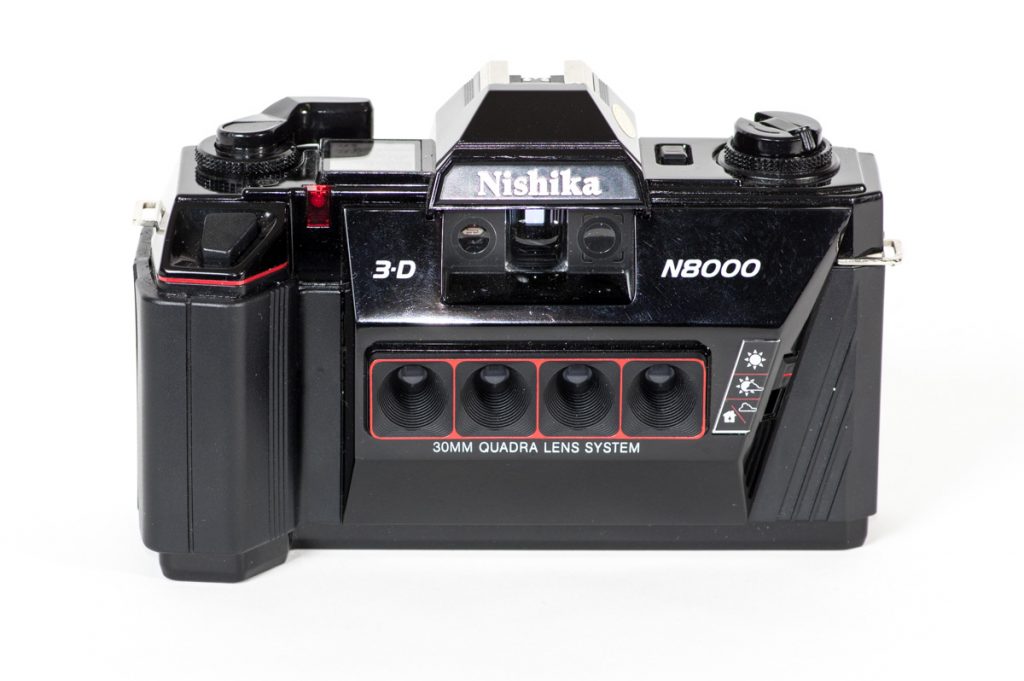
What’s large, heavy and unnecessary? A 10lb lead ball and the Nishika N8000. Now the unnecessary part may be a little unfair you could use the lead ball to sink something to the bottom of the ocean. There are certain aspects of the N8000 that serve no purpose. Like the fake top plate ‘LCD” and the battery indicator. What do the batteries even do anyway? And of course there is the superfluous metal plate inside the camera to add a little gravitas. The shutter in the N8000 operates at a fixed 1/60sec however there are three aperture settings. Sunny/partial cloud/cloud. The lenses are 4 separate 30mm ‘doublets” that’s two plastic elements so don’t expect anything even up to the standards of a disposable camera. The key thing though is that the shutter fires for all 4 lens at the same time. And because they are arranged in a row separated horizontally you get slightly varied views of the same scene. That’s where the fun is because you can take the four images and build them into a little GIF to create a ‘wigglegram’. to give a 3d effect.
I’m currently testing a Nimslo 3D which has the potential to be a much better camera that resolves all the issues I have with the N8000. It’s smaller lighter and has better lenses and exposure system.
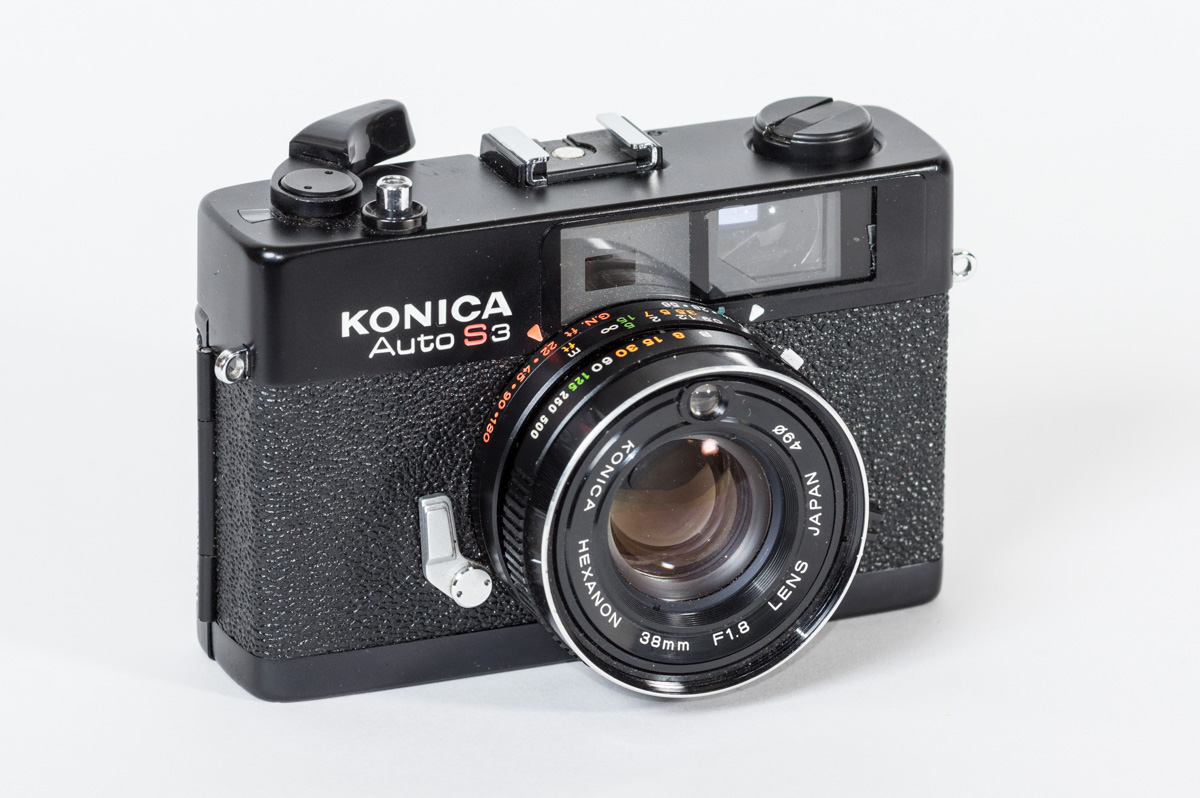
As much as I have wanted to like Portra 160 I just cant seem to come to terms with it. I am almost always happier with the results I get from Portra 400 and if I want to use a lower ISO film then Ektar 100 often fits the bill. This should have been a good pairing with the fast lens of the Konica Auto S3 and under good light it can be but that extra stop and a bit you give up from Portra 400 can really make the difference. Will I keep trying with Portra 160? Of course I will it has a niche somewhere I just need to find it for me.
At some point I acquired these cameras with the idea of running a roll of film through them and blogging about it but they have sat in the “Too be chosen bin” for awhile now with no sign of making it out. So I decided to apply a new test or more accurately a thought experiment. Would I want to expend a roll of Kodak Portra 400 in them, and they were found lacking. Looking at them all sitting there it has become clear to me that its the 38mm wide end. The no mans land of focal lengths. Not nearly wide enough and the telephoto end isn’t that spectacular either. The Minolta has the nicest finish and the Pentax is the most ubiquitous, you almost always need to push some aside to get at the other cameras at a thrift store. So for not having made the cut these ones will find their way back to a thrift store. I just need to make sure I don’t buy them back accidently.
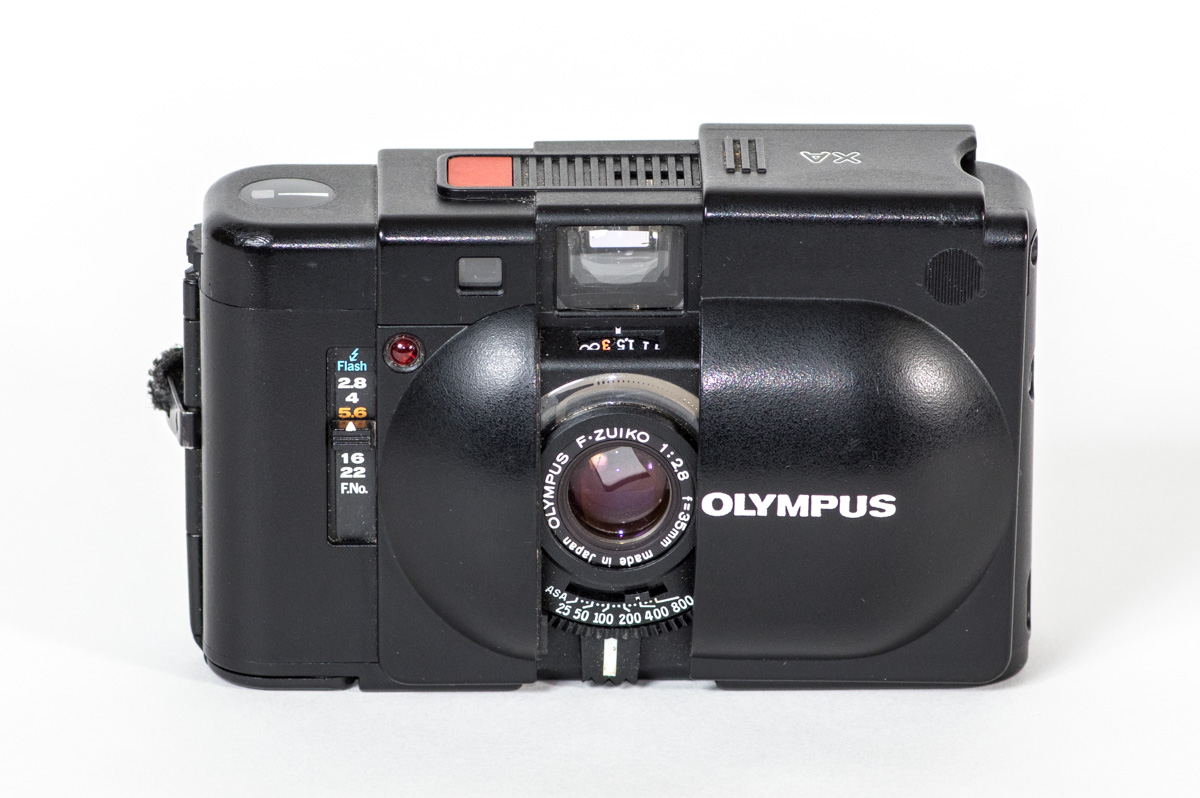
Back in the early 1980’s the Olympus XA was quickly adopted by many photographers as a pocket camera for many reasons. It was small and pocketable but it also produced good results. This of course is due to the lens which is made using 6 elements in 5 groups. (That’s where the F Zuiko comes from, F is the 6th letter in the alphabet E would denote 5 elements and G would be 7). The lens focusing is done not with the front element as is particularly familiar with small film cameras but is done using internal elements. The electronically controlled shutter also sits between lens elements. The shutter operates all the way from 10 seconds to 1/500sec so properly secured the XA can be used for relatively long exposures.
The rangefinder focusing can be a little fiddly with the XA and its small focus lever in the center just bellow the lens but it works.
Have you ever wondered why it can be so difficult to achieve focus on close subjects? Bellow is some of the Olympus XA’s depth of field at different apertures presented graphically.
The yellow area represents the closest and furthest distance that is reasonably in focus for any given aperture when focused at the minimum distance of 2.8ft. You can see that increasing the aperture does not have the same increase in depth of field as it would if the lens is focused at a further distance. Contrasting this when the lens is focused at 12feet an increase in aperture can have a dramatic impact on depth of field. An example is at f5.6 and 12feet the area considered to be in focus is from about 7.7ft to 27.5ft but simply stopping down to f8 yields 6.7ft to 62ft.
This is how fixed focus cameras work they are set to a certain distance of focus and an aperture that provides enough depth of field. Similarly this is what you are doing with zone focusing and again why that can be so difficult when you cant control the aperture and the camera to subject distance is short.
Olympus considers the XA as one of its technological milestones for its online camera museum. Olympus Museum Cameras XA
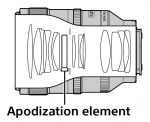
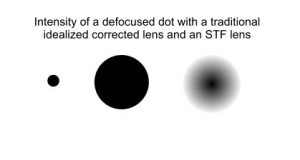
I guess a little explanation is in order. Smooth Transition Focus (STF) is where within the lens design there is an apodization element placed near the aperture of the lens. It acts like a circular graduated neutral density filter with the purpose of reducing the light from the outer edges. The gradual diffusion of the perimeter light results in the out of focus regions also being softer and more defuse while leaving the area of focus that passes through the center unimpacted and sharp.
As described by Sony (Minolta)
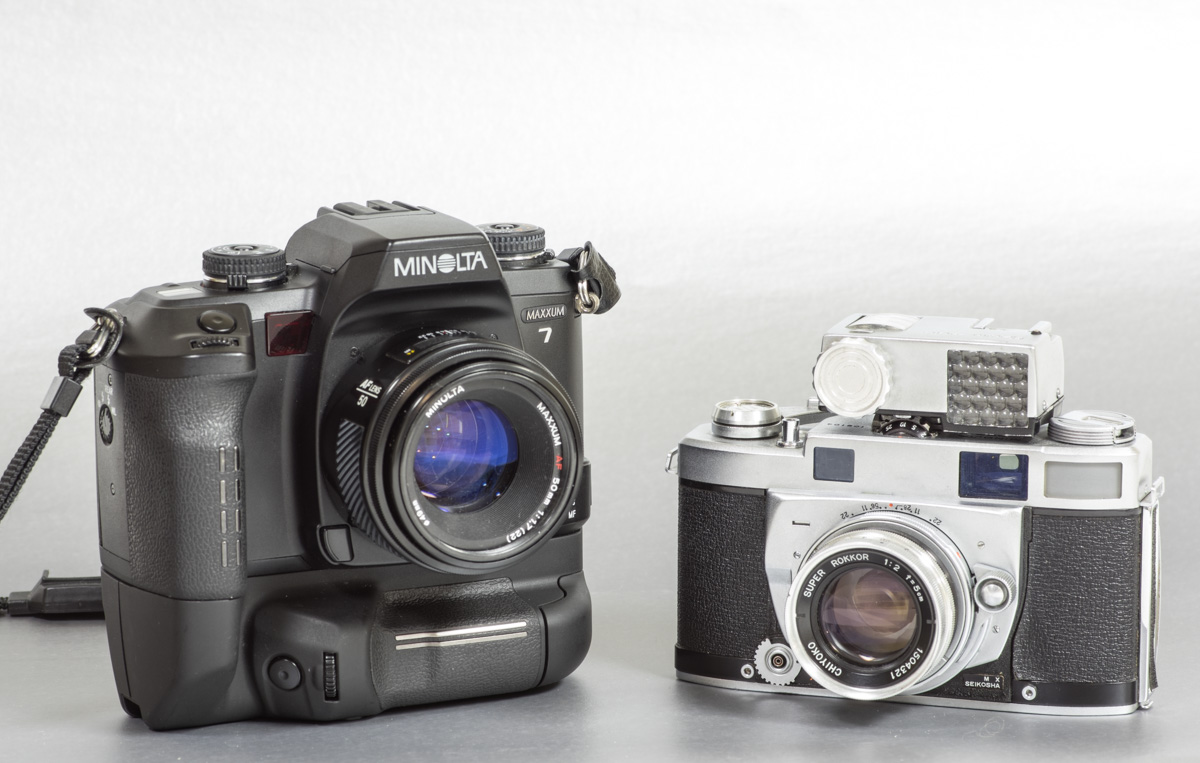
That’s how it is done optically but there is a camera that can simulate the effect. The Minolta Maxxum 7 has a custom mode called STF where it takes multiple images at different apertures all on the same piece of film. The out of focus areas all have different characteristics blended together while the in focus area is very much the same across all the apertures.
You can see the result if you look at the background of these images. The busier of the two is from a single exposure at f4.5 and the second is using STF blending 7 exposures at T6.7. It works as advertised stacking the multiple images for a smoother transition and a better blurring of the background.
I did a little test using the same idea to create STF images in camera with my Pentax K-3 to see how well it works.
One immediate drawback of this method is of course nothing can move between exposures. The GIF below contains on exposure at f8.0 and another one with 7 exposure from f3.5 to f8.0 as an initial test before any effort to do it in the wild
And here is what it looks like if you take things to extremes. With 15 exposures from f1.2 to 5.6 if you look closely at the highlights you can see the different exposures not quite blended well enough.
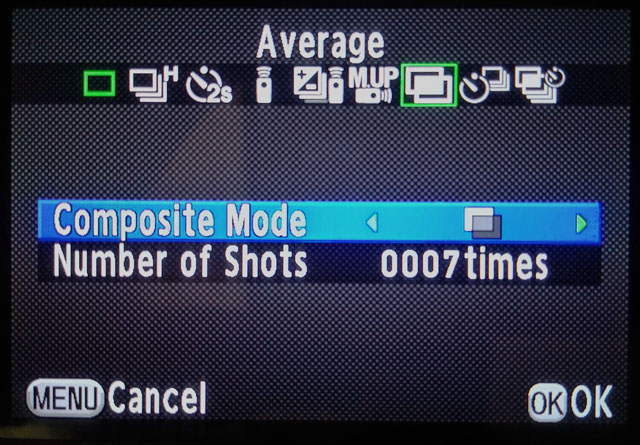
I will get back to doing it in more detail with the K-3 at a later date. So how to do this with the Maxxum 7? First is requires delving into the Custom menu. Under the metal flap below the LCD you will find a row of buttons.
Pressing the CUSTOM button brings up that menu then using the left and right of the focus area selection pad you can navigate to custom function 25. There are two settings at this point and pressing up and down on the focus pad will toggle between them. What you want to do is select number two “STF mode”.
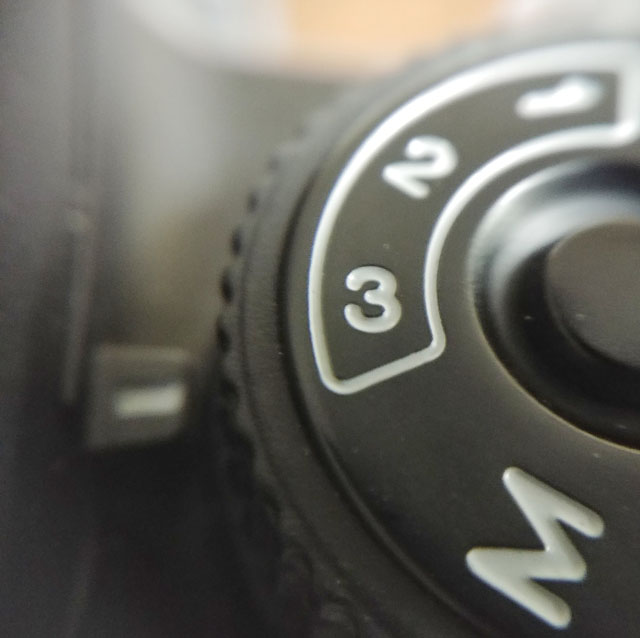
Once this is done selecting number 3 on the mode dial will put the camera into STF mode.
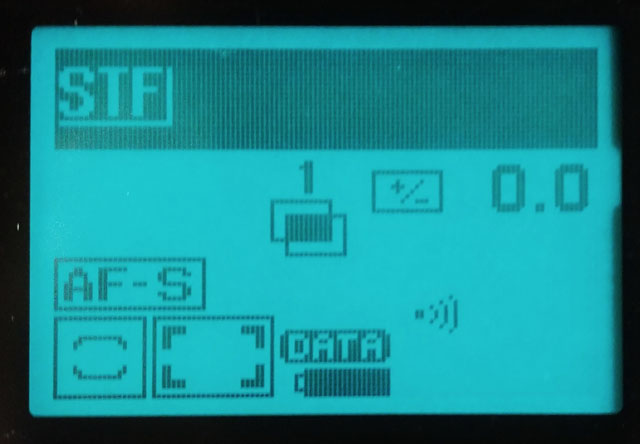
Pressing the shutter now will result in 7 images being rapidly taken as the camera changes the aperture between them. So you had better have the camera mounted on a solid tripod.
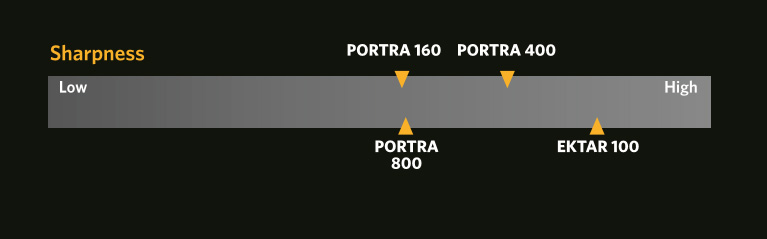
Back in 2011 Kodak updated Portra 160 using the technologies from their motion picture Vision films. While Portra 160 does have a finer grain structure than Portra 400 they have it rated for sharpness even a tiny amount bellow Portra800. Its grain though falls between Portra 400 and Ektar 100 which is claimed to be the finest grained colour negative film ever.
Given all this it should perform similar to Portra 400 but with a slightly lower sensitivity and perhaps every so slightly softer which may be why Kodak present it as a film ideal for portraiture.
You can see that 160 and 400 have similarly shaped spectral curves that differ from Ektar 100. The images from Portra 160 & 400 emulsions properly exposed should therefore give similar results which is what I have found.
This is one of the reasons I gravitate towards Portra 400 rather than 160 I rarely find myself in a situation where there is just too much light to shoot 400. And given the abilities of these films to handle over exposure of several stops it just isn’t a problem shooting 400 speed film. Also with a hybrid film to digital workflow there is always the ability to make some adjustments. So while I do use Portra 160 from time to time as seen in the images below I prefer Portra 400 for its versatility.
You can find more info around Kodak Alaris films here
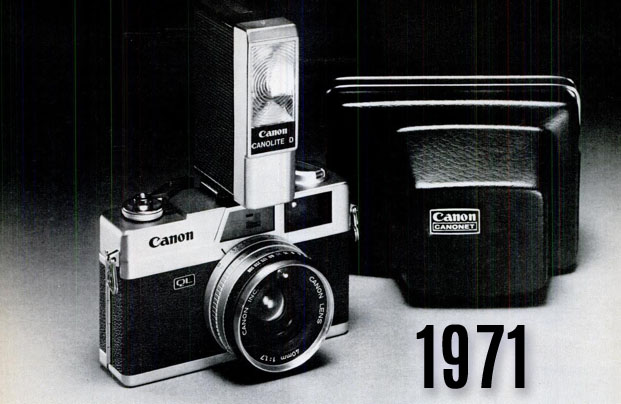
In 1971 Canon was advertising the Canon QL17 as a carry-it-anyplace camera that gave quick and precise rangefinder focusing and that it was the most automatic precision camera you can buy but that it could be used 100% manually if you prefer.
My camera is actually the QL17 G-III but there is little difference between them.
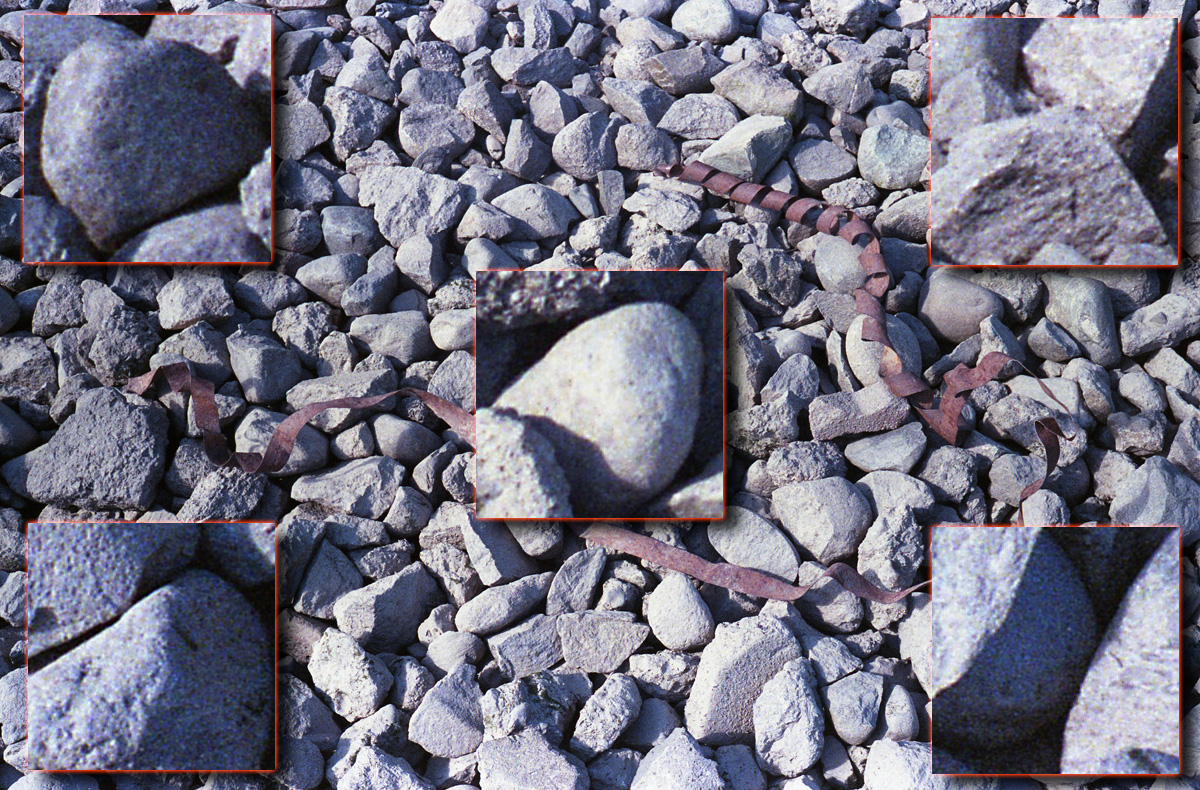
It may have been superseded as the most automatic precision camera you can buy in the last 48 years but it is still an easy to carry precision rangefinder. The lens of the QL17 is a 45mm f1.7 constructed with 6 elements in 5 groups. and is a fantastic performer. The image bellow shows details from the corners and center without any editing. You can see there is just a tiny amount of chromatic aberration but the entire field is sharp. This image was taken with the lens stopped down but it is good even wide open.
The shutter a Copal SV has a top speed of 1/500 second and can be used without a battery which is fortunate because the camera was originally designed to use a 1.3V mercury cell.
So there is good reason that this camera is still well regarded its just a great little fixed lens rangefinder.
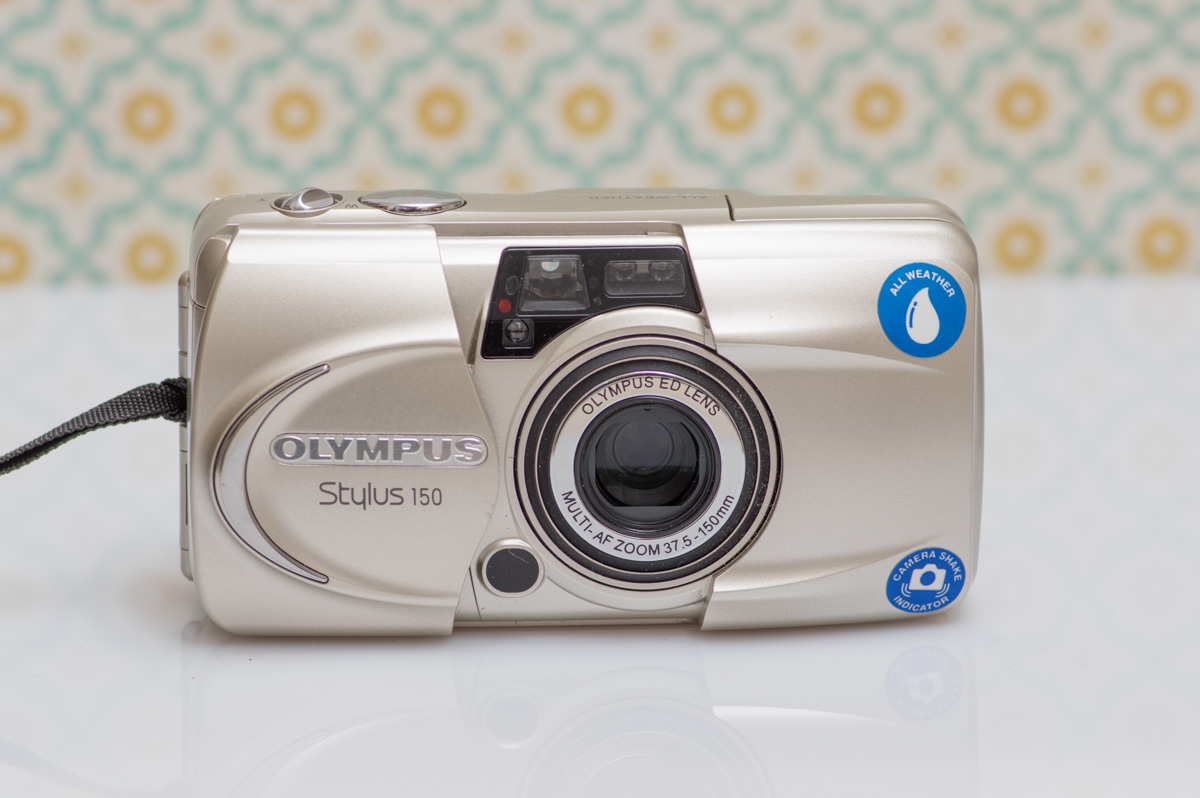
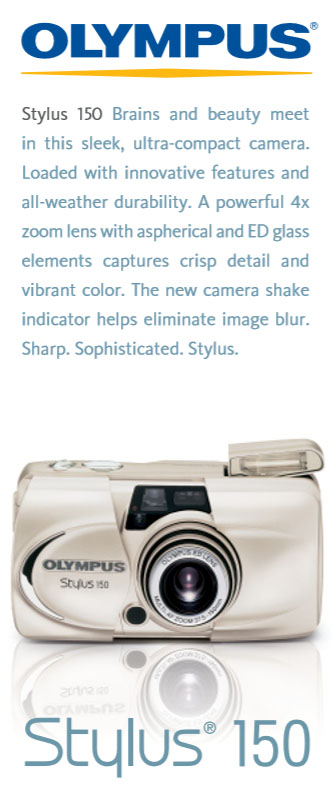
Released in 2003 six years after the much better and more desirable Olympus Stylus Epic the Stylus 150 marked the end of new film cameras from almost all camera makers as they focused their efforts exclusively on digital cameras ( I believe the Stylus Epic Zoom 170 was released before the 150) . And that’s okay because cameras like this had reached their limit and maybe even pushed a little too far. What I mean is at an aperture of f13.3 and a focal length of 150mm it reaches beyond where it should. Without a lot of light the camera is going to be forced to use slower shutter speeds than should be used. There is a mode that is intended to counteract this it is the camera shake mode under the flash menu. Olympus isn’t very clear about how this functions. In the manual it says that if the green and orange LED’s around the viewfinder are alternately blinking then there is a potentially for too much camera shake and to hold the camera securely until the blinking stops. This suggests that there is a sensor in the camera that is measuring the shake. In a brochure for the camera they say it a little differently.
Camera Shake Indicator: This innovative feature prompts you to steady the camera when shake is detected. Even if movement continues, it automatically selects a faster shutter speed to reduce image blur.
How effective this is isn’t clear but that fact that they were making this effort is another indication of the problem that these long zoom compact cameras were suffering from.
The specifications for the lens on the Stylus 150 is 37.5 ~ 150 mm, F5.1 ~ 13.3, 8 elements in 7 groups.
A previous post about the Olympus Stylus 150 can be seen here Stylus 15o
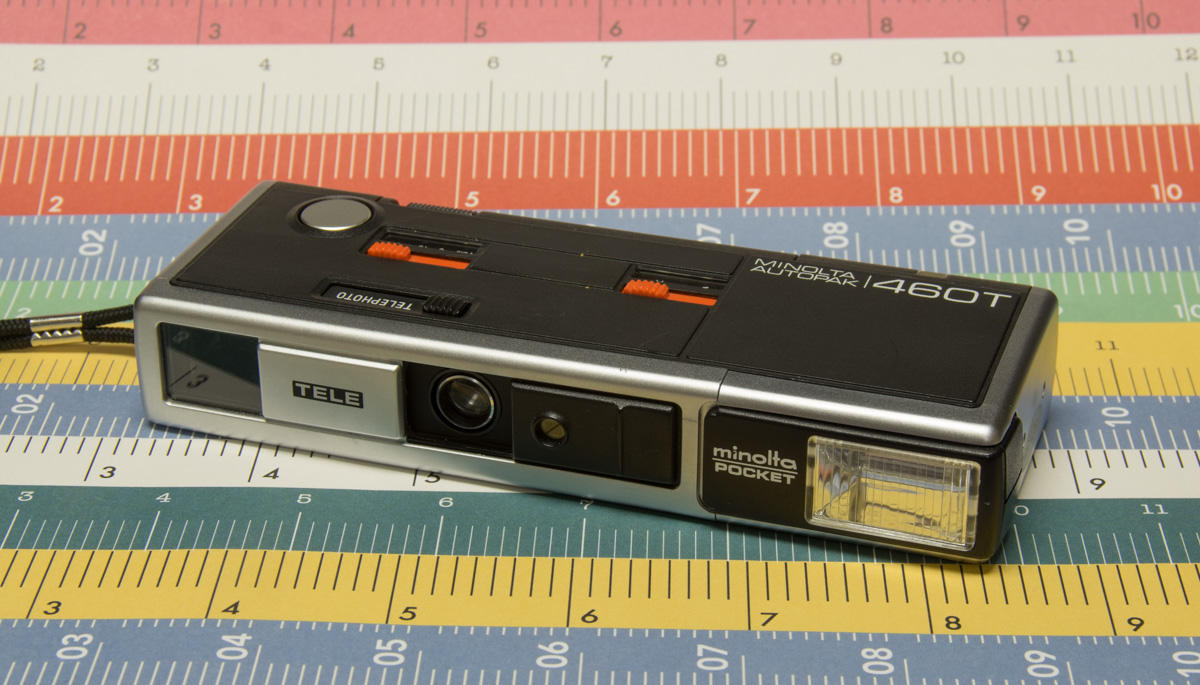
Most 110 film cameras are notable for their lack of notability but the Minolta Autopak 460T is an exception particularly due to its lens(s). It has a 26mm f3.5 and a 43mm f4.7 lens when set to telephoto. It does only have a fixed shutter speed of 1/200 second but the apertures can be stopped down to f8 for the normal lens and f13.2 when set to Tele as well as some value in-between which I’m not certain of but if your using 110film you cant be that choosy.
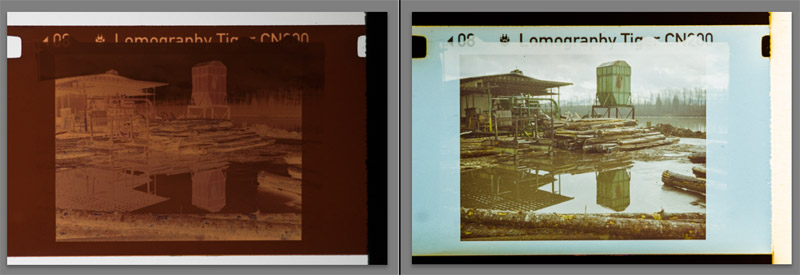
I’ve always struggled with scanning 110 film. I’ve tried holding it flat on my scanner with little success and I’ve tried using a modified slide duplicator but this time I just laid it out on a piece of frosted plexiglass and took pictures of it with a macro lens lighting it from behind with a flash. The results are much better although they need to be converted from a negative to positive and colour corrected something my primary image management software Lightroom is not well suited for.
However here is a Lightroom preset you can use as a starting point if you choose to attempt something similar. Negative Conversion Template
Just place this file in the user presets folder for Lightroom and the next time you launch Lightroom it can be found under user presets.
 The spring that tensions the shutter took a flying leap never to be seen again fortunately I have enough random bits that I was able to replace it.