May
11
2015

The Pentax K-3 has a number of new features not previously available on any camera. While other cameras have had the ability to take multiple exposures none have come close to the versatility of the K-3. In my case I wanted to use this feature to create the look of a long exposure with flowing water. Light conditions were that even stopped down to f22 and 100 ISO the shutter speed was around 1/2 second. That just isn’t enough time to give the look I was after, which ultimately is an averaging of the water. This GIF shows two images each captured using 20 exposures one using averaging and one with bright mode. 
Primarily the difference between the two methods was that averaging did as it suggests and all twenty frames smoothed each other out where with the ‘Bright” mode of composition any bright reflection of water registered above the rest of the frames. So it would appear that for smoothing out water averaging is the better mode. Another difference though was that the Bright mode image was about a half stop brighter. I could have edited to eliminate that but I’m not sure if it is something that always occurs and it also helps to differentiate the images.
I continued to use ‘Bright’ mode for the rest of the images it gives the look of a long exposure with the added stop motion of a fast shutter speed. Which one is preferable is a matter of taste. additionally I lowered the number of exposures I used to create each image to 9 which seems to give roughly the same effect as the 20 did with these shutter speeds.


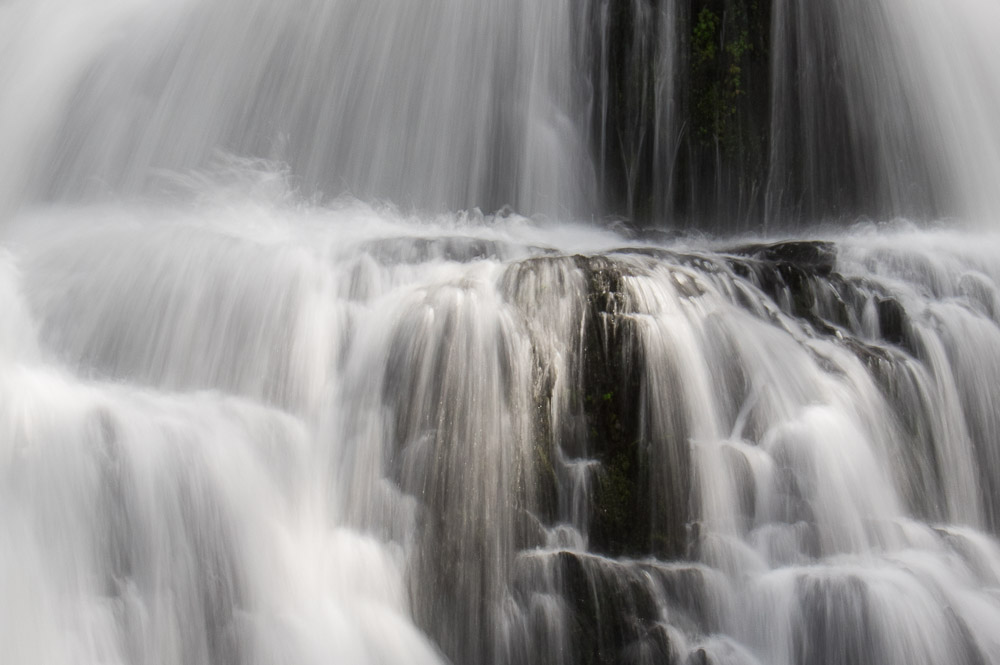
Here is a detail from one of the above images which shows how using the bright mode allows for individual variations in the water to still register and not be smoothed away this would likely have created a more dramatic difference had I used a shorter shutter speed for each exposure.
My initial post and more information about composition here Pentax K-3 Multi exposure and Interval Composition
There is another way to use Bright composite that I haven’t been able to fully utilize yet and that is to use it to create multiple flash exposures. The idea is that with the camera on a tripod taking multiple exposures and a wireless flash trigger you can walk around a scene lighting it with a flash. I have done some initial experiments but haven’t had an opportunity to take it to the level I want such as lighting an entire section of a forest or other landscape. That will be a future post I’m sure


1 comment | posted in Cameras, Photography
May
5
2015

Apparently the use of blue coloured glass on the rangefinder patch was enough to warrant marketing this camera as something unique. Unfortunately other than the blue glass the camera is rather basic. Not having a light meter isn’t that big of a deal but the shutter doesn’t offer anything particularly unique going to 1/500 second and the lens is 45mm at 2.8 just fast enough to be useful but a bellow average performer. I’m trying hard to think of something nice to say about this camera but nothing is coming to mind and that is not a good sign as I’m often effusive about other cameras…wait wait I thought of something it makes cool Bokeh balls.
no comments | posted in Cameras, Photography
May
2
2015

After two issues with the film not advancing the final indignity the Contax RTS delivered to me was that for the one roll that had worked it was light struck through almost every frame. So as far as I’m concerned I have a group of Contax/Yashica lenses and no camera for them to go on…Yes that’s right RTS you are not welcome here you may leave now. Besides you are heavy and cumbersome, good bye I said!
no comments | posted in Cameras, Photography
Apr
28
2015

There were two versions of this camera the Epion 3500ix and this the 3000ix. The former had a detachable controller that also doubled as a lens cover or a wireless remote or could be clicked to the back making it like the 3000ix. The fixed back is better if you don’t want to lose the half that controls everything or the half that takes the pictures. The reason I like these cameras (APS taken into consideration) is the 21mm wide-angle. The full size of an APS film image is the H format or 30mm x 16.2mm so using the Pythagorean theorem c = sqrt { a^2 + b^2 } . we get a diagonal of 34.1mm While 35mm film has a diagonal of around 43.3mm. If we take the larger size and divide it by the smaller diagonal we get a value of 1.26 This is our ‘crop factor’ between the two film formats (Most people just round it to 1.3). So the 21mm of the Fuji is equivalent to a 26.7mm lens on a 35mm film camera. Okay there is a problem with all this in that the aspect rations are different but if you want to argue about that you’re welcome to find a camera forum, pretty much anyone will do. I also like the 16×9 aspect ratio which I may have mentioned on a few previous occasions.
I should probably mention that the film I used was just some random stuff I had. Some images even look like they have a 32 colour pallette I cant expain that. I even tried two different methods one of them my Pentax K-3 with plenty of dynamic range. There just wasn’t much information captured in the film itself resulting in this ‘analog’ banding which I like.
no comments | posted in Cameras, Photography
Apr
25
2015
In the dusty pages of some old photography books can be found tips on dealing with a scratched lens. 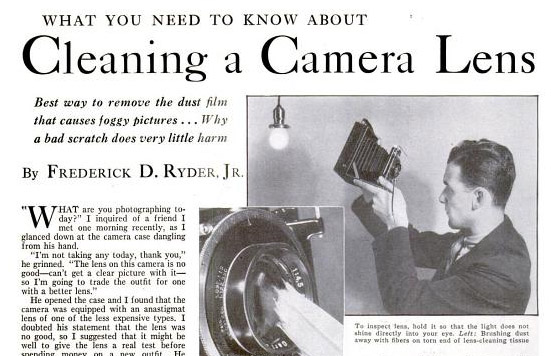
Generally small marks on the front of a lens aren’t apparent in the final image but it the light strikes them in the right way they can cause extreme loss of contrast and flare. With large lenses feeding light to large pieces of film a small mark is hardly noticeable and the flare and contrast issue can be controlled by painting it black. It may be surprising but it works. I thought I would give it a try with this digital camera that I picked up cheaply. It has a dent on the body but works fine despite that. It’s the number of what appear to be gouges on the lens that needed to be addressed though.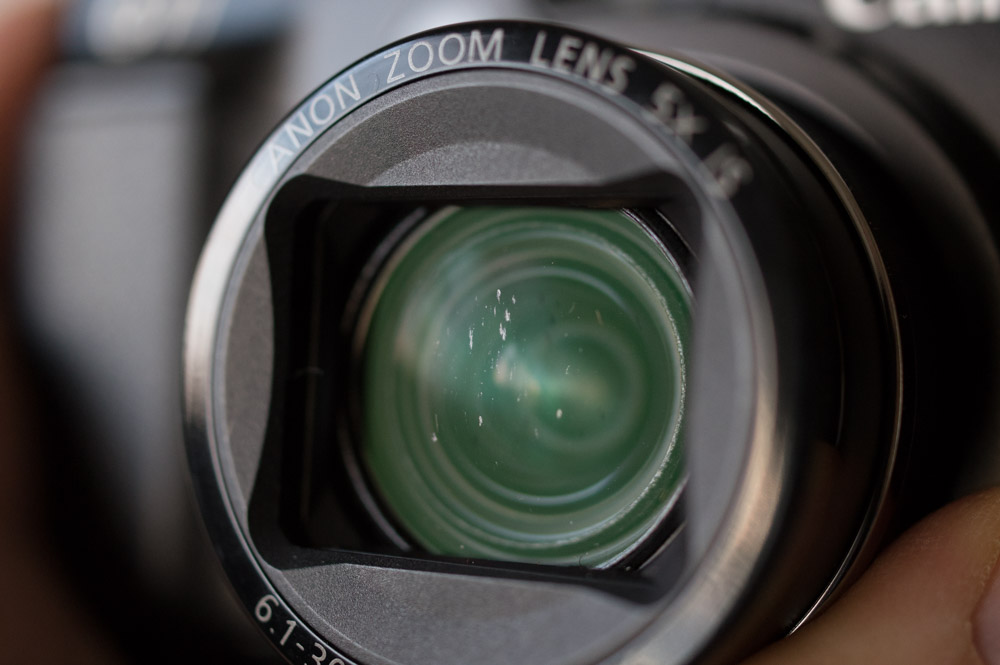
I set up a baseline test to see what sort of improvement I could achieve. I pointed an LED flashlight directly at the lens at an angle that produced the greatest impact. 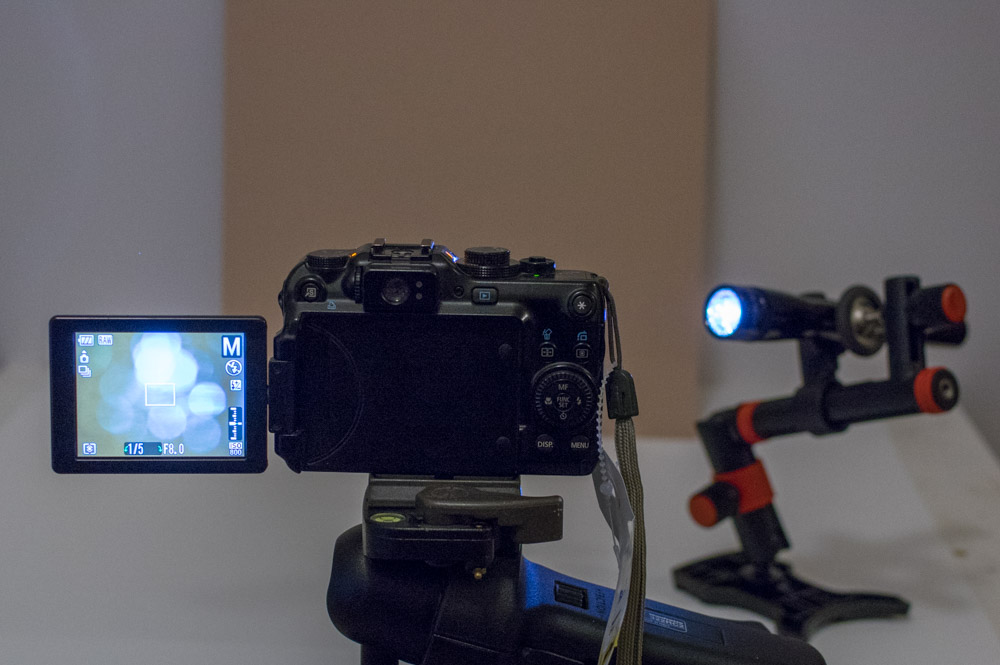
after which I carefully applied the minimum amount of black pigment in the scratches to prevent light from being scattered. And it did have that effect but unfortunately the black was readily apparent in the images. This appears to be a function of two things tied to the image sensor. One the sensor is small so the lens is small too meaning that any scratch takes up a greater amount of the total surface area and secondly the small sensor provides for a large depth of field meaning that rather than being defused across the entire image the blackened scratch appears in focus to an extent. While the lens is badly damaged and it effects the image in real world shooting the problem is far less apparent. It’s only when you let direct bright light fall on the front of the lens that it is obvious. 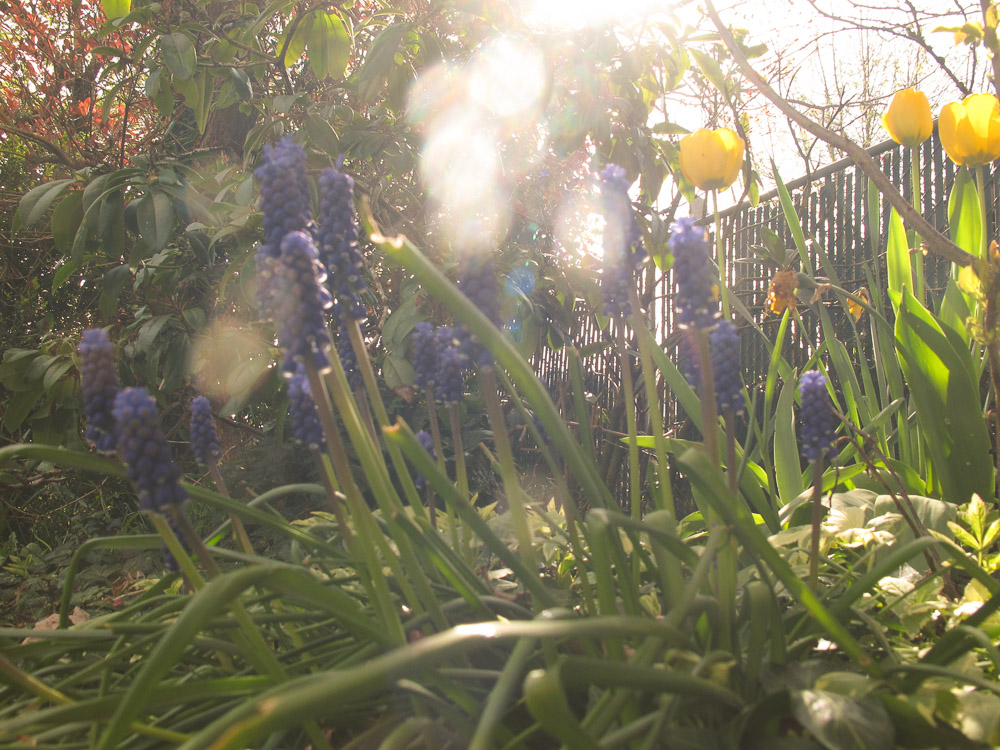
Here are some more samples from around my yard, you can see that its harder to even find the scratches. Also I found that by using the telephoto end of the zoom they had even less impact on the image.
no comments | posted in Cameras, Photography
Apr
21
2015

I wanted to play around with the half frame Canon Multi Tele taking two shots side by side to make one single image. It worked to a point but I encountered problems with the camera, that seems to be happening a lot to me lately. I did achieve a few examples before I gave up and just took what I could with the rest of the roll. I’m quite disappointed with this particular camera failure because it’s so unique with it’s half frame verticals.
What I learned was that to make the images work as I wanted I need to alter reality more. What I mean is either I need to compress or elongate the item I’m photographing otherwise it just looks semi-normal with a black line through it. The image that works the best and I find the most amusing is the aircraft.

no comments | posted in Cameras, Photography
Apr
17
2015
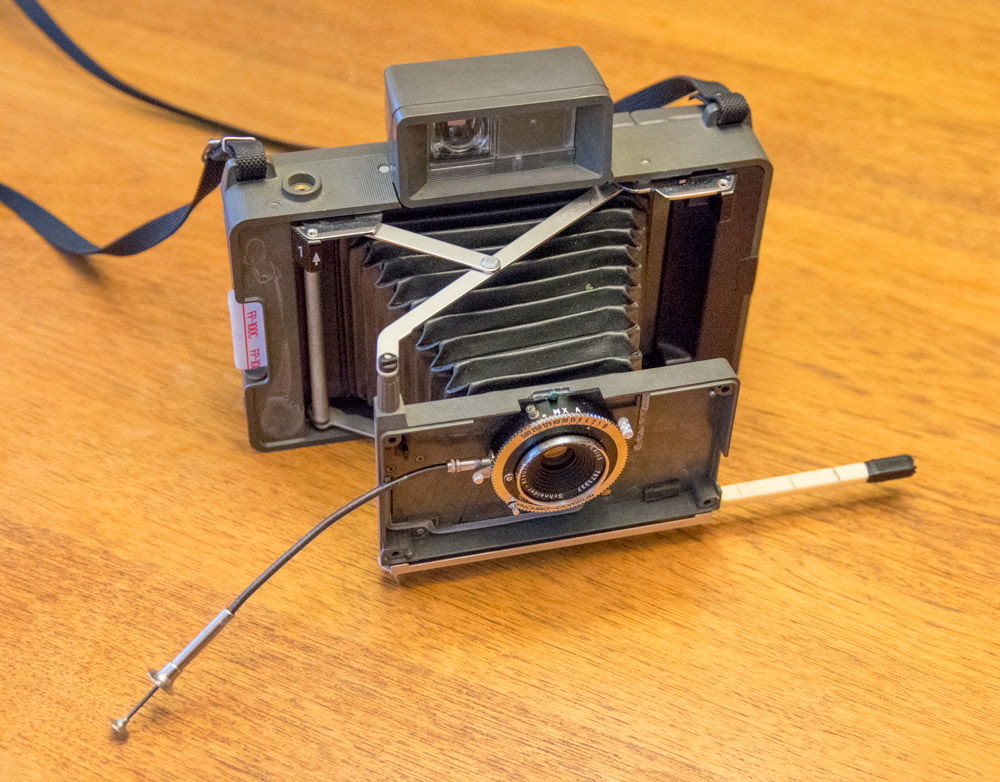
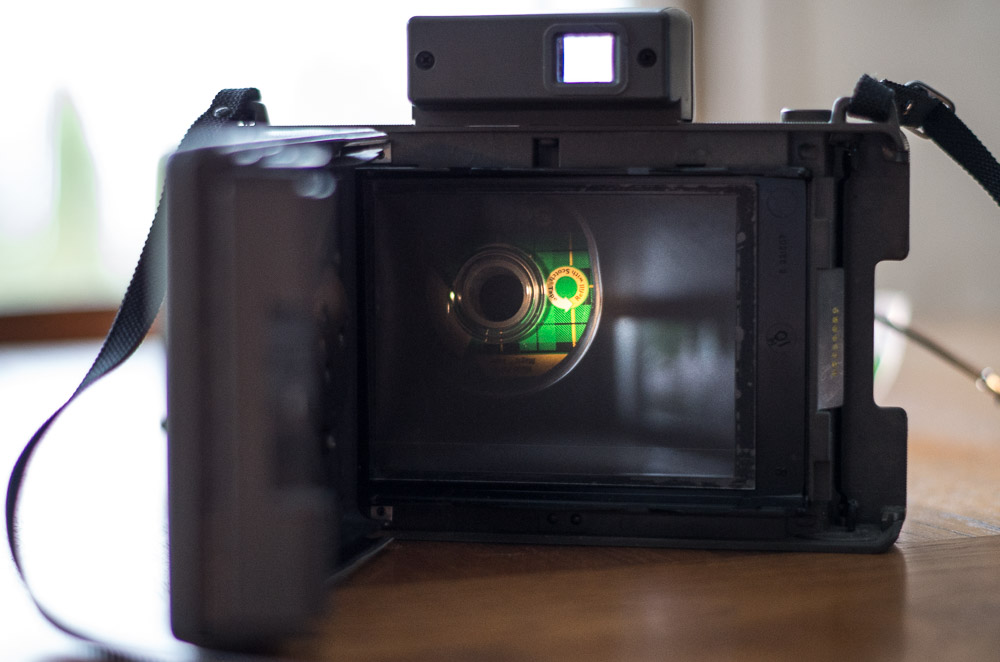
I wanted to have a wide-angle instant camera and this seemed like one way to go about that. A few years back I received this lens and shutter and had paid very little for the Polaroid camera. The first thing I did was to remove the lens, shutter and all the electronics from the existing camera and make small modifications to fit the new one (There are still some cosmetic changes to be made). The lens has 6 elements and is designed to cover an image of 65mm x 95mm with some shifting. Fortunately Fuji FP100c’s image area is 73mm x 95mm. It does however result in vignetting when used wide open. The lens has a field of view of 80 degrees which equates to about 25mm on 35mm film that is pretty wide for a Polaroid.
The registration distance is different for the new lens so I needed to figure out a different method of focusing. I found that as part of the collapsing mechanism I was able to add what amounts to a measuring stick with marks for important distances. This ‘Stick’ slides in and out as the lens is moved back and forth. In order to calibrate this I cut drafting applique and put it in an old film holder so that it was at the same location in the camera as the film would be. I then measured the distance for different points where that image was in focus and marked them on the ‘stick’.
The new focusing allows for close focusing all the way to 5″ however going the other way once you focus past 3 feet it becomes difficult to make changes as the differences become very slight. However with such a wide lens it’s not really a problem with whats in focus extending from very near to infinity focus.
The lack of a tripod mount is probably the largest problem I have and will look to address as I make improvements. Having to hold the camera while also focusing by pulling the lens in and out and tripping the shutter is a little too cumbersome. Here are the first four sample images from my new Frankenroid.
1 comment | tags: instat, polaroid | posted in Cameras, Photography
Apr
14
2015

I’ve written previously about using Cinestill 800T film and it’s look particularly with light sources. Cine Still Film Tungsten 800, Niagara at night, and even when I had an issue how Cinestill handled it How Customer service should work
I think the Canon A-1 is well suited for nocturnal photography with its manual control of shutter speeds all the way down to 30 seconds, it has exposure compensation, self timers of 2 and 10 seconds, the LED’s can be turned off and finally it has a built in viewfinder blind activated with a lever. 50mm f1.4 lenses are also readily available and add to it’s low light usability. All that and frankly it looks cool, it is the epitome of late 1970’s early 1980’s design and camera technology.
A previous post on this camera can be seen here Canon A1 The image of the car wash is also the cover image of Latent Image Magazine Issue #5
no comments | posted in Cameras, Photography
Apr
9
2015

Some pictures from a day trip I took, in this case I gathered together images of signs.
It was a rainy day so that clouded my decision-making around what photographic gear to use. I certainly wasn’t going to not go, photography is a rain or shine proposition for me. The Pentax K-3 has 92 weather seals and the DA* series of lenses are also well sealed against moisture and dust. To this point I’ve not had any issues when using Pentax weather sealed cameras and lenses in some very wet conditions. I use the lens hoods when actually shooting to help keep moisture off the front element of the lens but the camera itself can be allowed to get wet.
When I shoot like this there is often a lot of cross over between my digital shots and film and I’m sure that when I actually develop my film that will be the case.
1 comment | posted in Cameras, Photography
Apr
7
2015
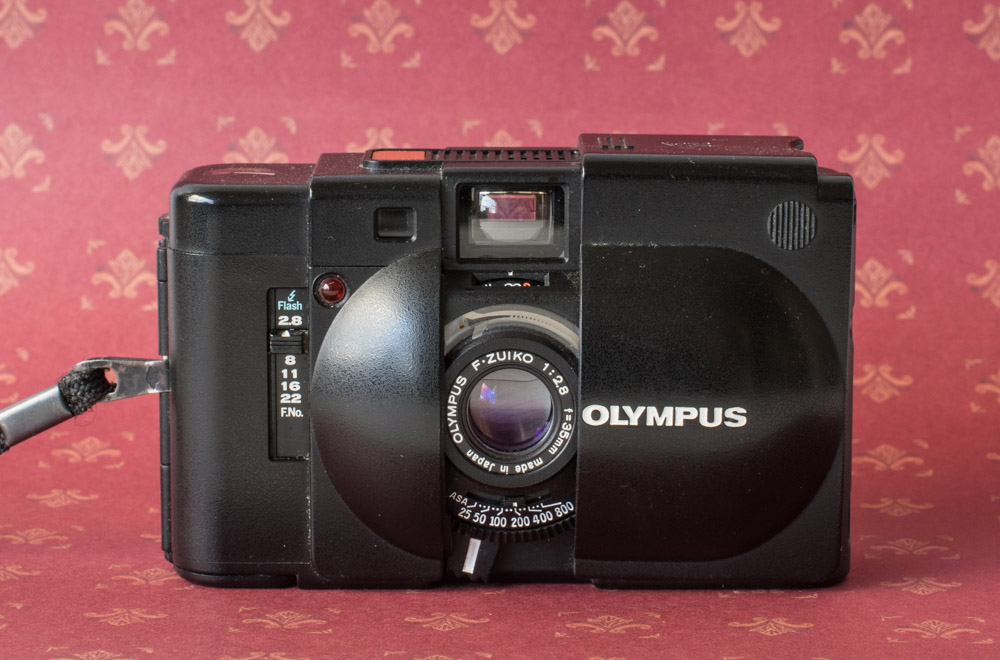
The Olympus XA is a fantastic little rangefinder if your willing to live within its limits. Those limits are primarily the tiny focus lever and its aperture priority with minimal over rides. At it’s heart is the 35mm f2.8 six element lens that produces sharp images from corner to corner despite how close the design requires it to be to the film. The rounded edges and clam shell lens cover make it a joy to hold in the hand or slip into a pocket. The XA is really one of the iconic cameras of the 1980’s and rightly so. The camera is also incredibly quiet with only a small ‘snick’ of a shutter sound and no motor noises with it’s thumbwheel film advance.
no comments | posted in Cameras, Photography