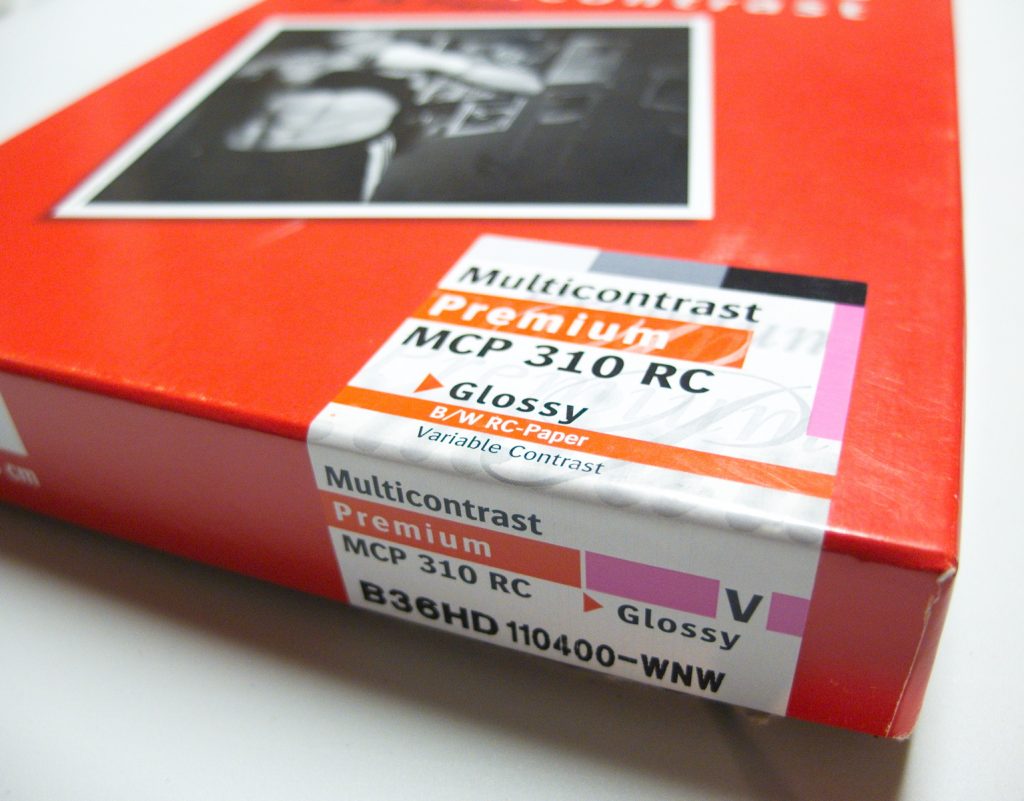
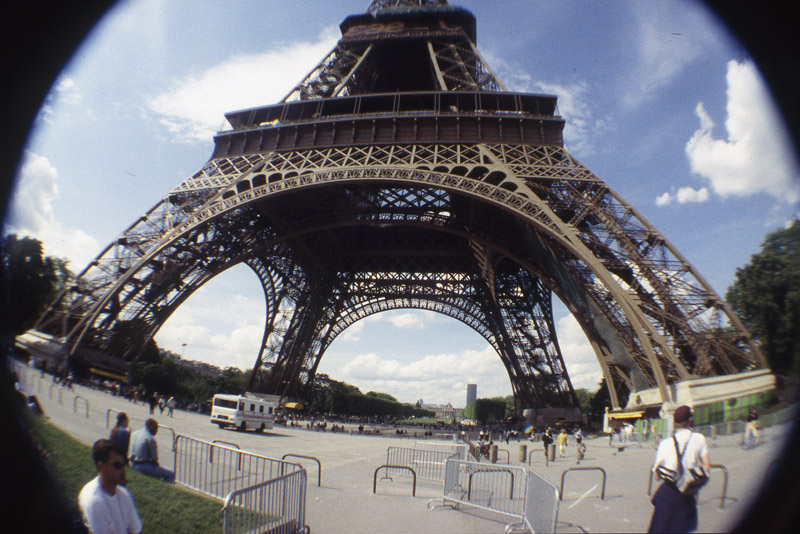
I have a bunch of AGFA MCP 310 multi grade paper that is fogged. Its not really any good for making Black and White prints but not wanting it to go to waste I started using it as paper negatives. Because it is 8×10 sheets of paper intended for use in a darkroom there are some considerations that need to be dealt with. First its Orthographic which means that it is sensitive to Blue and Green light but insensitive to Red light. (That’s the reason you can use it under a safelight in a darkroom) This means that things that contain reds will be rendered very dark and things with blue will be rendered very light. (Sky for instance will mostly be blown out to white) The next consideration is of course cutting it down to fit into a film holder. Although it seems like a no brainer just cut the 8×10 into four 4x5s you do need to trim them slightly smaller to fit in the holders. And the final consideration is the sensitivity of the material. Just how much light is just right. My first few attempts I just treated it like it was around ISO 6 which is roughly what you would expect the paper to be. It was fun and I achieved some decent results but mostly through random experiments.
Once that phase was over I decided to take a little more care and determine how to achieve the best results consistently. Rather than trying to find the absolute ISO value of the film I decided to find a value that provided me with a negative that I could achieve the best results with. I set up the camera and had 8 frames to take of the same scene with varying exposures. I started by taking a picture with a digital camera set to ISO100 it metered the scene at 1/500 and f5.6 which is 14EV.
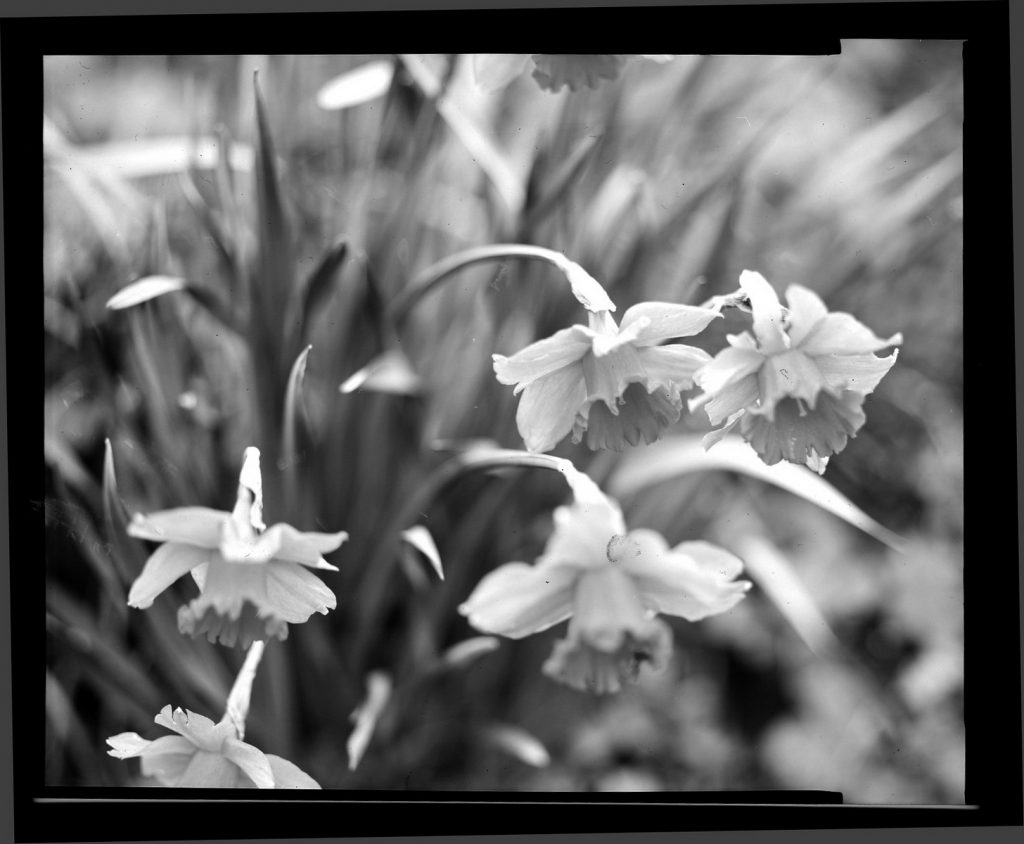
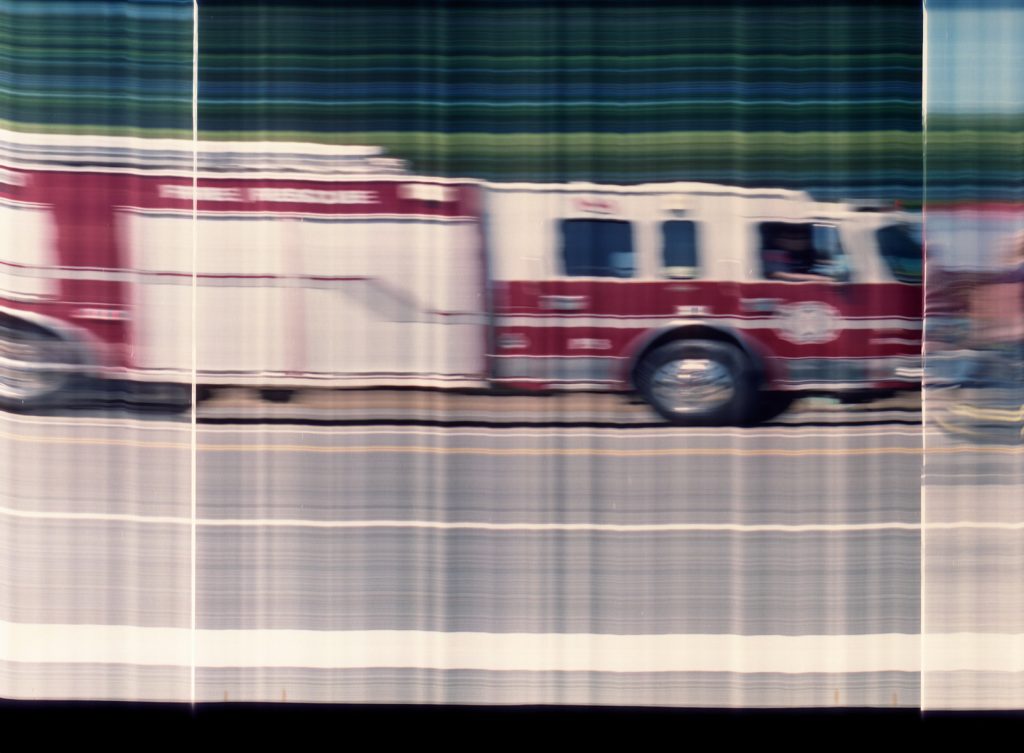
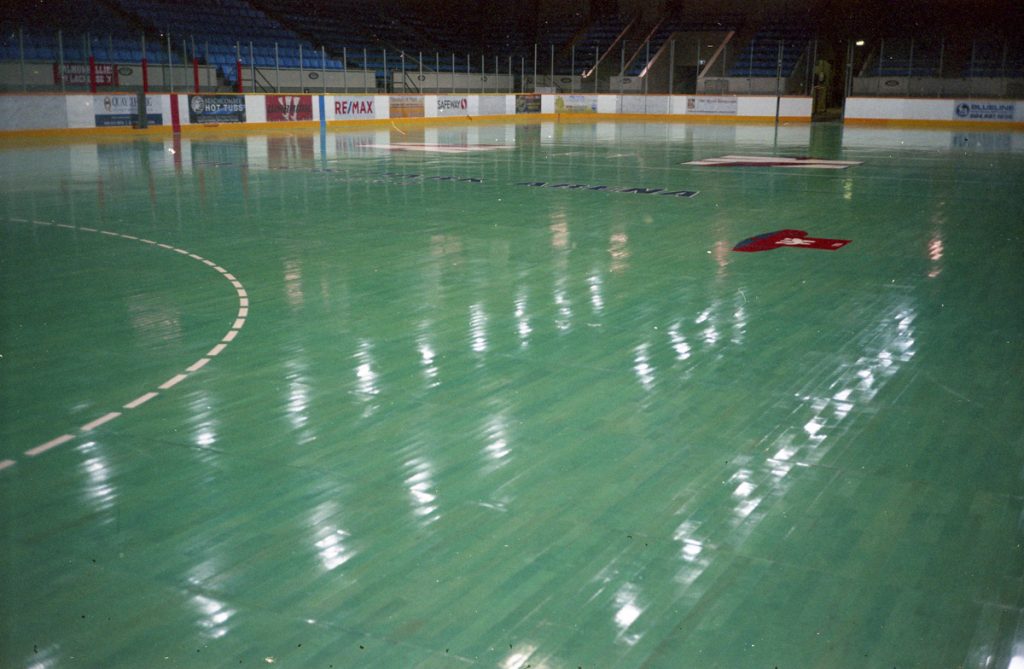
So this was my starting point knowing full well the paper was not equivalent to 100 ISO. I set the 4×5 camera to f22 and 1/30 sec. which is also 14EV and sure enough the result from that frame was too light (I’m speaking in terms of the image after scanning and conversion to a positive), next up was 1/15 second or twice the light it was better but still too flat. At 1/8 of a second though we seem to have hit the sweet spot where the highlights were not blown out yet there was detail in the shadows. This f22 and 1/8 second suggested that the best result was achieved when you treated the paper as if it was ISO25 not bad and quite a bit faster than the ISO 6 I had tried previously. Not having seen the results yet of course I continued on with the test setting the shutter to 1/4,1/2,1,2 seconds each one with a greater degree becoming blown out. The results of this test excluding the 2 second one is displayed bellow
You can see that 1/8 of a second gives a result that offers the most range for both scanning or contact printing. I’ve adjusted the levels of the full 1/8sec image (ISO 25) for a result I like.
You may be wondering what sort of detail do you get using a paper negative. And there is no doubt they are by their nature going to be softer than a real film negative but here is a crop into that monument across the water.
So now knowing that the paper yields a reasonable result when its shot at 25ISO I can continue further experiments and potentially refine the results. I have plenty more paper to use so rather than writing more I think I will load some and get out and shoot. Maintaining physical distancing from other people of course. (If your reading that last line years from now and don’t know why I would say such a thing then I am very glad for you)
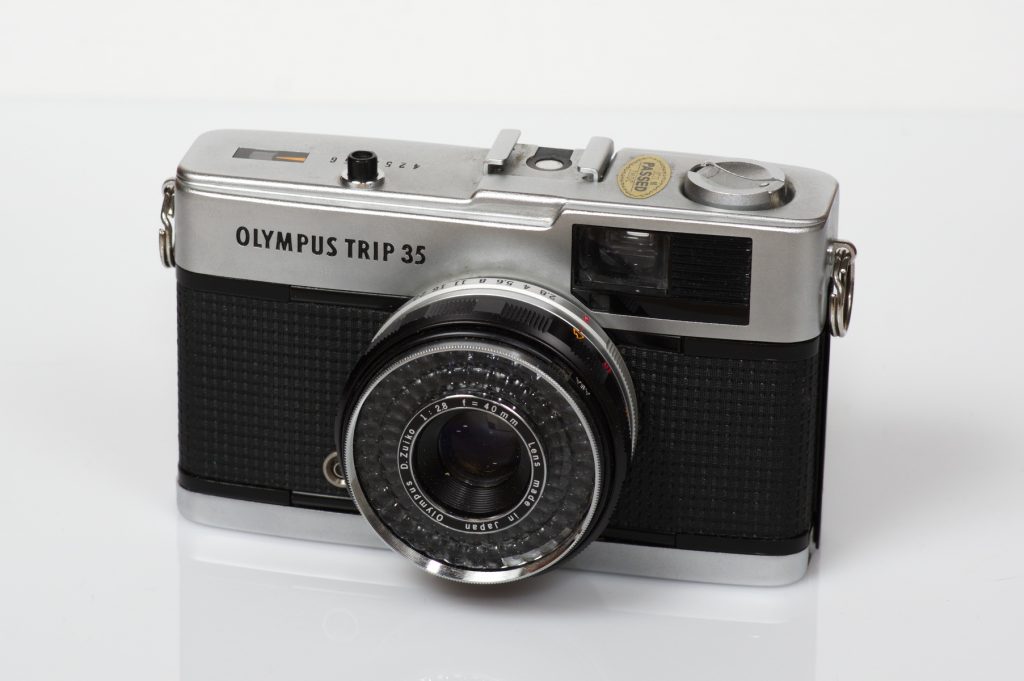
I’ve written about the Olympus Trip 35 a couple times so I will attempt to not repeat myself. Olympus Trip 35 2015Olympus Trip 35 2012. One thing I need to say though is each time I have used the Trip 35 I have been pleased with the use and results. I’m not super keen on zone focusing as I tend to forget or miss focus on one or two shots but not needing batteries yet having auto exposure is a nice plus. Considering that the camera came out over 50 years ago that is an impressive feat.
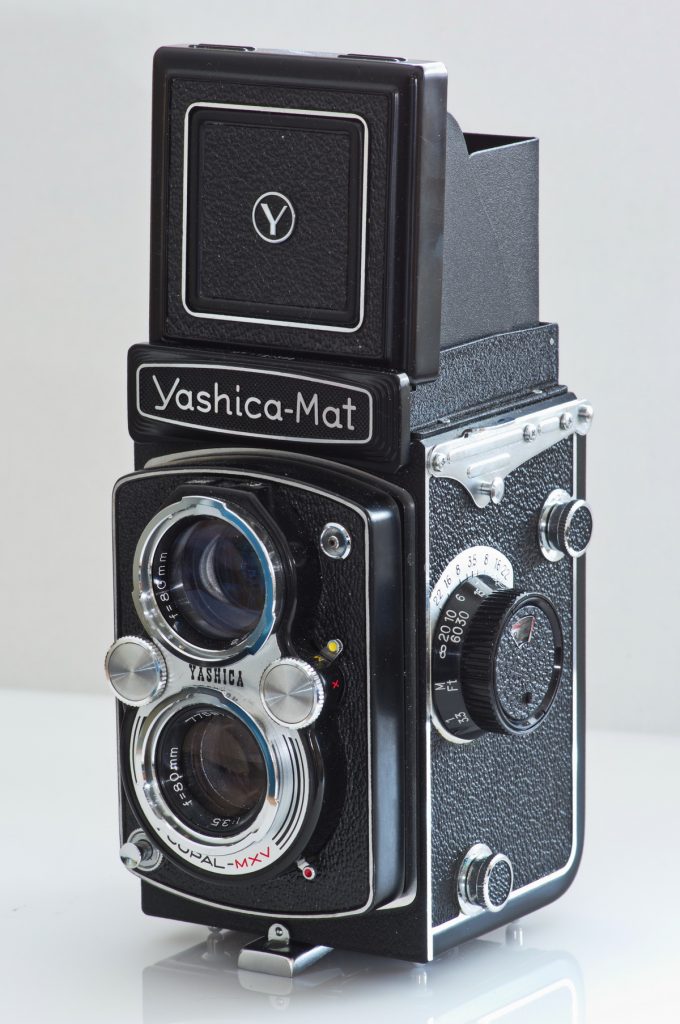
While I’ve owned a very fine Rolleiflex TLR for many years I wanted to find a camera that I could use as more of a daily shooter. Enter the Yashica Mat.
I was fortunate to pick up a practically pristine one at a nearby camera show for a very good price. A price which was actually pretty close to what it cost when the model was released in 1957
Looking at the four cameras above you can see that the defining difference is the film advance crank rather than a winding knob. This feature makes it all the more like the Rolleiflex it displaces. The four element 80mm Yashica lens is fantastic and with the large 6x6cm negatives there is a ton of detail recorded. Additionally the out of focus areas are nice and smooth. Its just an all around great performing camera and lens for the money.
The first roll I shot through it I did make the mistake of starting to shoot too soon and cut the first image off. It’s important to actually align the arrows on the film backing to the arrows inside the camera
I used Portra 400 and was very pleased with the results. The next roll I shot was Cinestill 800T. All the frames from this film had little purple spots on them. I cant say whether its from the film or from the processing. (I sent this roll out as I was between chemistry).
Aside from the film issue the camera performed perfectly and I was otherwise pleased with the images.
I now have a TLR I can comfortably take anywhere that gives results that I am pleased with so now its just a matter of shooting more with it.
Wow I didn’t realize how few words there are that rhyme with Canon I mean I should have considered this when I started writing this limerick.
Forget about the bad poetry what about the camera? Well the reason I would even bother writing about a plastic point and shoot from 2003 is because of its 26mm f6 three element lens. Perusing my blog it would become apparent that I like wide angle film cameras and the wider the better. So 26mm is very unique and deserves some attention. The downside though is in an effort to make this camera cheap Canon stripped it of functionality. An example of this is that it can only read the DX code for 100 or 400 ASA film and there is no manual override. Its shutter speeds vary between 1/250 and 1/40 of a second and it has fixed focus. None of these are desirable attributes, yet here we are. One positive is the fact that it takes standard AA batteries. So with little else to say about the camera and its operation (You point it at what you want to take a picture of and press the shutter button) here are some images.
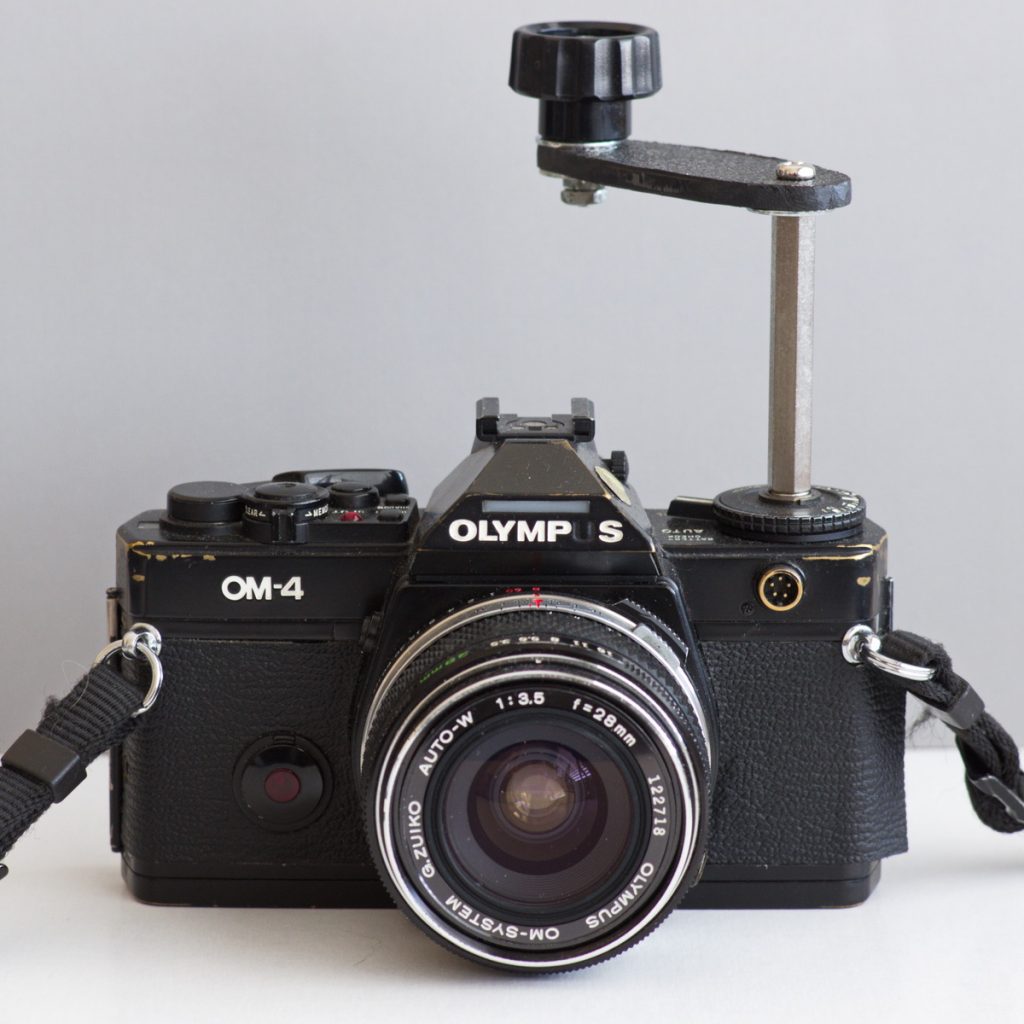
I don’t like to waste things and in particular cameras. This Olympus OM4 had questionable electronics so was of otherwise little use. One thing about the OM4 though is that although it requires batteries and electronics for normal operation that isn’t true for bulb mode. With that in mind I set out to modify it into a slit scan camera. Before I go into that though here is a little description of what that is.
Normally the intention when capturing a picture is to record the entire scene in one exposure. With a slit scan camera what you are doing is recording the same small slice of space in front of the camera over time. You achieve this by moving the film behind a vertical aperture or ‘slit’. This is the principle behind finish line cameras.
To do this with the “Coffee Grinder” I replaced the rewind lever with a larger system that would allow me to crank in a smoother motion without shaking the camera. I also made a mask from some thin opaque instant film backing leaving approximately a 0.5mm slit for light to come through.
Loading the film is a matter of taking all the film out of the canister onto the take up spool. I did this by covering the lens with a cap and advancing the film all the way out one frame at a time.
Then in preparation for taking an exposure what you do is set the camera to Bulb mode, cock the shutter and press the rewind button. Now you are ready. For smooth even operation a tripod is a must.
When you want to capture something you press and hold the bulb button while cranking the lever in the rewind direction. As you are in a sense just capturing the same sliver of a scene over and over again if nothing changes then what you get is streaks like this.
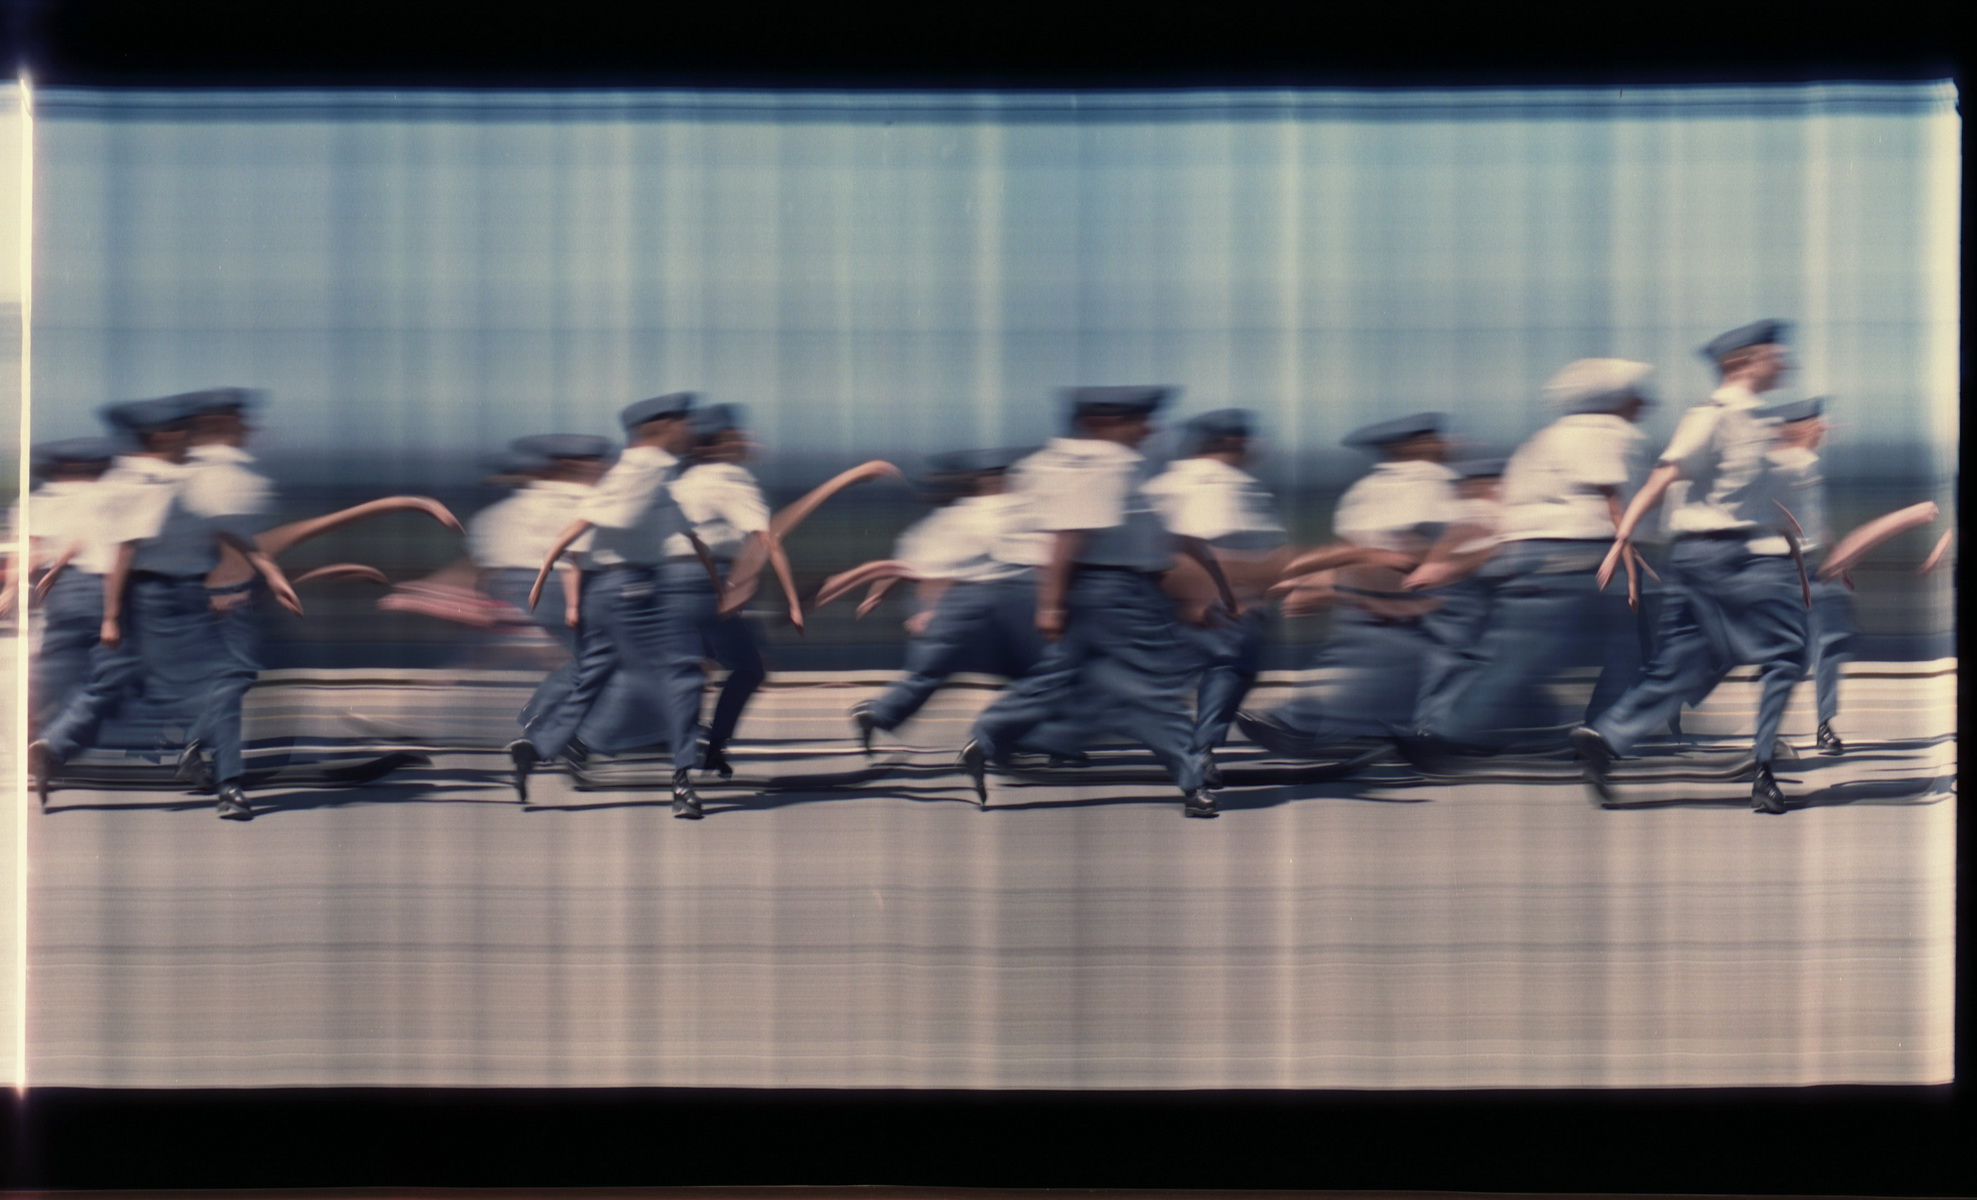
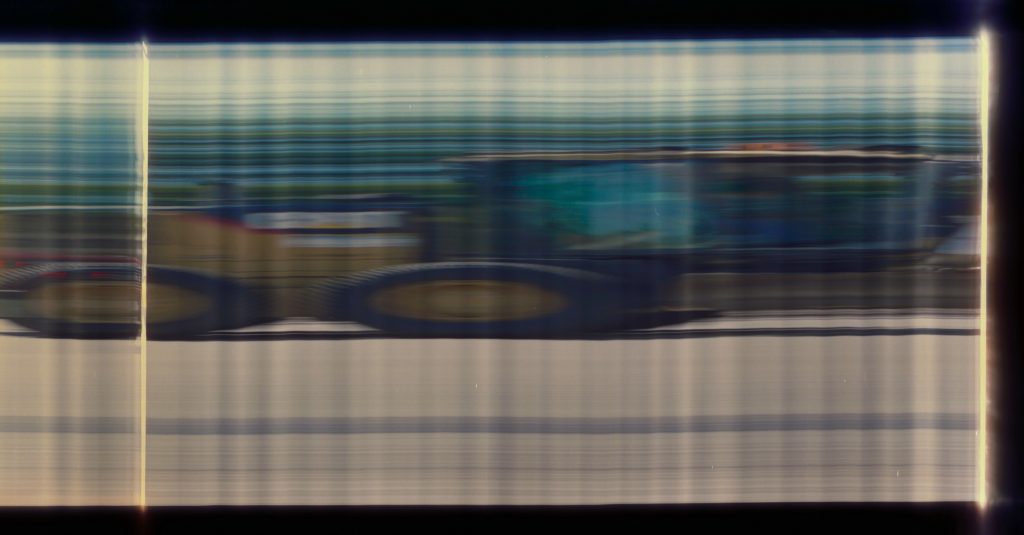
It gets more interesting when something is moving in front of the camera during the exposure. Things that are moving from left to right are stretched over time and things that are moving right to left are shrunken all the while the background is the same so results in just streaks.
The March
Some things I learned from this experiment that will allow me to improve the next iteration. I ended up cranking too fast in most cases which used more film than was necessary and resulted in too much stretching of time. I compensated for this by squeezing the scanned images horizontally. If I am to slow the cranking then I will need to reduce the size of the slit or stop down the aperture more so I don’t over expose the film. Also as smoothly as I tried to crank you can see the vertical banding that results from variations in speed. Removing the human element and replacing it with a motor would be the best way to deal with that but considering that this was a one afternoon project I’m not unhappy with the results.
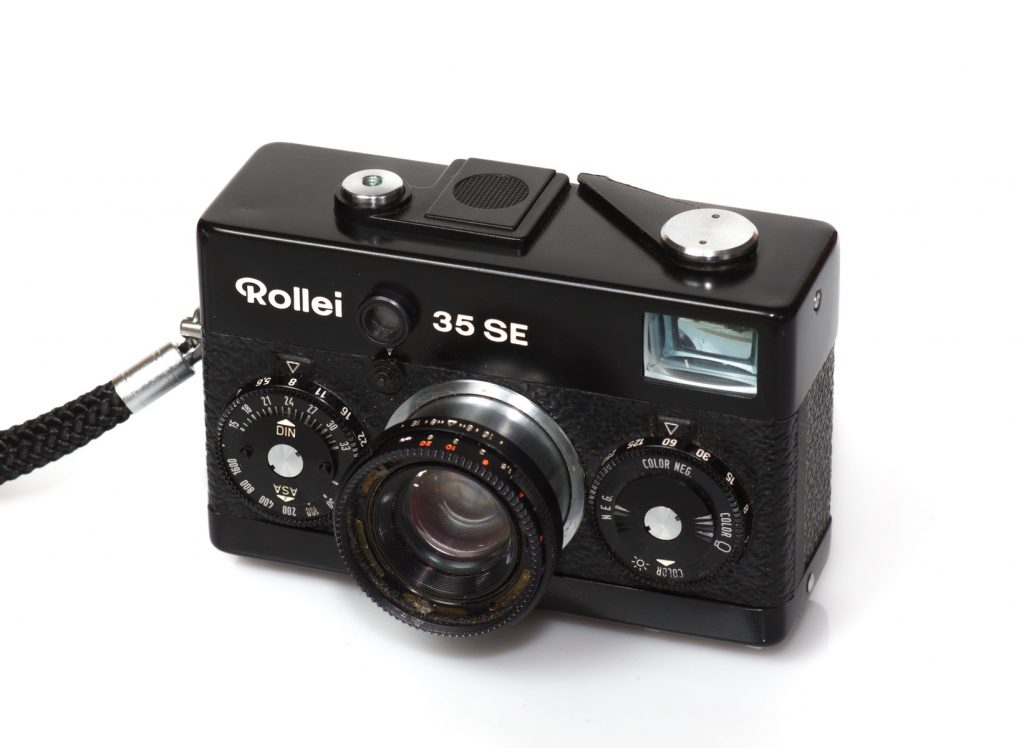
There are certain cameras that have reached a cult status which can cause a bit of a problem writing about them because what is there that hasn’t already been said somewhere. My take though on the Rollei 35 SE and really all the variants of the Rollei 35 is that they are a great lens on the front of a marginally okay camera interface. Don’t get me wrong it has all the settings such as shutter speed and aperture but with them sitting on the front of the camera you need to hold the camera away from your eye to make changes to them that you are certain of. Also the metering just consists of a green or red LED for correct or not exposure. The camera is nicely built however and as an object of design is cool. The collapsing lens is a nice touch, just remember to have the shutter cocked in order to operate it. Focus is strictly of the zone variety, where you pre set the distance you want prior. This works well for some things but slows the process and lacks accuracy. Another knock on these cameras is the cost they can go for quite a lot. A current look puts them at more than twice the cost of a similar specked Olympus XA or Minox. Now for the good stuff. The lens on the Rollei 35 SE is amazing I don’t use that term lightly. It is a 40mm f2.8 Zeiss Sonar and the clarity of the images from it were striking when care was taken.
So despite the challenges with usage the results may warrant picking one up if the price is right.
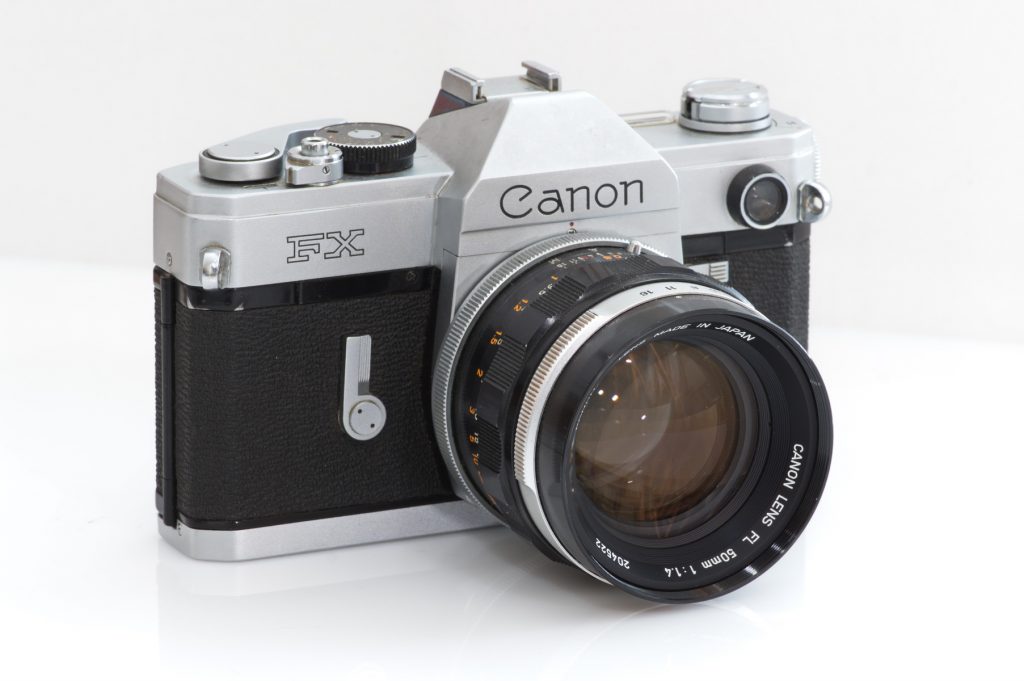
I admit I went a little crazy with shallow depth of field when I used the Canon FX but I blame it on the camera and the Canon FL 50mm f1.4 lens. You see the lens is such a substantial lump of glass that it seemed a waste not to shoot it wide open. And the split image focus with a fresnel matte screen in the large viewfinder is so clear and precise that it makes focusing on the thinnest things effortless. So as you can see I had no choice. The FX has a meter but the Cds sensor is not in the optical path and isn’t coupled to the exposure settings of the camera anyway. So when shooting it now its probably not worth bothering with the meter, which originally took a 1.3V mercury cell anyway. The FX weighs around 900g with a lens which is a good thing because the shutter and the mirror make some dramatic thwacks that would shake a lesser camera like a leaf in the wind. Despite being over 55 years old the Canon FX is a great looking and operating camera although with mine I discovered the shutter timing is off for 1/1000 of a second rendering some images black on the right hand side.
I sometimes wonder about all the photographs and where they end up. This curiosity can be sharply brought to the fore when I encounter discarded images from someone else’s archive. These mostly take the form of slides because how do you stumble across the work of a digital photographer that never printed. There is a melancholy attached to discoveries like this. Who was the photographer? Were they proud of their work? Does their work matter, does mine? Looking at my binders of negatives I have to consider ‘what if they all were destroyed’. The fact is the world would go on none the wiser and no worse off. Don’t get me wrong I enjoy photography, it is just in this image saturated time, I need to keep what I am doing in perspective. I am not changing the world.
So it was with these slides that I came across in a thrift store piled in a shoe box. Each roll carefully noted by the well travelled photographer. I chose one slide box marked from Paris and left the rest for others to discover.
There is a flip side to this and that is that as time passes even otherwise mundane photographs take on significance through the weight of time. The ‘Fragments of Vancouver’ archive of images I am going through is a prime example of this. People frozen in time 70 years ago as they walked passed a Vancouver street photography company photographer. The way they dressed the way they responded to the photographers presence stored on rolls of film like a time capsule to be opened at a later time or lost forever depending on chance.
So I will continue to photograph and sometimes print because its meaningful to me at least in this moment. And someday maybe someone will come across one of my images and question if it matters.
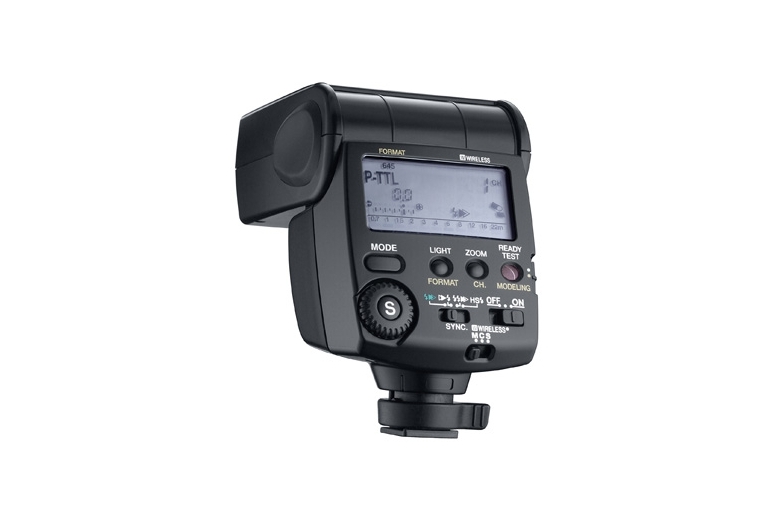
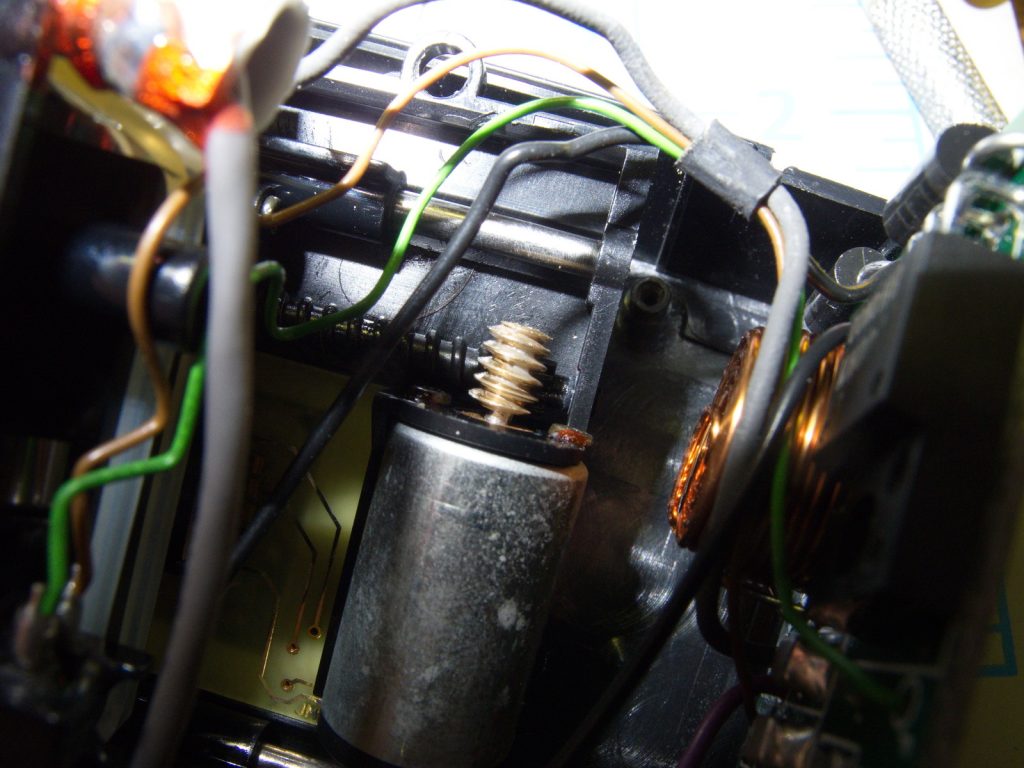
Just a quick and somewhat incomplete guide to fixing a misbehaving Pentax AF360 Flash. The problem started out of the blue without warning. When mounted on a camera and powered up the internal zoom mechanism would just continuously struggle against itself. I thought perhaps some mechanical fault had happened such as a gear slipping or something coming apart. As it turned out during the diagnostics it was none of these.
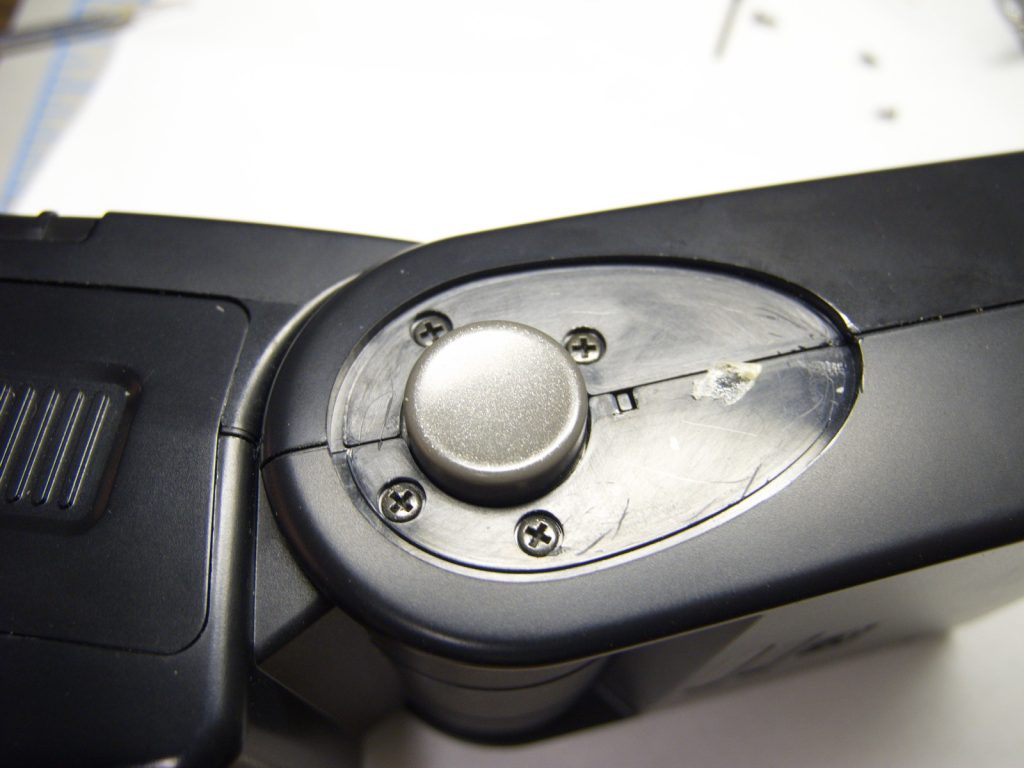
The first thing you want to do is remove the batteries or discharge the flash and then remove them to limit the potential for receiving a shock. After that you need to take the flash apart. As I write this I can no longer remember all the screw locations but in general if something is not coming apart easily do not force it its more likely that you have missed a screw hiding under something.
Once I had it apart I did power it up so that I could see what was happening if you do this be very careful and perhaps wear insulating gloves just to once again limit the chances of a shock.
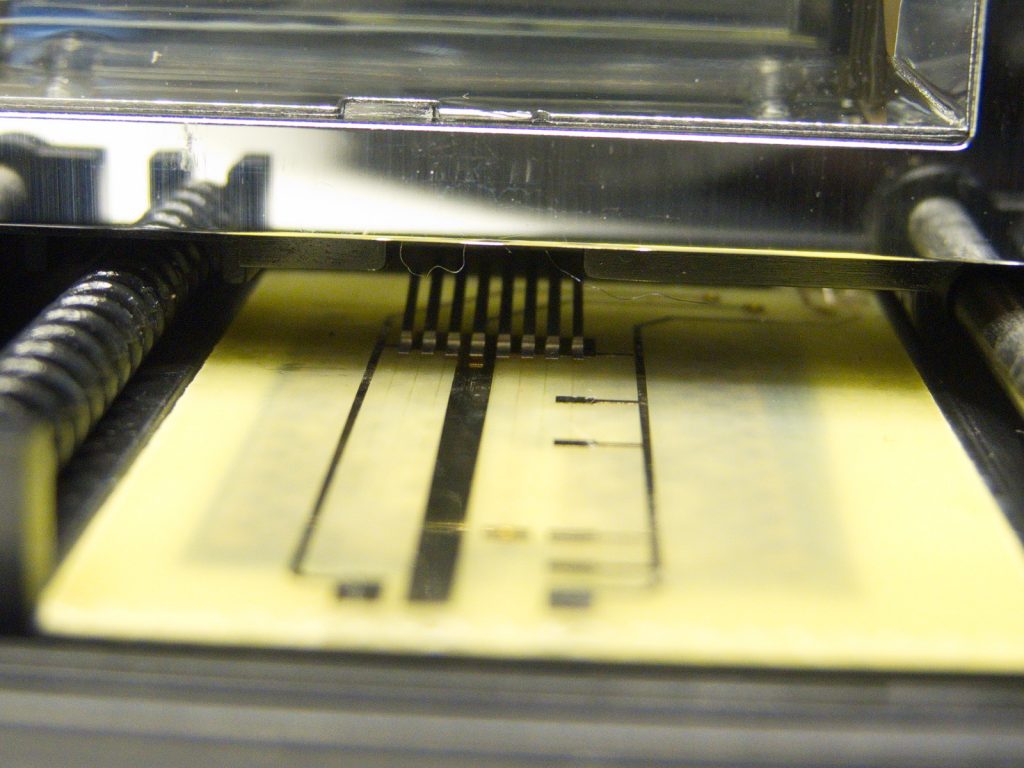
What I discovered was that everything mechanical was working properly but the flash was not registering when it had reached the end of its zoom so just kept on trying. The zoom position is determined electronically by a series of small contacts running along a printed circuit board.
The fix was as simple as gentally cleaning the contacts and traces on the board with electronics cleaner. (any fast drying solvent that doesn’t leave a residue would work)
And after reassembly I had a fully functional flash once again. So if you experience a similar fault with a zooming Pentax flash and your even a little handy its worth a try.
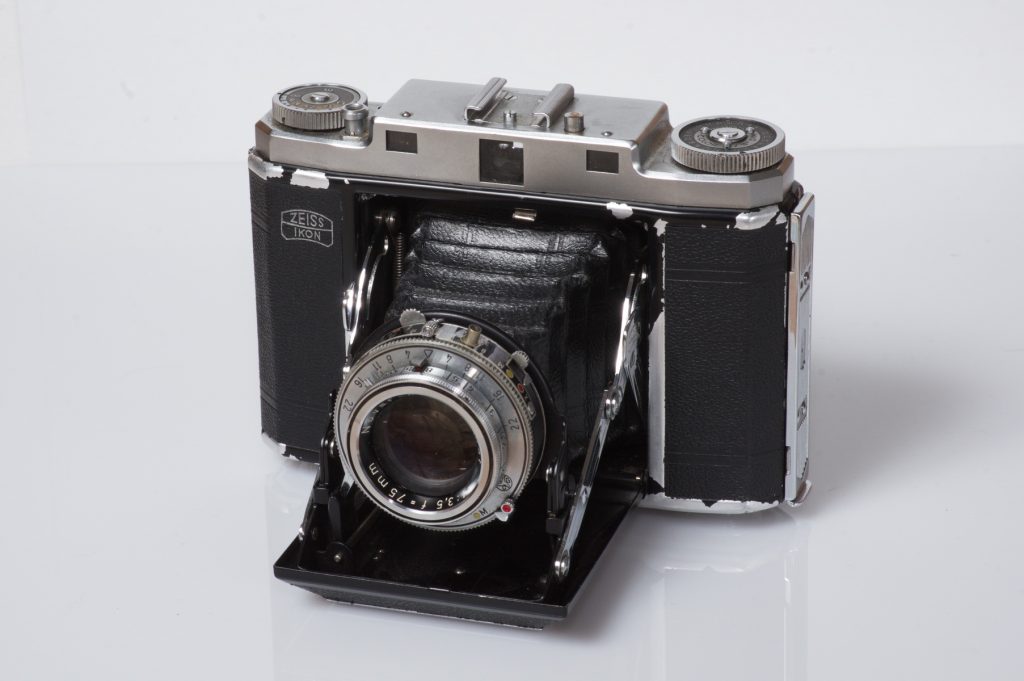
If you can look past the flaking paint I think this Zeiss Ikonta M is an attractive camera. Or maybe it’s because of the flaking paint. But that’s just the body any camera systems defining feature is its lens or lenses if they are changeable. The 75mm Novar Anastigmat is constructed using 3 elements so it is a simple design but at f3.5 is reasonably fast for its day. It’s also quite sharp even wide open with the caveat that that is true primarily at the center and has more distortion in the corners
Ikonta M 75mm f3.5Center Crop from above image
You can see from the center crop above that even when shot wide open at 75mm the center area in focus has a lot of detail. The situation isn’t quite as good at infinity focus but then atmosphere and other factors come into play.
Zeiss Ikonta M (aperture not recorded but likely f11)Zeiss Ikonta M center crop
You can see that at a 1×1 viewing level the scan lacks the sort of sharpness and detail you would get from a digital file but the roughly 5000×5000 image has plenty of detail for a certain level of enlarging
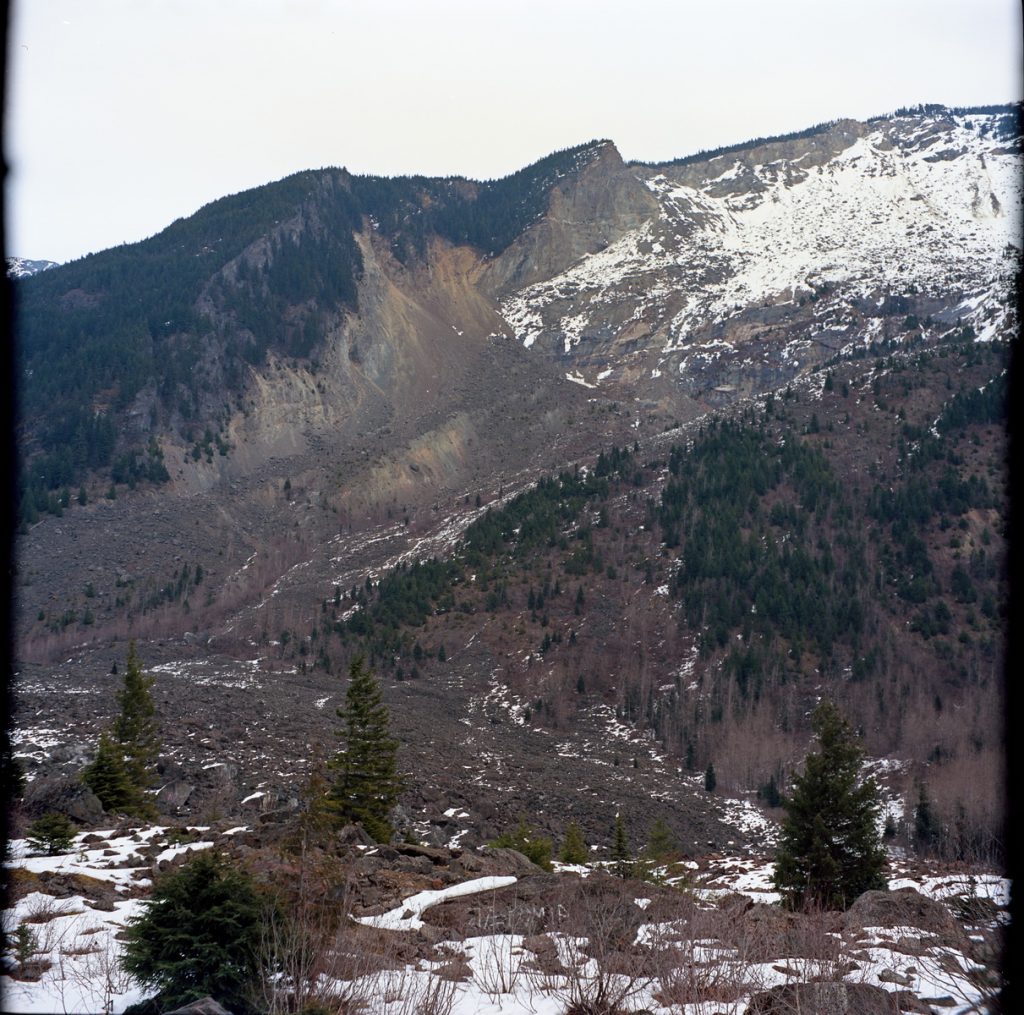
Composing images for square format is a little different and is a nice change that can help a photographer to see things in a new way. I recommend trying it even if you don’t use a camera like this to do it.