Jan
17
2014
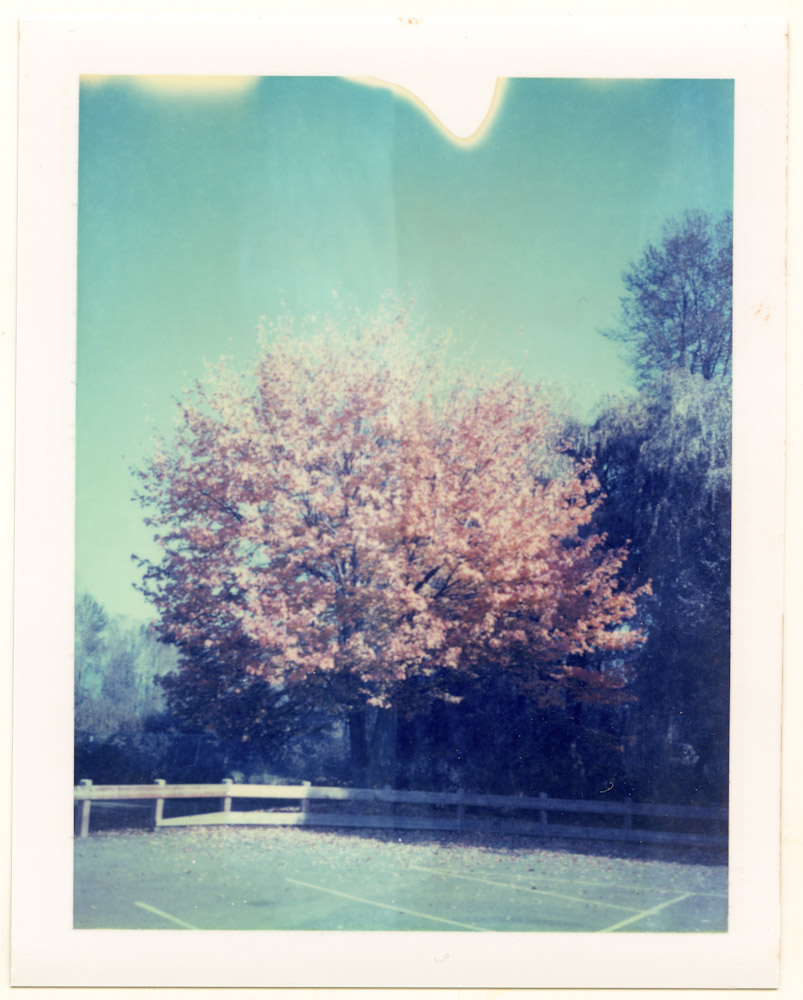
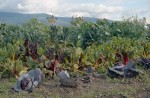
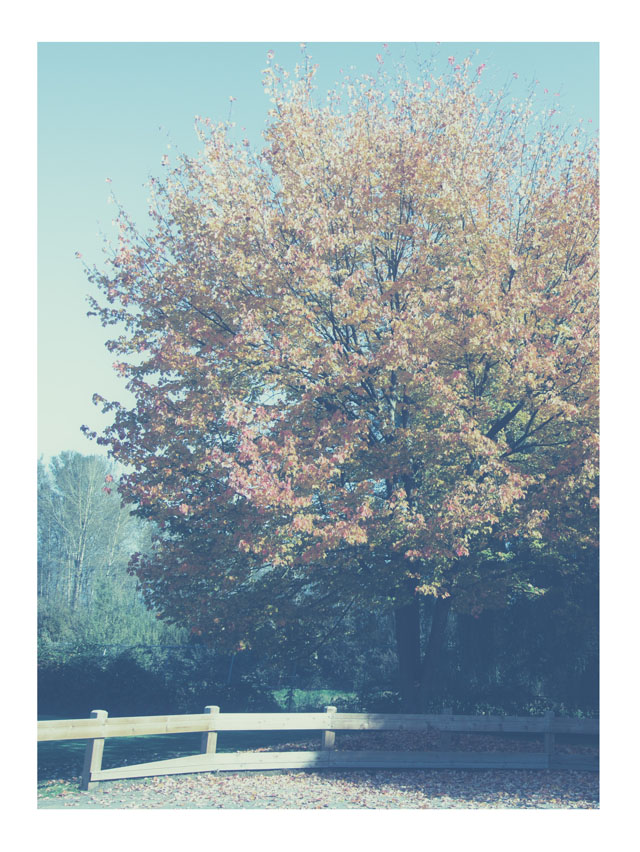
I received a Polaroid 430 Land camera as a kind gift and was surprised to find it still contained a few unexposed film frames. My Expectations of any of it still working were very low so I was surprised when I could discern an image with the first exposure. The next one didn’t work out as well as the chemicals werent distributed by the rollers. What you see here is the final frame, the colour has completely changed with age, but any picture is better than no picture I always say (right now for the first time).
Here is a digital image I’ve edited (as best as I could) to look like a Polacolor. Yah I didn’t think so either.
no comments | tags: polaroid | posted in Photography, Processing
Dec
26
2013
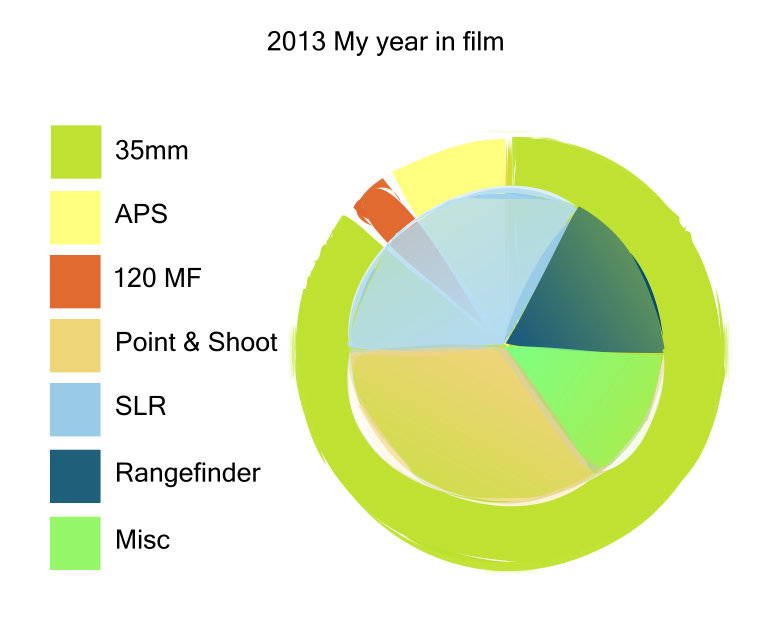
I shot quite a bit of film during 2013 and so I did a quick accounting to see how it broke down.
35mm Film 70 Rolls
APS Film 8 Rolls
Medium Format Film 3 Rolls
I also wanted to see if there was a type of camera that I had favoured over the course of the year.
Point and Shoots 28
SLR 27
Rangefinder 15
TLR/Zone/Misc 11
The one surprise for me was that I had used SLR’s as much as I did, but it was mostly my Pentax Z1p a very good and consistent camera so that does make sense to me.
I have every expectation that 2014 will find me using my film cameras every bit as much but maybe with even more experimentation. I look forward to it.
no comments | posted in Photography, Processing, Uncategorized
Dec
21
2013

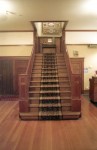
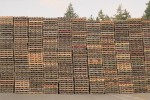
I once again used my go to Pentax Z1p camera loading it with Fuji Superia film. I’ve included the picture of the lift truck despite the fact that I miss focused it, I was using the Vivitar 28mm close focus f2.0 lens. That just goes to show how difficult it is to focus manually in low light with a camera built for autofocus I thought I had it but clearly I did not.
no comments | tags: film, Fuji, Superia | posted in Photography, Processing
Nov
23
2013

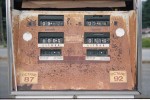
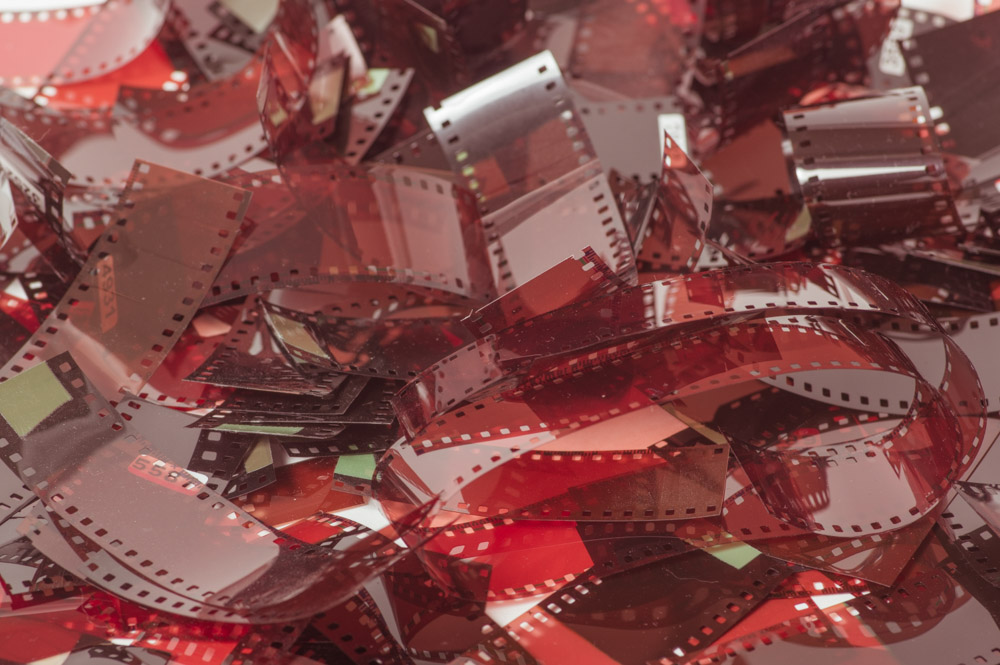
I love the variety of design with older cameras despite the similarity of materials every one of these cameras is unique.
You can view the 288 Mpixel zoomable version by clicking on the thumbnail bellow (Warning it contains about 80Mbytes of data in total)

3 comments | tags: Cameras, Pentax | posted in Photography, Processing
Nov
21
2013

Some more Kodak Portra 400 images a film that I like the look from the more I see the results. Other Portra images and discussion can be seen here Kodak Portra 400
no comments | posted in Photography, Processing
Nov
15
2013
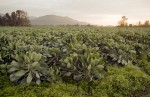
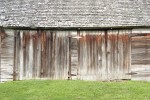
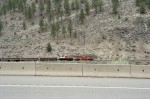
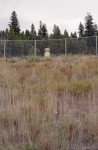
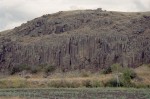
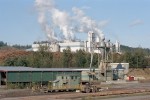
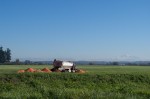
I loaded some Kodak Portra 400 into my trusty Pentax Z1p and took it with me on a trip into the Cariboo region of British Columbia. I’ve always tried to stay away from using 400 ISO film in daylight but this is touted as being extremely fine-grained so I relented. Technical details can be seen in Kodak Technical Publication e4050 . The film was upgraded in 2010 using technology previously used in the Vision motion picture line of film but I don’t have any samples from the previous formulation to compare, the film in its current state though is incredibly versatile. It costs me about $8 per roll vs $5.50 for Ektar so with Ektar being yet even finer grained it’s not a replacement for that film. compared to Fuji Superia 400, Portra 400 has a much tighter grain and less colour mottling and seems to have a much smoother tonal range.
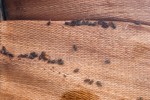
Here are a couple of 100% crops from the film so you can see for your self. The negatives were scanned at 3200 DPI and would provide 11×14″ prints at 300DPI. From a normal viewing distance the grain would be visible but not unpleasantly so. With a very slight amount of processing in Lightroom this grain could be greatly reduced if that is what you wanted, I don’t.


Here are more images I hope you enjoy. On a side note I refered to Kodak’s Vision film earlier and I’ve purchased 4 rolls of Cine Still Film 800 Tungsten which is motion picture film processed and packaged for still photography I’m really looking forward to trying it out.
1 comment | tags: film, Kodak | posted in Photography, Processing
Nov
13
2013
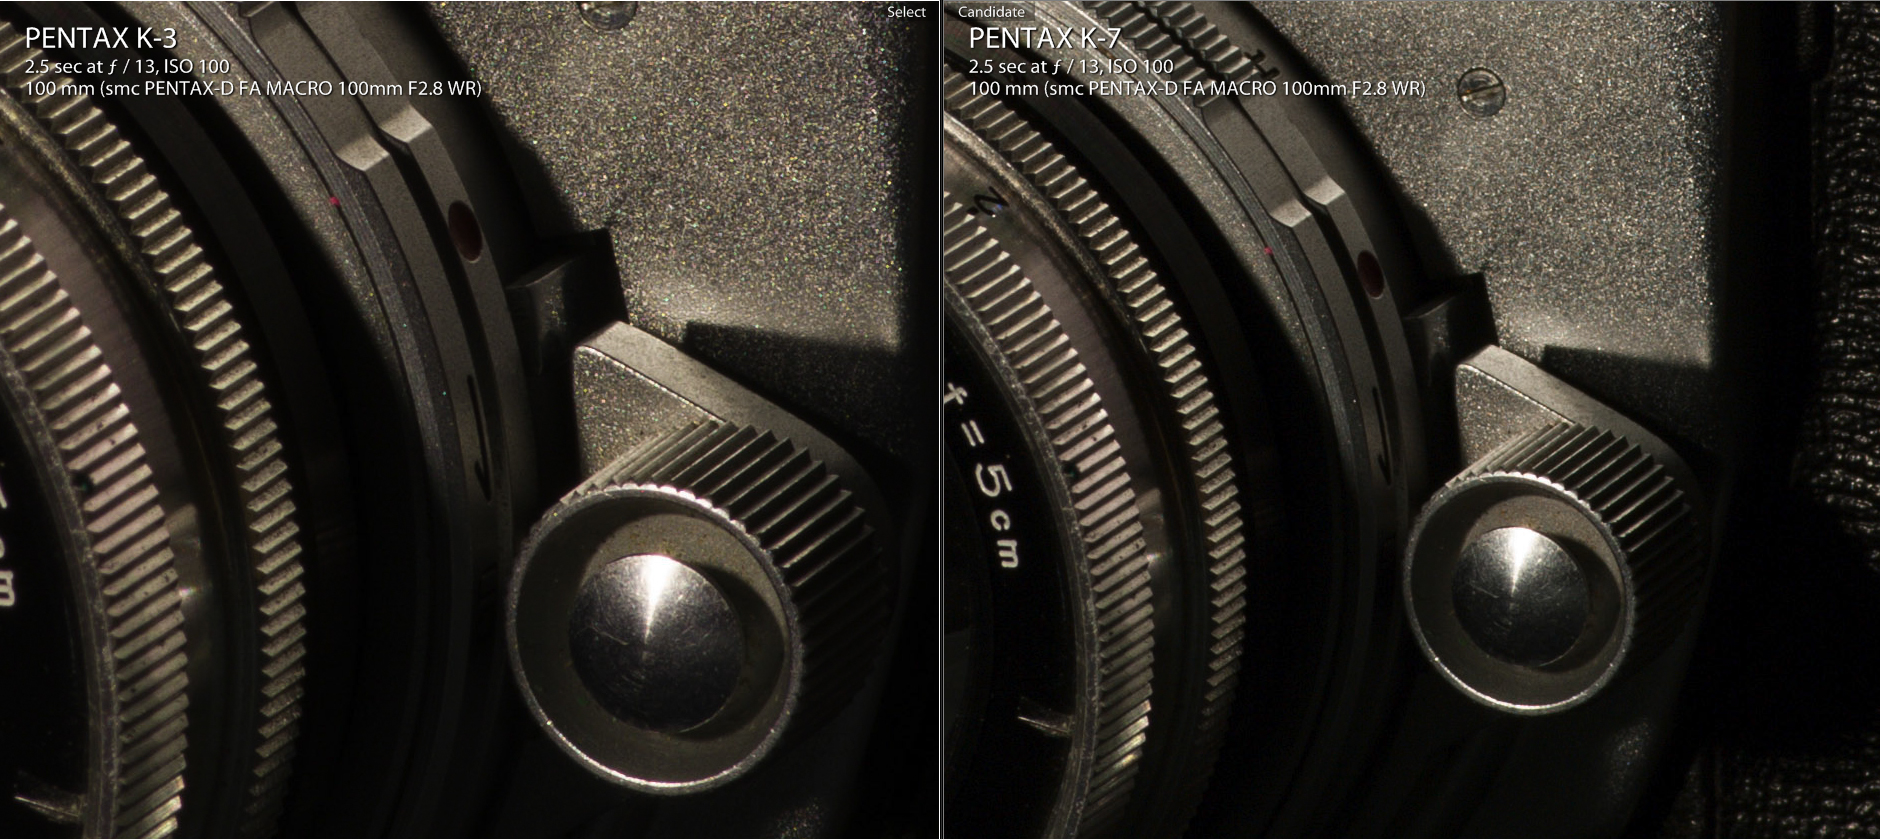
With the acquisition of my latest camera the Pentax K-3 and the fact that I pre-ordered it and ended up being among the first people to receive one I felt I needed to do some testing to determine how far I can push it in terms of ISO performance. This camera is an upgrade to my Pentax K-7 DSLR at 14.6Mpixel but in between I also have my mirrorless K-01 with its 16Mpixel sensor. I thought I would share my findings and hope that you find them useful.
I set up a simple scene of my Minolta Super A, a camera with a lot of details, against a black background with a constant fluorescent light. I used the Pentax SMC 100 Macro WR lens on all three cameras and set the aperture to f13 each time while allowing the camera to vary the exposure with a -1EV bias set to compensate for all the black. The images are all shot in DNG RAW and taken as screen captures from Lightroom where I have set all noise reduction, both chroma and luminance, to 0. A setting I would never use in normal operation but makes things equal and accentuates the differences
Here are crops from the two DSLRs set to ISO 100 a sensor level where they all perform well with the K-3 producing an image with more detail.
But it’s the higher ISO’s that are going to start to show the differences between the sensors and their noise performance. Next I jump to 1600ISO where the 4-year-old K-7 starts to struggle but the newer sensors produce images that can easily have evidence of noise removed.


In the above image comparing the K-01 and the K-3 at 1600 ISO you can see that the K-3 appears to have slightly more chroma noise however that is something that can be completely mitigated with very slight noise reduction.
Next I will jump to 6400 ISO a place the K-7 has no business going to but where the K-01 and K-3 still are producing files that would clean up with some noise reduction.

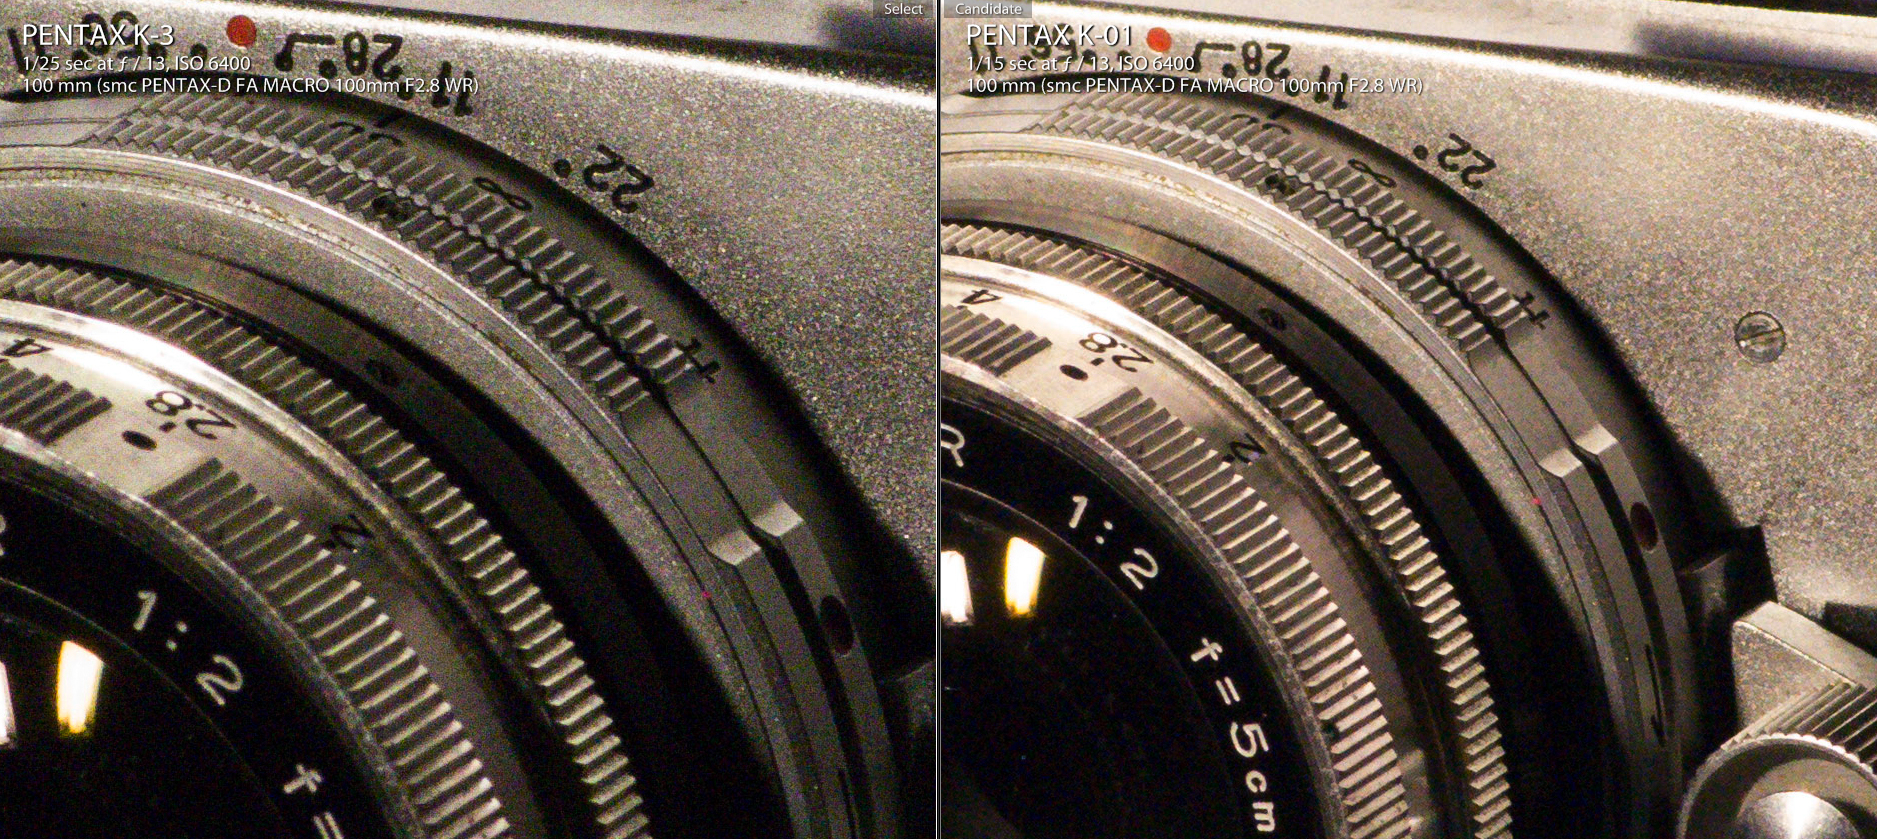
Despite both being shot in RAW it seems that the K-01 is using some noise reduction within the camera so while the K-01 image has less noise it also has less detail even more so than the difference in resolutions affords.
Here is the K-3 vs the K-3 at 12800 ISO with noise reduction in Lightroom 5. The K-01 file has less noise but also less detail I would choose the more detailed K-3 image if asked for a preference

Here is the K-3 at 6400ISO vs the K-7 at 800 ISO where the distance separating them is more than 3 stops. This is a major improvement for me as when I’ve shot performaces in the past I have needed to balance shutter speed aperture and ISO in a clumsy dance at the edge of the K-7’s performance envelope. Those extra stops can go into a faster shutter speed or smaller aperture or both. And the fact that the K-3 focuses in light the K-7 is blind in only adds more usability.

As for the K-3 vs the K-01 they have similar noise performance up to about 6400ISO after which point the K-3 starts to appear more noisy but the K-3 continues to retain more detail through out all ISO’s.
In conclusion the K-3 is a major ISO performance upgrade over the K-7 and therefore also the K-20d by default but is less so over the 16Mpixel sensor in the K-01. This is of course only one aspect of the camera and hardly begins to touch on what a fantastic camera the K-3 is. For instance I used manual focus for this test for the simple reason that I wasn’t able to set the focus exactly where I wanted with the K-7 or K-01 but with the K-3 I was able to easily select the active point from any of the 27 placing it where I needed. This is such a major upgrade for macro photography it can not be over stated.
4 comments | posted in Photography, Processing
Nov
5
2013
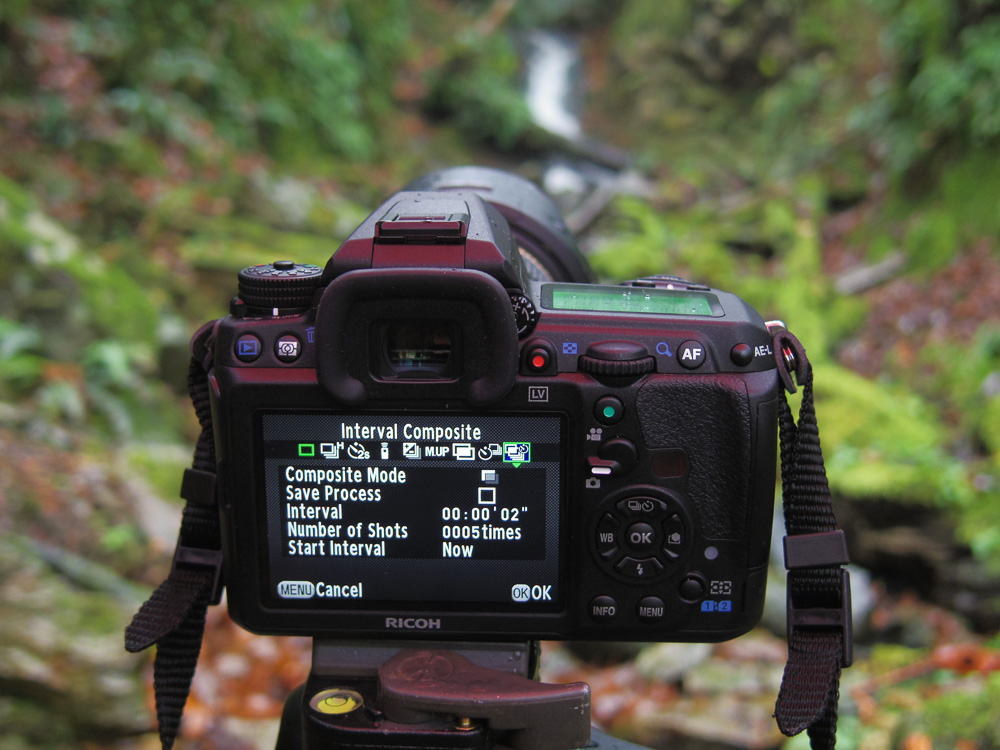
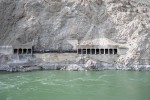
The multi exposure system of the new Pentax K-3 is much improved over previous iterations. Rather than being buried in the Menu system under the record menu it now finds itself in the more prominent drive menu available at the press of a button. It’s alongside interval composite and other drive modes like high continuous, mirror up and self timer. The number of images that can be combined has also increased from 9 to 2000 and there is an additional method of compositing called bright.

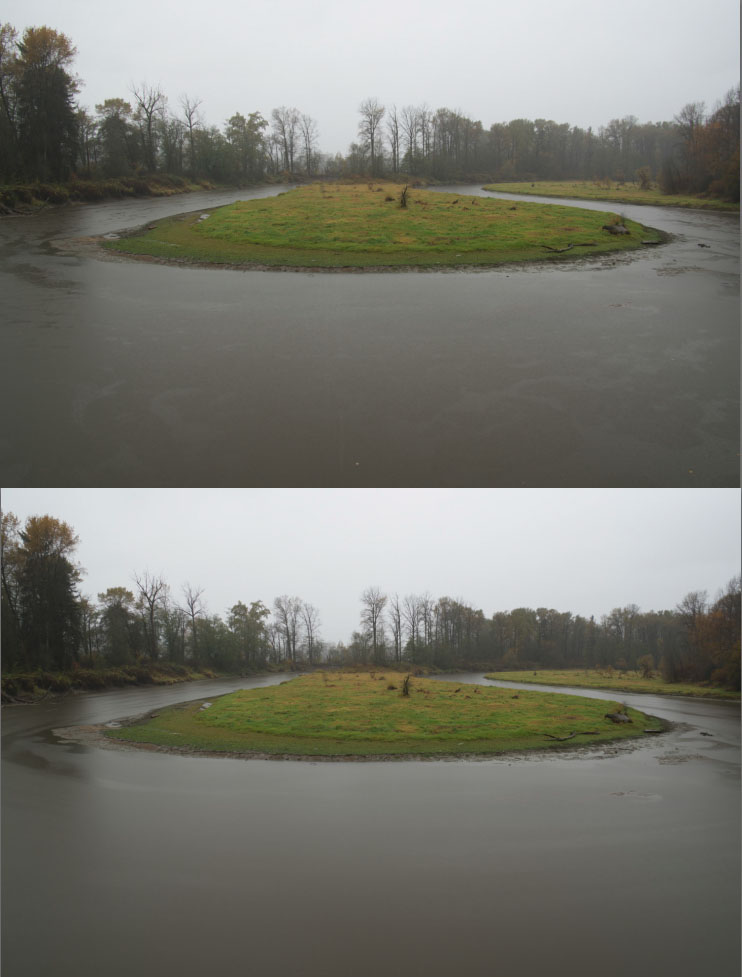
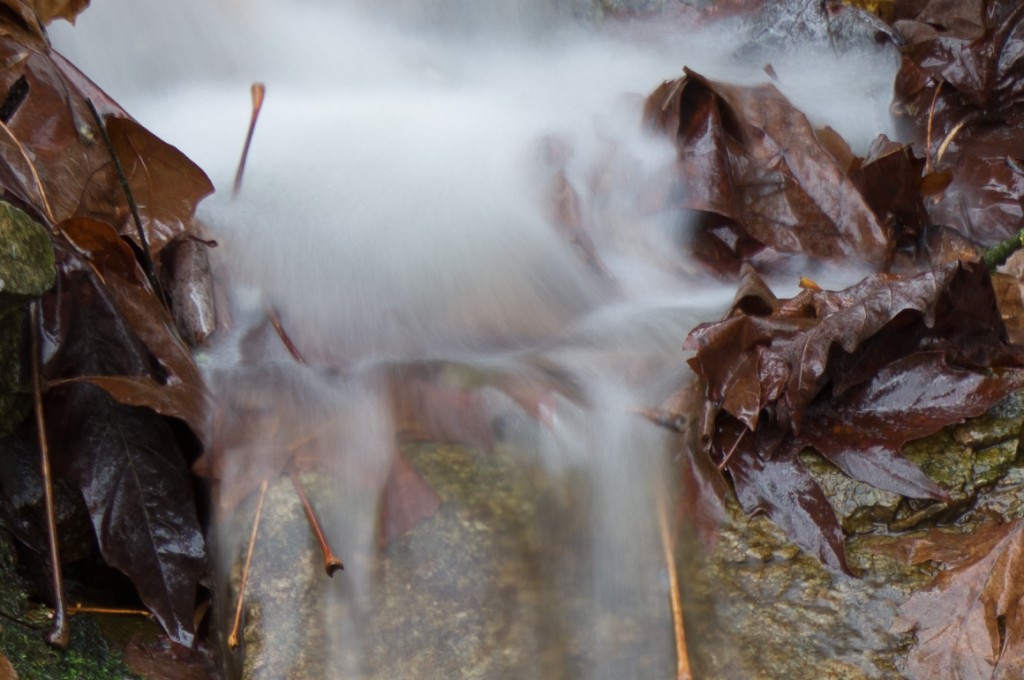
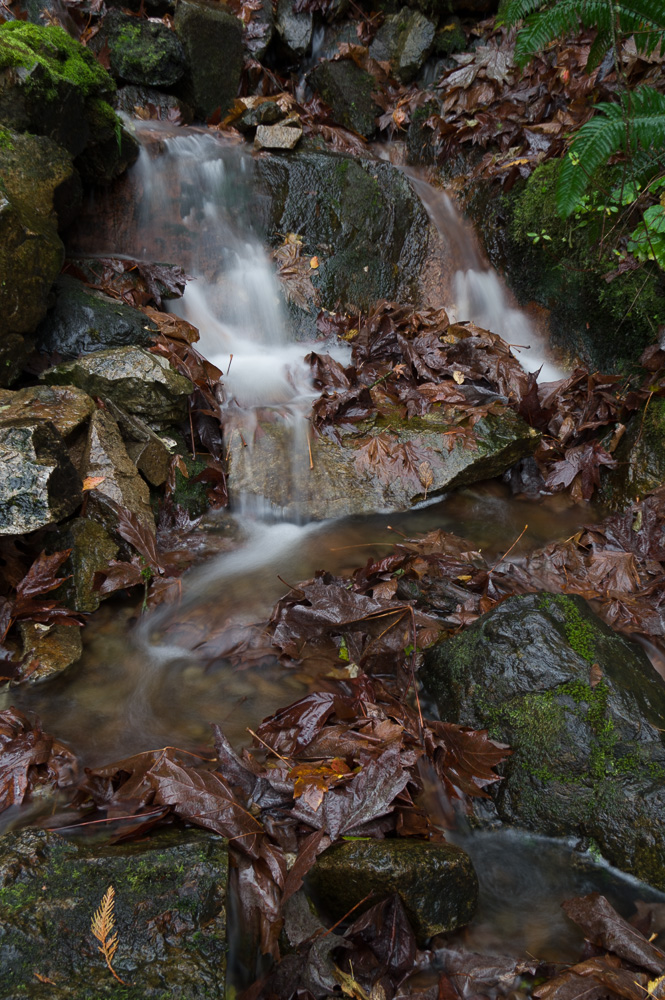
It’s the interval composite mode that is new and so useful for things such as blurring moving water when you can’t set a long enough exposure. With the camera on a tripod you can set it to take a picture every 5 seconds for 10 images and average the exposure. This will generate a single image that appears like it was taken with a single long exposure. Here you can compare a single exposure against the 10 on the bottom.
If you’re wondering why wouldn’t you just take a longer exposure the answer is that you can’t always get long enough shutter speeds especially when there is plenty of light and you don’t have a neutral density filter. The interval can be set From 2 seconds to 24 hours.
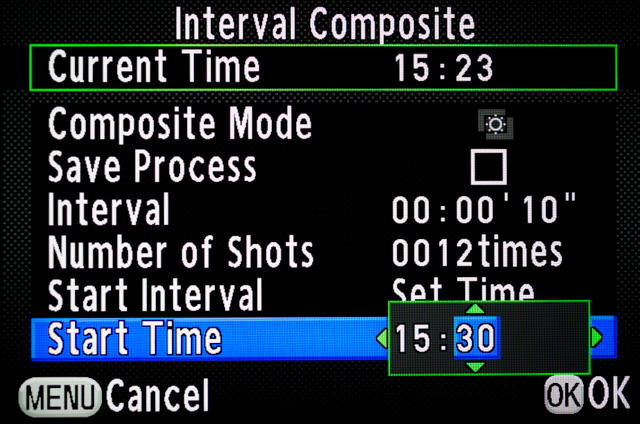
Additionally with composite interval you can specify a time for the camera to begin taking the images and with multi exposure you can choose single shot, continuous, self timer with mirror up and remote control.
It all amounts to great flexibility when doing multiple exposures and it remains to be seen what photographers will be able to do with this. Here are a few samples from my playing around.


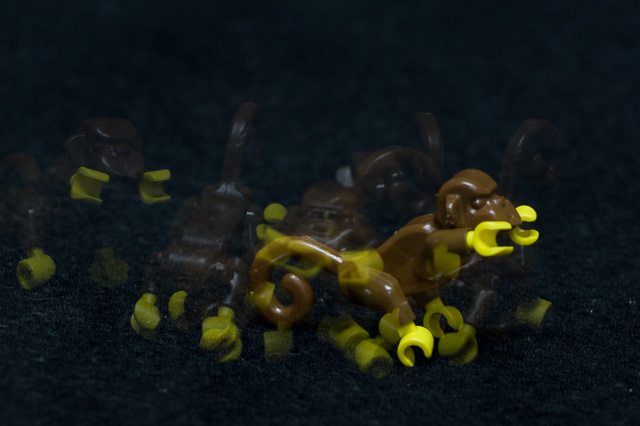

As a side note the above image is a crop from this 24 Mpixel picture, the amount of detail is astounding.
Previous use of this technique and explination can be seen here Multiple Exposures for atmosphere and Multiple Exposure again, again, again
5 comments | posted in Cameras, Photography, Processing
Nov
3
2013
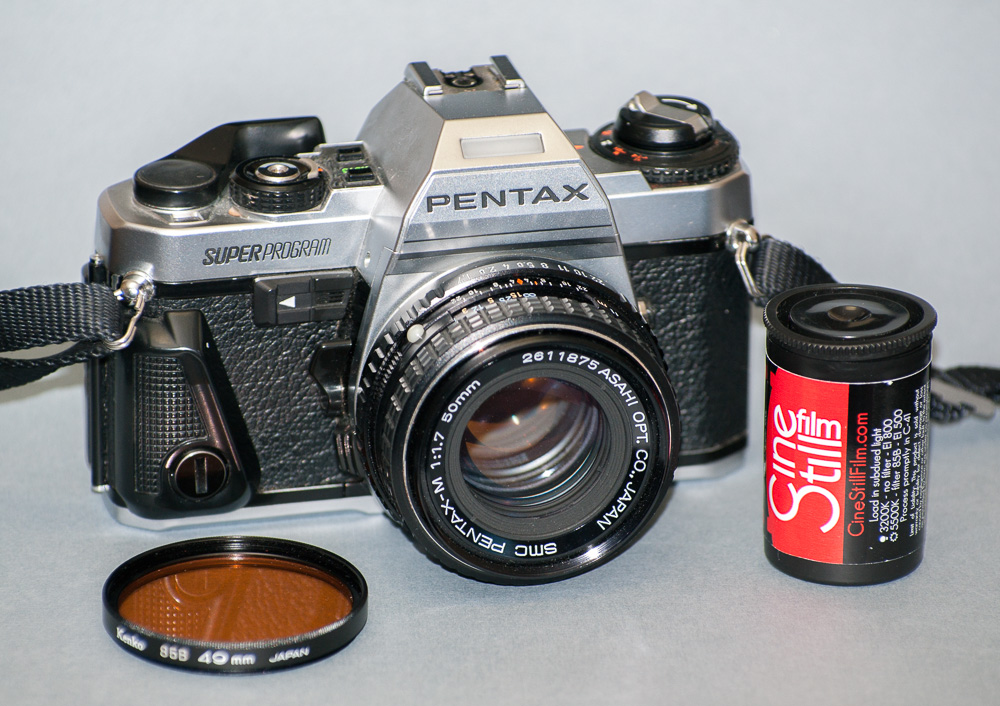
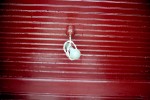
I tried out my first roll of Cine Still film on a whirlwind weekend in Gatineau Quebec. The film is Kodak Vision 3 Tungsten film that has been prepared and loaded for use in 35mm still cameras. Unfortunately through several issues many of the frames are quite under exposed. Im not trying to make excuses but it is something to learn from. I used my Pentax Super Program which doesn’t meter that accurately in such low light and turned out to have the issue of the self timer not working. The thin underexposed frames resulted in extremely grainy pictures with little detail in the mid tones. When there was sufficient light though the results were very good with lots of detail from dark to bright and reasonably fine grain especially for ISO800 film. As it is Tungsten film designed for use under light with a colour temperature of around 3200degrees I used an 85B filter to correct for daylight, however it was also easy to correct for the colour balance during scanning making the filter possibly unnecessary. As I initially said it was a whirlwind tour with only a brief amount of time mostly at night in very low light and rain, but hopefully I can take what I’ve learned about this film and make some improvements with my next roll.
As a final note on order for the film to be developed with standard C41 Processing Cine Still Film removes the anti-halation rem-jet backing from the film prior to packaging. The absence of this backing results in an interesting halo effect around light sources.
1 comment | tags: film | posted in Photography, Processing
Oct
29
2013
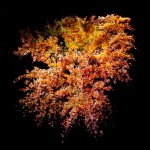
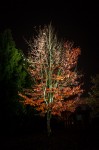
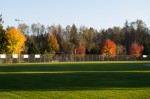
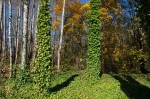
Just like spring has its blossoms Autumn has its leaves. I love the fall colours and can’t seem to get enough of them, the following is a selection from this year. More pictures can be seen here Autumn Pictures 2012 , Autumn Pictures 2011, Autumn Sun And more images and info about the night pictures at Duncan Turners Blog
1 comment | tags: Autumn | posted in Photography, Processing