May
7
2012

I’ve posted previously about creating infrared images with the Sony DSC-V3 but never shown the actual contrivance that I use to do it. In an ideal world I wouldn’t need all the step rings but I’ve tried to use only what I have available to me and as the infrared filter is the most expensive item everything else must revolve around that, literally.
Starting at the camera side is what would appear to be an extraneous item a 48mm extension ring however what this does is, through having less threads than the extension tube, over ride the cameras sensor for detecting the extension tube. This allows you a limited amount of zoom which would other wise be locked at its maximum. The next thing is the extension tube itself which places the rest of the filters out of the way of the cameras lens. Ignoring the step rings the next important item is the Rodenstock RG715 filter. Within its name is a clue to its function, the 715 refers to the wavelength of light that it allows through. The RG715 blocks light bellow 715nm and passes the near infrared above this. As visible light is defined as between 390 and 750nm you can see that most of the light we see with our eyes is blocked. After the IR filter I use neutral density filters to cut down the total amount of light coming in. When the camera is in “Night Shot” mode in daylight the sensor is overwhelmed and the image is completely washed out. This happens because the camera locks out all user adjustment in this mode forcing the shutter speed to 1/30sec and bellow.

And of course the camera itself needs to be set to Night Shot mode. What happens in this case is the camera flips it’s small internal infrared filter out of the way allowing those higher wavelengths of light to fall on the sensor. Normally this extra light would be unwanted and be detrimental to the image but this is the light I am after. The results are mixed, yes you get a near infrared image but the overall image quality is lower than the camera can produce in normal operation and without being able to control the exposure that too can be hit and miss. I’m not aware of any current cameras that have provisions for IR photography without actually modifying the camera but a modified DSLR would give better results for sure.

no comments | tags: camera, Digital, IR, Sony | posted in Cameras, Photography, Processing
May
5
2012
There is no doubt that digital photography has killed film for the majority of people, making it really a niche for those wanting to do something different from the pack or create a certain look. There are areas that digital technology needs to improve though. Many people right now seem to be focused on the ability to capture images without noise in low light and manufacturers are obliging us by placing a lot of their engineering towards that. For me personally I wish they would more directly address dynamic range instead of as a side effect of this noiseless pursuit. What I mean is that with the chemical process of film it behaves differently around highlights and shadows. Specifically film allows you to expose a scene with dark shadows and highlights without clipping the highlights into just pure white. This happens because of films non linear response to exposure.

The image here is a comparison of a film capture with Ektar 100 and my Pentax K-7. What you can’t see is the fact that I needed to under expose the digital capture to preserve the highlights and then adjust the image post capture to try and brighten it overall, none of this was necessary with the film. While I recognize that the sensor on my K-7 has a dynamic range of around 11 stops and newer models have improved on this they still behave in a linear way and clip highlights while the film trails off it’s response still recording detail far furthur into over exposure.
2 comments | tags: Digital, film, Photography | posted in Photography, Processing
Apr
19
2012
I wanted to see just how far I could edit an image in Lightroom and whether I could achieve the effect I wanted without the need to go into a more advanced editing program and this is the resulting image.

Whether what I did was good or not is not the point, the point is that by using local adjustments, the healing brush, graduated filters and overall image adjustments I was able to create the image I wanted without leaving Lightroom. There are definitely areas within the software that could stand improvement but I don’t think Adobe has much appetite for that as they won’t want to create a situation where people feel Lightroom is all they need and have them forgo buying the much more expensive Photoshop.
Here is the before and after, hopefully most of my edits will be unnoticed except for the most obvious one of course.

no comments | tags: Digital, editing | posted in Photography, Processing
Mar
27
2012
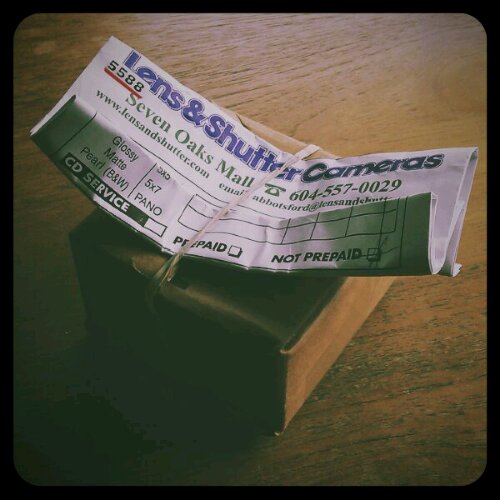
You never really know what’s inside. Just to re-enforce this notion Lens and Shutter has returned my processed film to me in this nice little hand made gift box. I can’t wait to open it.
2 comments | posted in Photography, Processing
Mar
24
2012
 Who wants to be in front of a Computer monitor on a nice spring day? Not I said I, so I’m posting this from the field
1 comment | tags: film, Photography, polaroid | posted in Photography, Processing
Mar
11
2012
I’m going to share with you a method I use to create a reasonably effective film grain look with digital files. Yes there is software that can do this and some of them do a pretty good job but not always and why not use what you have. Lightroom for instance provides the ability to add grain to an image but it does this across the entire image without regard to exposure which is not the way that film looks I’m sorry to say Adobe.
To begin with here is an image I shot at ISO 3200 with my Pentax K7 1/8000 sec and f2.8, even though the image has been down sampled you can still see the digital noise that will become our “film grain”.

I then take this file and use the in camera processing to make these adjustments.

Custom Image Monochrome/Filter Effect Red/No Toning/
High Low Key Adjustment (here you can effect the image’s overall brightness while maintaining the highlights and shadows)
Contrast +2 (the film I’m trying to mimic is more contrasty than the digital capture)
Highlight Contrast -3/Shadow Contrast -4 (Here we want to reduce some of that contrast we just added but only in the shadows and highlights)
Set sharpness to zero as we already have a grainy image and we don’t want to over emphasize this and create something unnatural.
We also want to ensure that High ISO noise reduction “NR” is turned all the way off just prior to processing the image.
And the resulting image made to mimic Kodak PX125 otherwise known as Plus-X

And a 100% crop (There will be some compression due to the reduction in file size for the internet)

This is just one example of what can be done but it all started with taking a RAW image shot at high ISO.
And a few more examples


and a detail from the above image shot at 1600 ISO and processed in a similar way.
One final note, you may have noticed that I mentioned I shot that first image at 1/8000 of a second at f2.8 at an ISO settingof 3200. As sensors improve there is less and less noise at higher ISOs so this technique may not work as well into the future. If for instance it took an ISO of 6400 to achieve this result I would already have to stop down the lens to F4 as my shutter is limited to 1/8000 of a second as are most high end DSLR’s. In this case I’ve created a situation where I’ve overridden the noise reduction technology but that too may not always possible. Have fun and experiment.
I used this technique back in December of 2009 to create this set of images Bellingham
2 comments | tags: Digital, film, grain, noise | posted in Photography, Processing
Feb
26
2012

Sometimes things don’t go exactly right with Polaroids and the chemicals that develop the image either dry up or aren’t spread correctly and the result can be some interesting stuff as seen in this detail. Benoit Bandelbrot would be pleased I think.

2 comments | tags: film, polaroid | posted in Cameras, Photography, Processing
Feb
24
2012
As I’ve posted before I like the Leica Mini finding it does a great job as a point and shoot. I unfortunately used some pretty poor film in it this last time and didn’t really end up with too many keepers. These four shots are my favorites and stand out from the rest mostly because they turned out. Note to self outdated Kodak 400 is to be avoided.
3 comments | tags: film, Leica, Photography | posted in Cameras, Photography, Processing
Feb
22
2012

While scanning some old negatives I came across a fragment of a contact print I would have done as a teenager. When I was in my late teens I converted my parents camper into a dark room. It took quite a bit of effort to get it dark enough that I could do colour prints from slides. Without running water I used a large 5 gallon jug with a spout as my water source. I also repourposed a heater from an aquarium to keep a constant temperature for my liquids and measured the temperature with a thermometer for wine making. Looking back it was a lot of effort but also a wonderful experience. I printed both black and white and later the more demanding colour Type R process. Type R was a way of printing directly from a positive slide to a positive print without the need for an inter-negative. I loved the black borders this gave my images. These papers are no longer made so this process is no longer possible, but printing from a scanned slide now produces equally as good results with a lot less effort.

You can see on the right side of this 8×10″ Type R print the two holes from the clip I used to hang it to dry.
no comments | tags: film, printing | posted in Photography, Processing
Feb
20
2012
Here are some more images that I processed in camera with my Pentax K-7. Yes I am well aware that you can do all of this on a computer but no one says that when you use your smart phone to do a similar thing.
no comments | tags: filters, K-7, Pentax, Photography | posted in Photography, Processing


