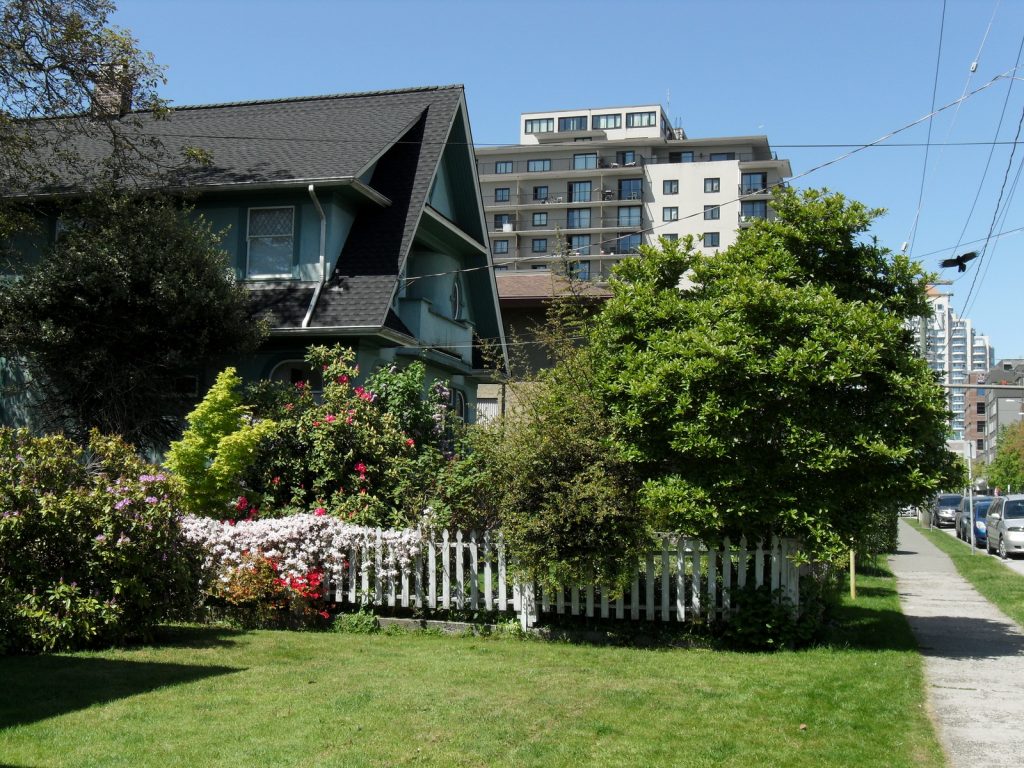
When I was in Lethbridge briefly during the winter of 2018 I managed to shoot quite a few rolls of different film despite it being bitterly cold. Like the sort of cold where I know people were looking at my from their warm vehicles thinking or saying what is that idiot doing out there in -35degrees. I kept my cameras in pockets or close to my body and it was fine thanks for your concern. One thing I didn’t do though is mark what camera I used with each roll leaving it as a bit of a guessing game. For this one I know it was a point and shoot and it looks like it had a limited zoom range so that makes the most likely candidate my Canon Z90w. I do however know that the film was Agfa Vista 200 and once again it proves to be a great film with accurate colours. The camera and the film together performed well in the challenging conditions of bright snow.
Regrettably Agfa Vista 200 is no longer available from any of the major film sellers (I’ve checked) so sadly that’s one less colour negative film in the world.
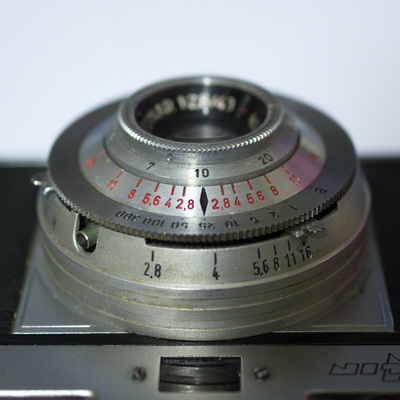
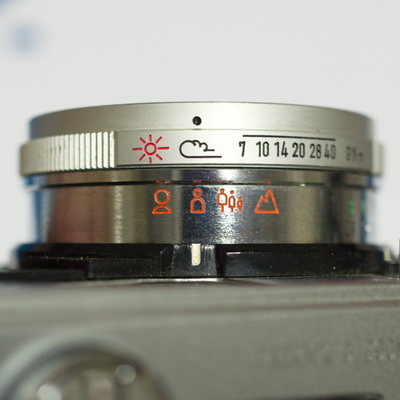
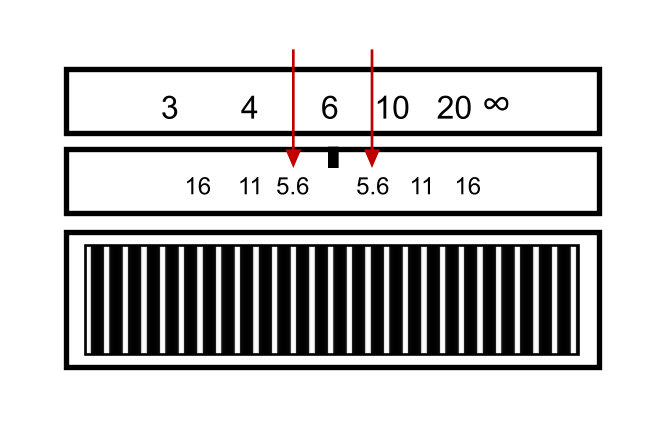
If you shoot with older simple film cameras your bound to come across ones that require zone focusing. A simple explanation of zone focusing is that you preset the focus of a lens prior to taking a picture using a distance scale. The scale can be as complex as distance values cross referenced to aperturesor as simple as a few icons on the lens barrel.One of the key things about zone focus cameras though is that they don’t provide a focus aid like a rangefinder or SLR. You can however choose to zone focus with those types of cameras if it suits your needs (We can cover that in a bit).
Zone focus cameras are simpler than other cameras and tend to be cheaper because of it but there are certain instances where they can be the right tool. If you know that some action you want to capture is going to take place at a certain distance in front of you, presetting the focus is a great way to ensure your not fiddling around focusing and end up missing it. Many street photographers have used this method no matter which camera they use. The drawback of zone focusing is the lack of precision of what is in sharp focus. That’s where the ‘zone’ in zone focusing comes in. When you focus with a camera there is a certain amount of distance in front and behind that plane that can be considered to be in focus. We refer to that as the depth of field. The depth of field increases as you stop down the aperture of the lens making that zone of acceptable focus larger.
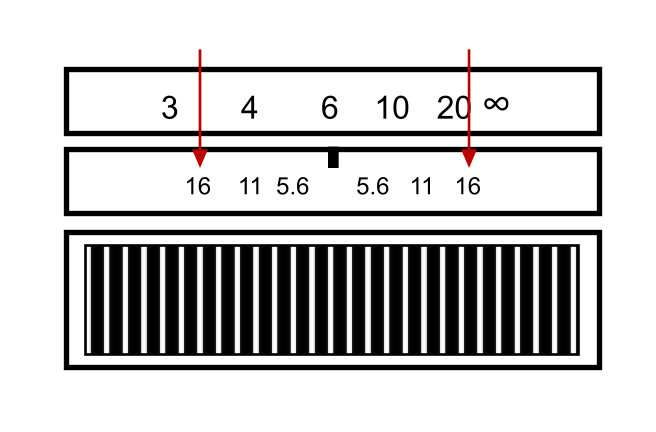
Focus at 6ft aperture at f16
In the above example the lens is focused at 6ft and the aperture is set to f16 giving a range of acceptable focus of around 3.5ft to 22ft
Focus at 6ft aperture at f5.6
Now if we set the aperture to f5.6 leaving the focus at 6 feet we only have a range of acceptable focus of around 5 to 8 feet which is a lot less and harder to ensure good results with.
This is the principle behind zone focusing. You set the focus to a distance and count on the depth of field to provide a sufficient range for the subject.
So what you are unlikely to be able to achieve, without effort and luck, using zone focusing is shallow depth of field where the subject stands out from a smooth out of focus background. What you gain is its not necessary to focus at the moment of exposure as you have already done that.
Another issue with zone focusing is that as the subject is closer and closer to the camera depth of field decreases making accuracy harder. I’ve created this little animation to show the change in depth of field of a 50mm lens as the aperture is decreased. I’ve done this for two focus distances 2m and 3m.
Effect of aperture and focus distance on depth of field
You can see that the depth of field goes from about 10cm to 3m when the focus is at 2m and from 30cm to 15m when its set to 3m. The implication of this is that its best to use zone focusing for subjects that are a little further from the camera. Focal length plays a role as well that’s why I’ve used a 50mm lens in this example for simplicity.
RICOH IMAGING COMPANY, LTD. is pleased to announce that, on November 27, 2019, it will celebrate the 100th anniversary of the foundation of Asahi Optical Joint Stock Co., the original manufacturer of PENTAX-brand products
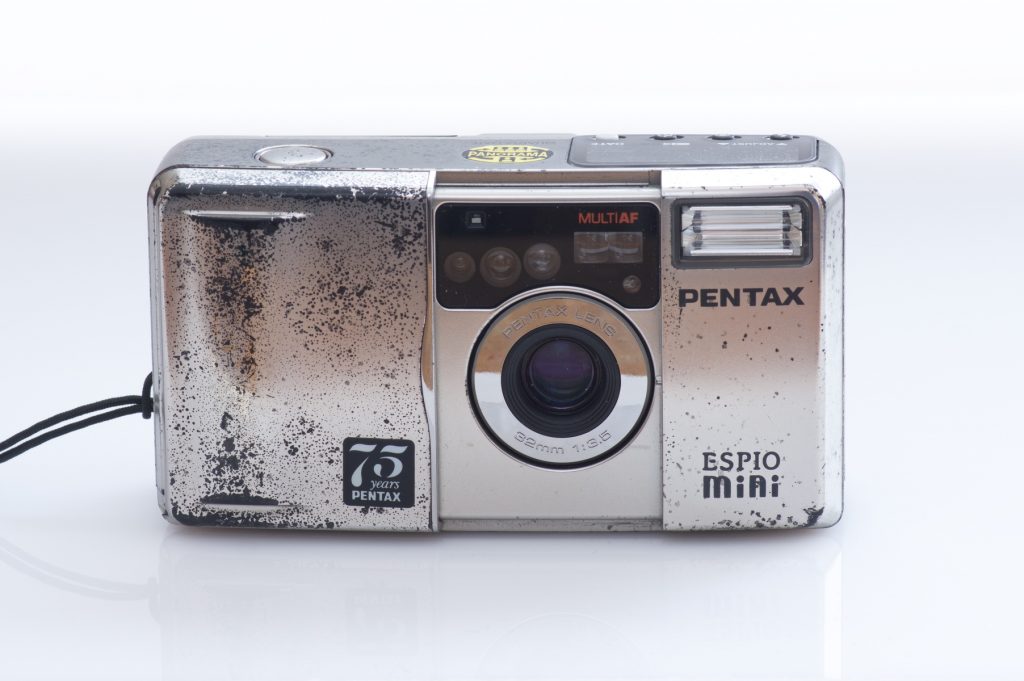
Seeing as Pentax is celebrating its 100th year I thought I would take a look back at one of its 75th anniversary offerings. The Pentax UC1.
I’ve used UC1’s on a number of occasions because few 35mm film cameras are smaller and I really like the 32mm focal length. The choice to make this camera chrome over plastic pretty much ensured that it would look worn even when it isn’t. I’m sure they were not expecting it to wear like that or that someone would be writing about it 25 years later. At the same time they were plating the plastic on the Espio Mini they released a titanium version of the Pentax LX which I’m pretty sure has stood up better. The UC1 (Espio Mini) is a fully automatic camera but focuses and exposes reliably so is easy to like. Happy Birthday Pentax thanks for some great cameras over the years.
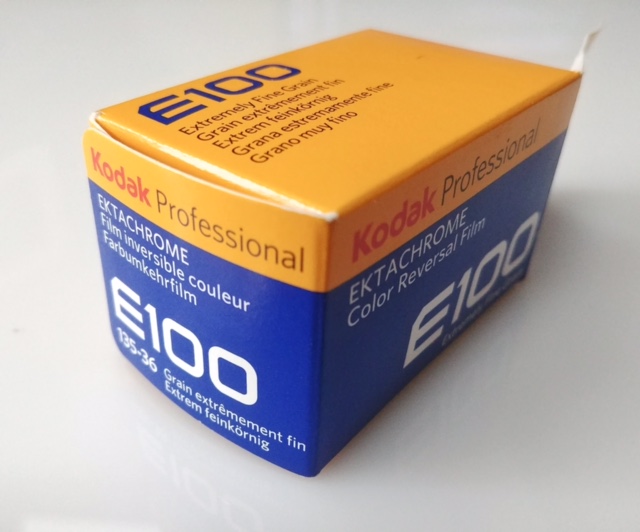
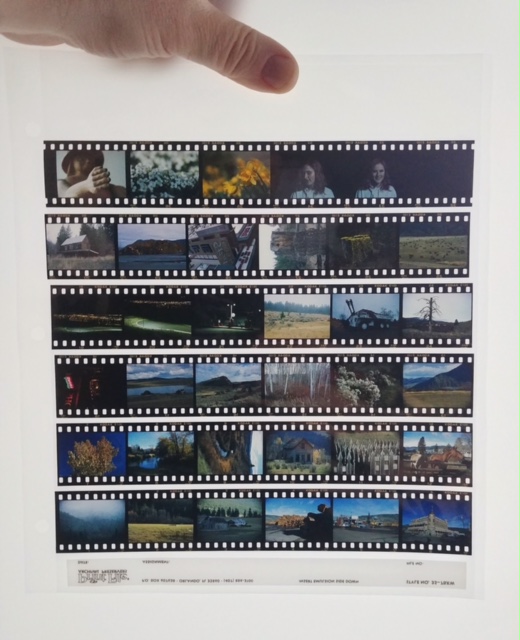
Ever since the end of Kodachrome I’ve been using colour negative film almost exclusively. Because of this I’ve become accustomed to looking at developed film that has an orange mask, in addition to being a negative. That’s why looking at this roll of Kodak E100 slide film was such a joy. It created a similar feeling for me as getting back a box of mounted Kodachrome once did. Holding the images up to sunlight and seeing the colour was a pleasure. Once scanned and viewed on the computer some of that charm is tempered. Its not the fault of the film but reduced to a digital form there is a degree of equalization between it and a digital camera capture. During scanning I was also reminded of another of the differences from colour negatives. Anything opaque on the film during scanning shows up as black instead of white. That too felt familiar as years ago I scanned thousands of family slides (Mostly Kodachrome)
After the scanning and dust removal it was time to evaluate the images. The colours were accurate if not perhaps a little flat. I found I needed to add a touch of saturation and contrast but little else to bring them in line with direct viewing. The bulk of slides that I had ever shot being on Kodachrome 64 I was surprised by the details in the shadows. This emulsion has a much broader dynamic range. You can see into darker areas without blowing out the highlights. Back with Kodachrome it was almost a binary decision, you could have highlights or shadows but not both.
Yes I’ve been invoking Kodachrome a lot, largely because that is what I was familiar with. In reality though the similarities are primarily around being positive film. When compared to a digital capture Ektachrome 100 could be considered much like a JPEG, with most of its character baked in, with the ability to only make some small adjustments. So yes using this film is less forgiving than shooting a modern digital camera in RAW but that’s not a bad thing.
Seeing as you cant put film in a digital camera even if you wanted to its a great excuse to use a great film in a great old camera. What I’m suggesting by that is this film, while somewhat forgiving, is best used in a camera with an accurate exposure system. On the downside is the cost, retailing at around $20 a roll, if you add on developing it becomes very close to $1 per shot which is in the same territory as instant film. Personally I consider it worth it, maybe not for everyday snaps but when it matters I will pull a roll out of the fridge.
I shot this roll in a Pentax MZ6 SLR with a variety of lenses including one originally intended for smaller APSc digital sensors. Its the DA*60-250. I haven’t done anything to mine and you can see that there is mechanical vignetting in the corners. Some people do remove the baffling at the rear of the lens which eliminates the vignette and makes the lens effectively compatible with 35mm film. I don’t expect to be using it that much for film or a larger sensor so will leave it as is.
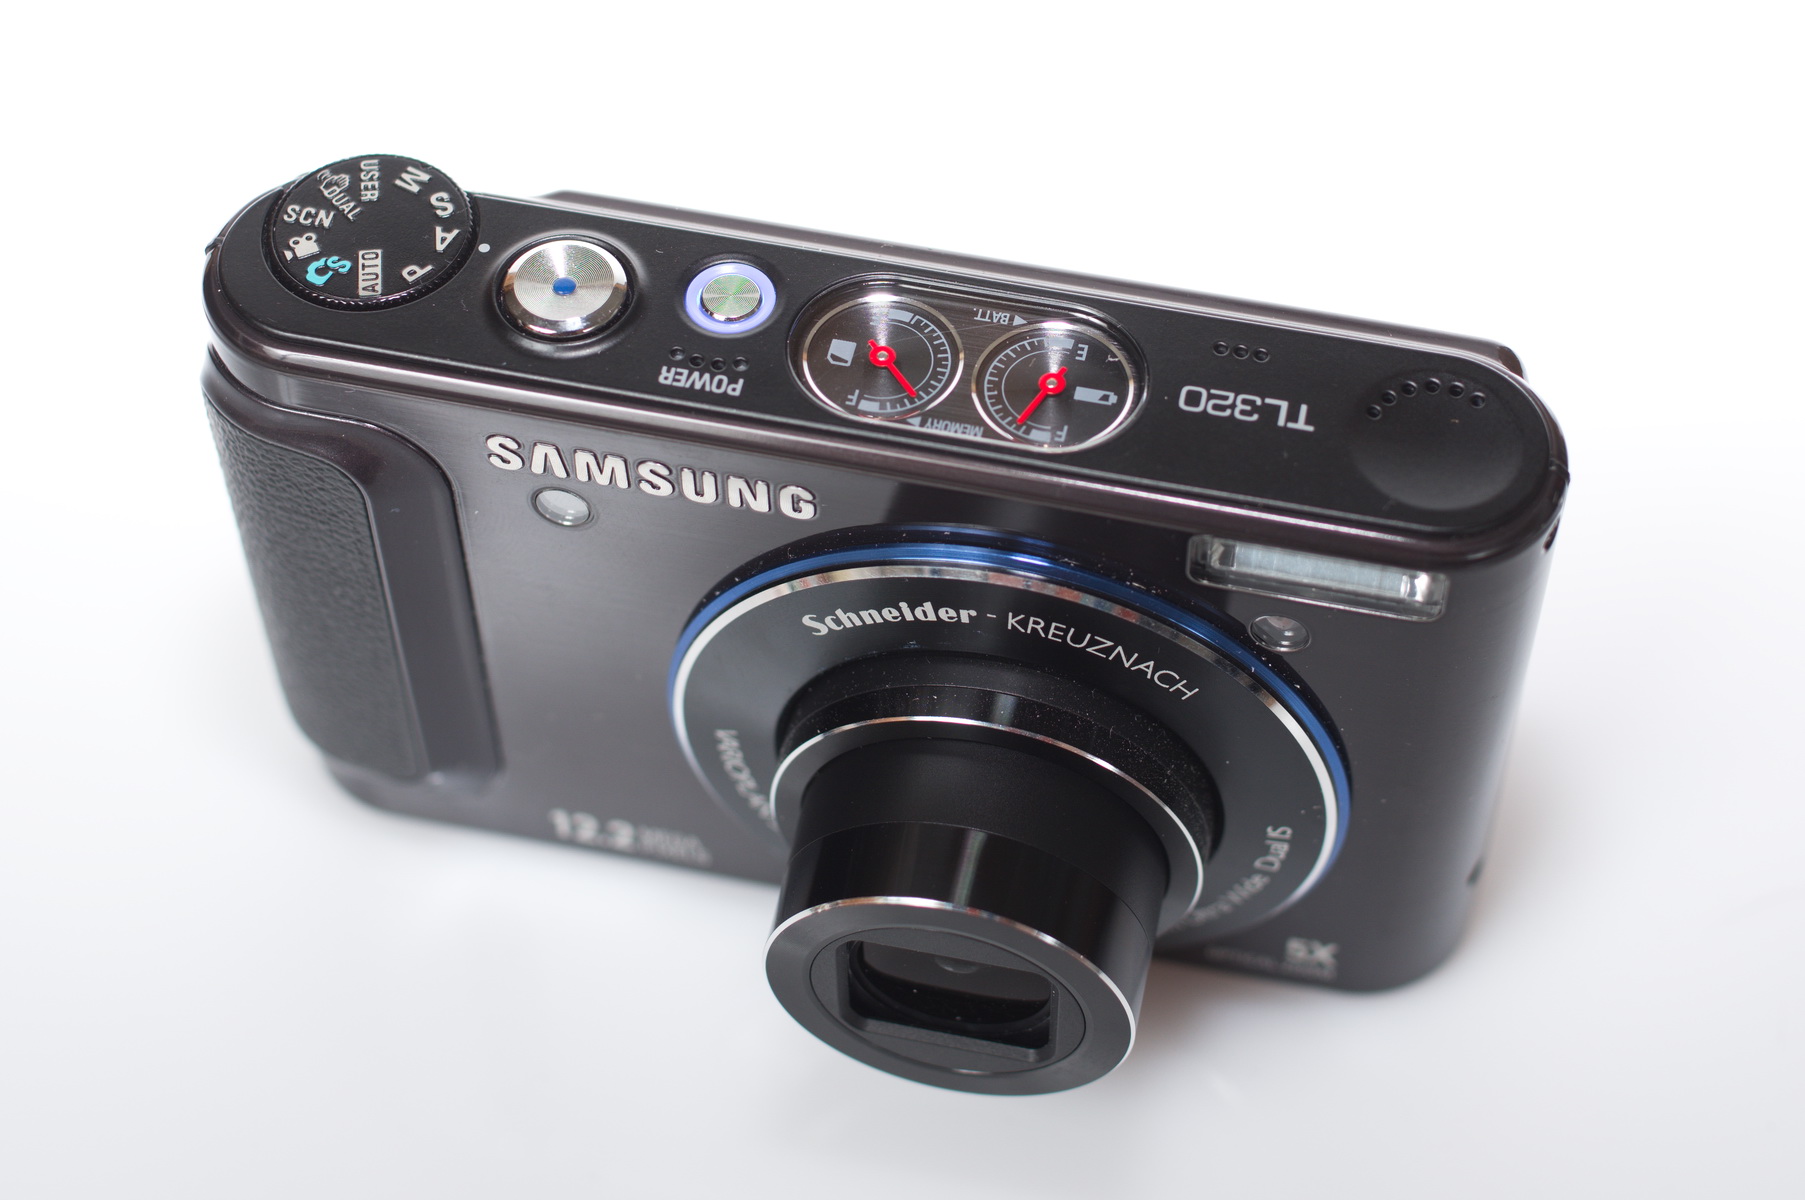
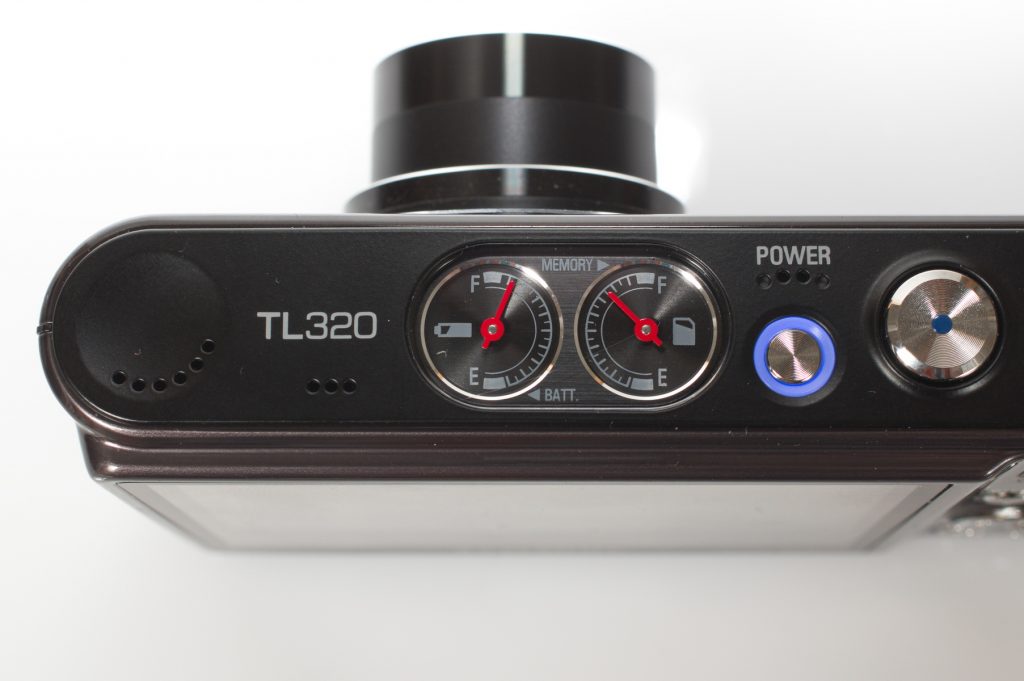
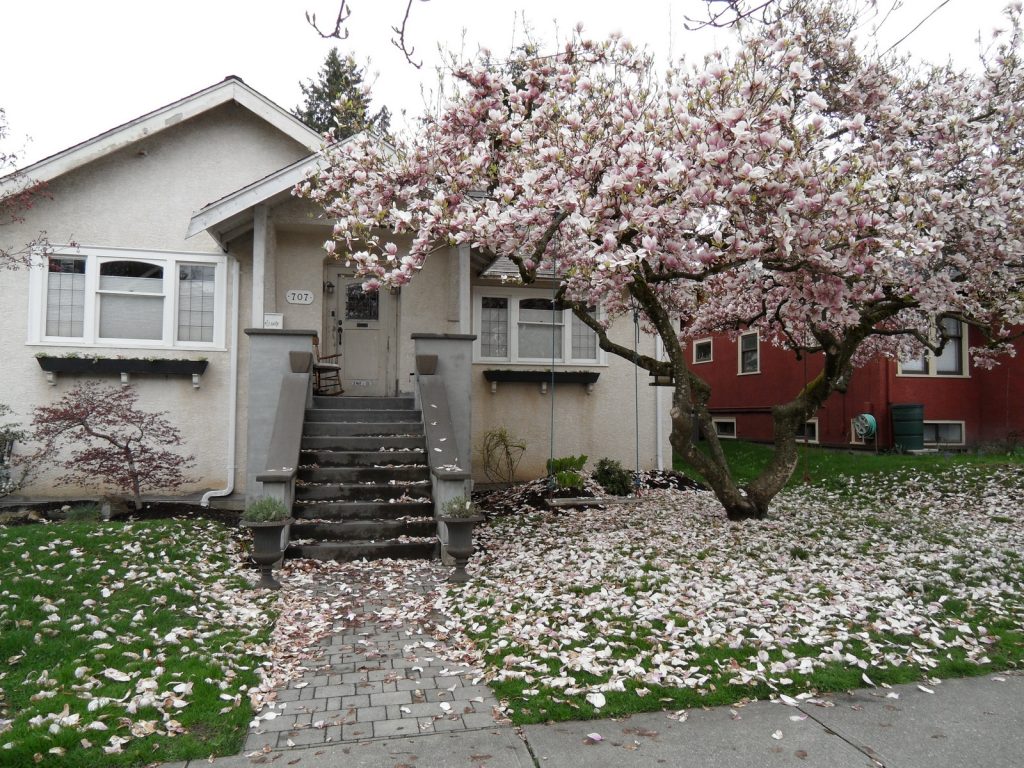
While I primarily concentrate on blogging and using film cameras, from time to time I will come across a digital camera of interest. Some years back Samsung made a couple of models of camera that had an interesting analogue touch. They had gauges with needles to indicate their battery and memory card capacity. I know I know its a gimmick and completely unnecessary but at the same time it was kind of cool and an even more retrograde touch than film. So when I came across the online listing for a Samsung TL320 I bought it.The camera itself is in great condition and it has those gauges but here is where things take a turn.
When I tried to charge the battery after a few moments of apparent operation it would quit and indicate an error. No amount of fiddling or retries had any impact. As a last resort I charged the battery outside the camera with a current limiting power supply like you would find in an electronics lab. This is not a long term solution but allowed me to test the camera and ensure it was otherwise okay. Ultimately I did find a charger for a Canon point and shoot that was the correct voltage and had its pins in the right place. With a little effort this can now be used to charge the Samsung battery. After this let down it made me think more about what cameras I wanted to have and what cameras were worth keeping. The primary problem with older digital cameras are their proprietary batteries and keeping them charged or working. It’s okay for a couple cameras but for any significant number the work and expense of dealing with batteries begins to out way the benefits. And what are the benefits? Unlike film cameras which have the film itself in common old digital cameras just get left further behind every year. So the odd one may have been a landmark in design or operation but the bulk of them are better suited for recycling. Time could prove me wrong but I am betting that the 3rd of 7 iterations of some plasticky 3Mpixel camera just is not going to be of any interest in the future. As a parting note here are some images shot with the TL320 to show that despite its gimmicky nature the camera does take pictures.
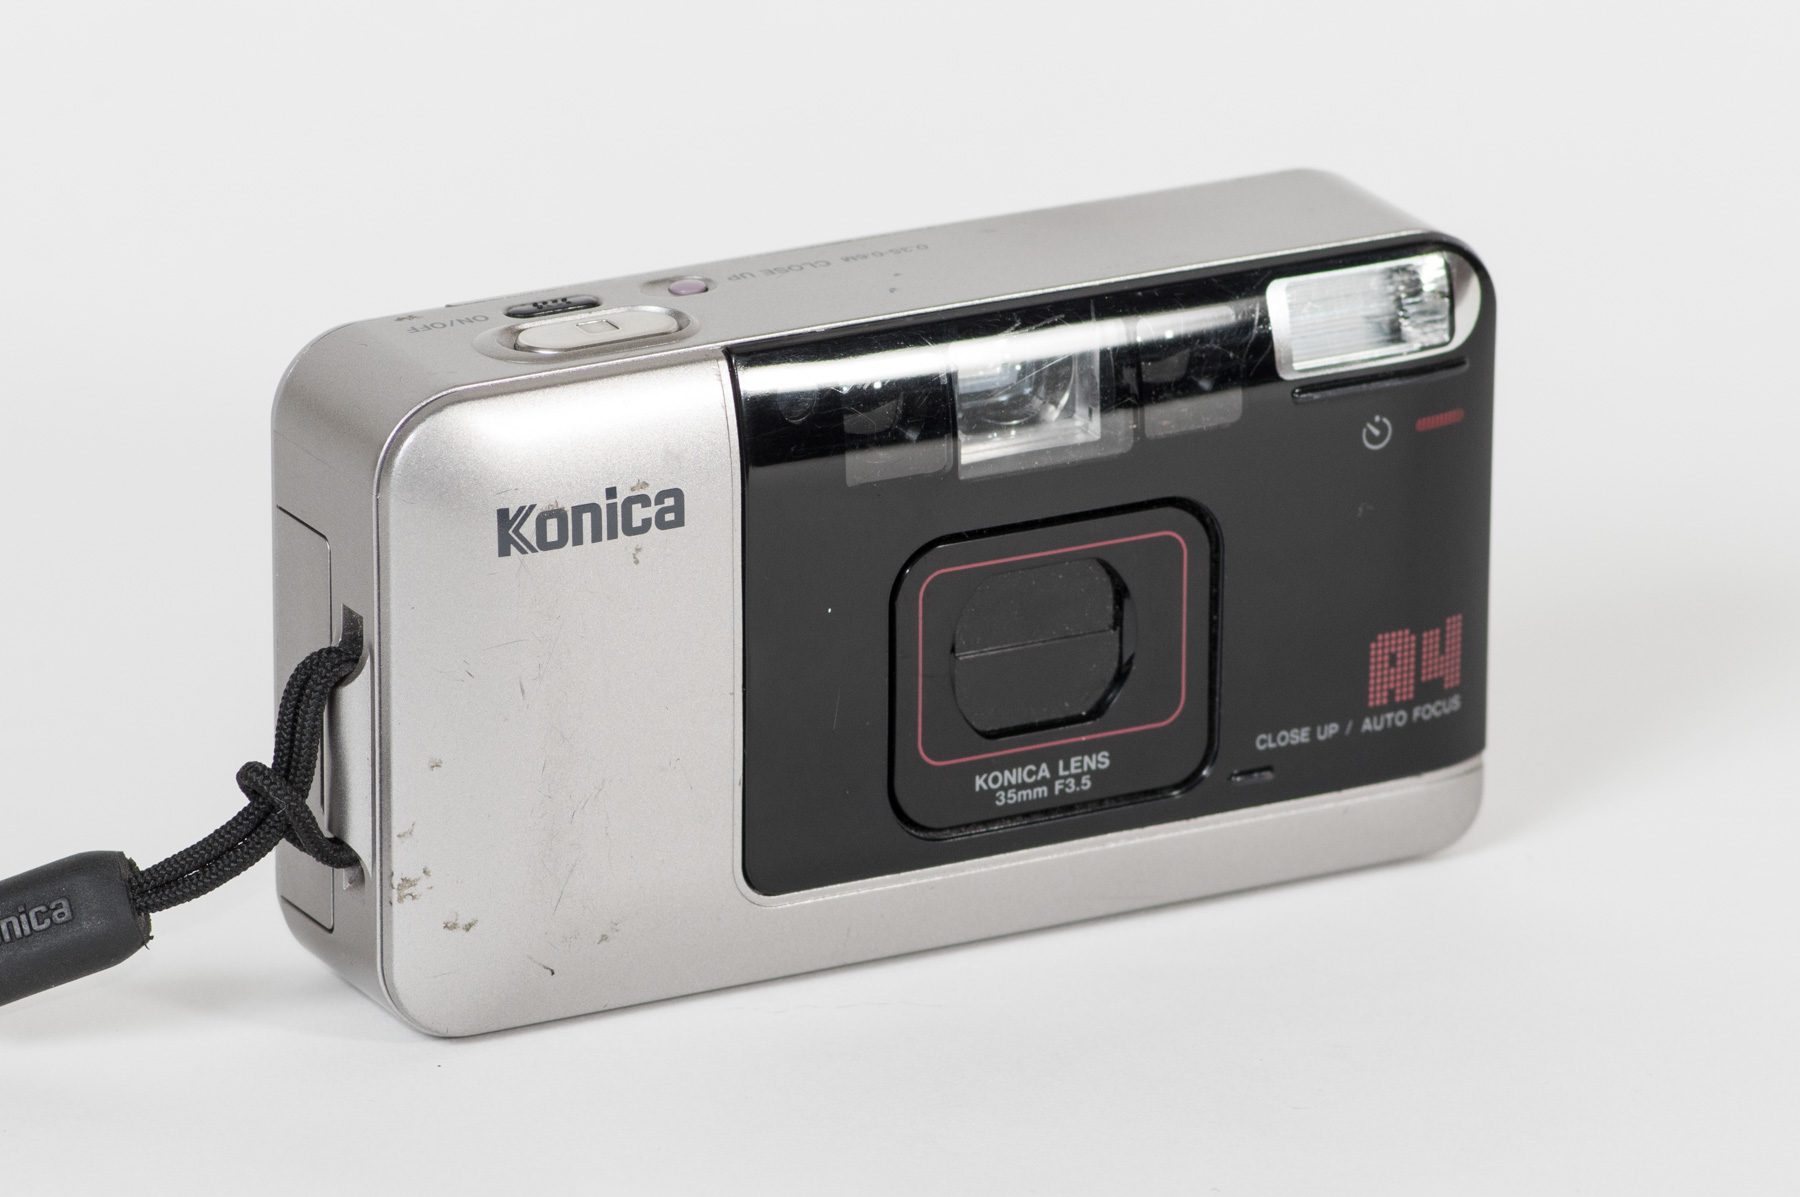
Using the Konica A4 became a little bit of a film rescue mission. Not too far into the roll the camera stopped advancing and shooting and refused to rewind. So it became necessary to open it up in my film changing bag and pull the film out and manually wind it back into the canister. The film itself is some seriously out of date Fuji 200.
The Konica A4 came out in 1989 but was quickly replaced with the much better known and specified Konica Big Mini a year later. The A4’s position in camera history is therefore more that it was the progenitor of the Big Mini
The A4 does have a nice 35mm f3.5 lens which I think I will harvest for future experimentation.
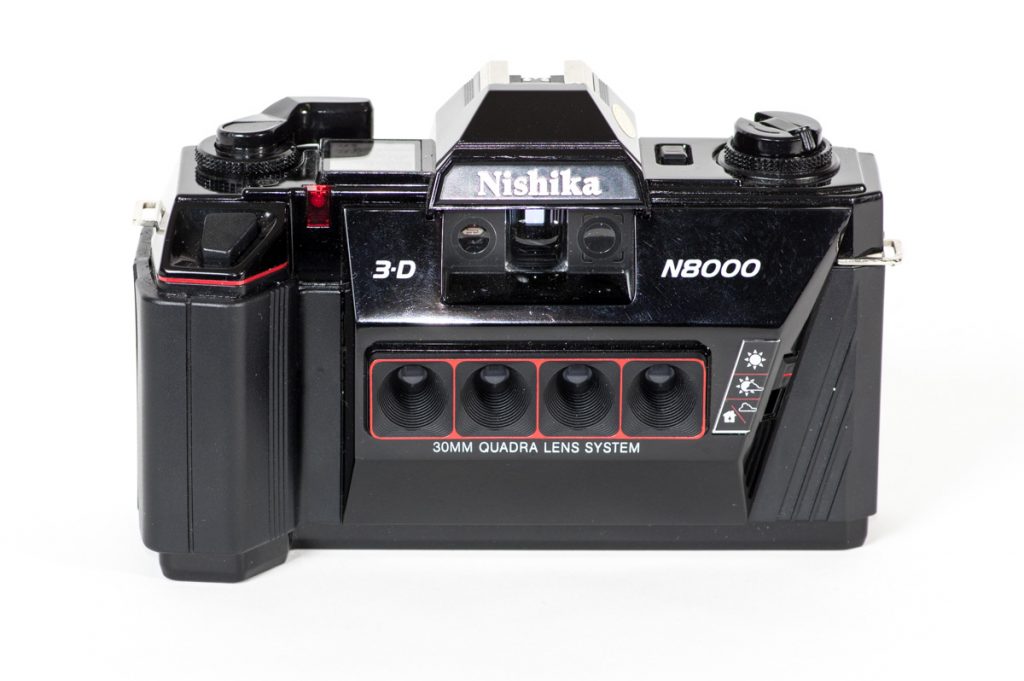
What’s large, heavy and unnecessary? A 10lb lead ball and the Nishika N8000. Now the unnecessary part may be a little unfair you could use the lead ball to sink something to the bottom of the ocean. There are certain aspects of the N8000 that serve no purpose. Like the fake top plate ‘LCD” and the battery indicator. What do the batteries even do anyway? And of course there is the superfluous metal plate inside the camera to add a little gravitas. The shutter in the N8000 operates at a fixed 1/60sec however there are three aperture settings. Sunny/partial cloud/cloud. The lenses are 4 separate 30mm ‘doublets” that’s two plastic elements so don’t expect anything even up to the standards of a disposable camera. The key thing though is that the shutter fires for all 4 lens at the same time. And because they are arranged in a row separated horizontally you get slightly varied views of the same scene. That’s where the fun is because you can take the four images and build them into a little GIF to create a ‘wigglegram’. to give a 3d effect.
I’m currently testing a Nimslo 3D which has the potential to be a much better camera that resolves all the issues I have with the N8000. It’s smaller lighter and has better lenses and exposure system.
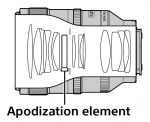
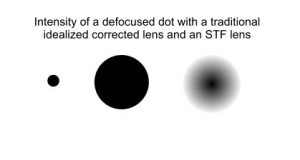
I guess a little explanation is in order. Smooth Transition Focus (STF) is where within the lens design there is an apodization element placed near the aperture of the lens. It acts like a circular graduated neutral density filter with the purpose of reducing the light from the outer edges. The gradual diffusion of the perimeter light results in the out of focus regions also being softer and more defuse while leaving the area of focus that passes through the center unimpacted and sharp.
As described by Sony (Minolta)
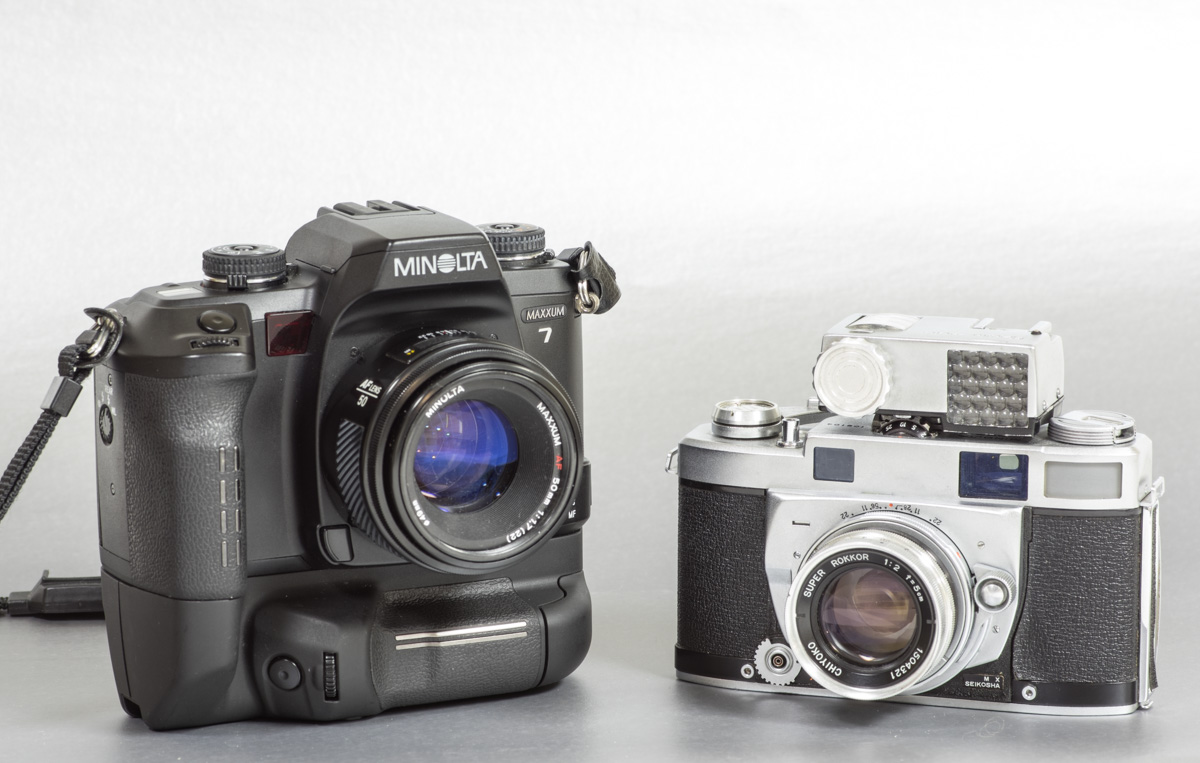
That’s how it is done optically but there is a camera that can simulate the effect. The Minolta Maxxum 7 has a custom mode called STF where it takes multiple images at different apertures all on the same piece of film. The out of focus areas all have different characteristics blended together while the in focus area is very much the same across all the apertures.
You can see the result if you look at the background of these images. The busier of the two is from a single exposure at f4.5 and the second is using STF blending 7 exposures at T6.7. It works as advertised stacking the multiple images for a smoother transition and a better blurring of the background.
I did a little test using the same idea to create STF images in camera with my Pentax K-3 to see how well it works.
One immediate drawback of this method is of course nothing can move between exposures. The GIF below contains on exposure at f8.0 and another one with 7 exposure from f3.5 to f8.0 as an initial test before any effort to do it in the wild
And here is what it looks like if you take things to extremes. With 15 exposures from f1.2 to 5.6 if you look closely at the highlights you can see the different exposures not quite blended well enough.
I will get back to doing it in more detail with the K-3 at a later date. So how to do this with the Maxxum 7? First is requires delving into the Custom menu. Under the metal flap below the LCD you will find a row of buttons.
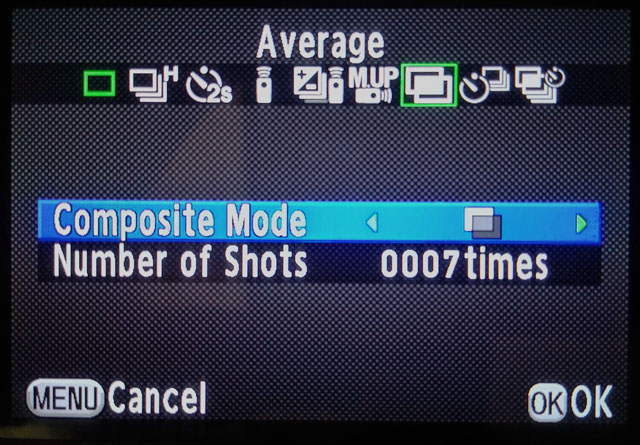
Pressing the CUSTOM button brings up that menu then using the left and right of the focus area selection pad you can navigate to custom function 25. There are two settings at this point and pressing up and down on the focus pad will toggle between them. What you want to do is select number two “STF mode”.
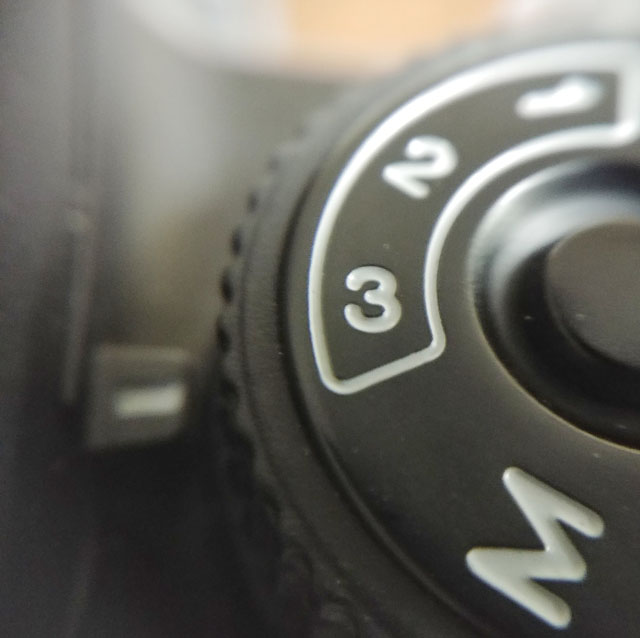
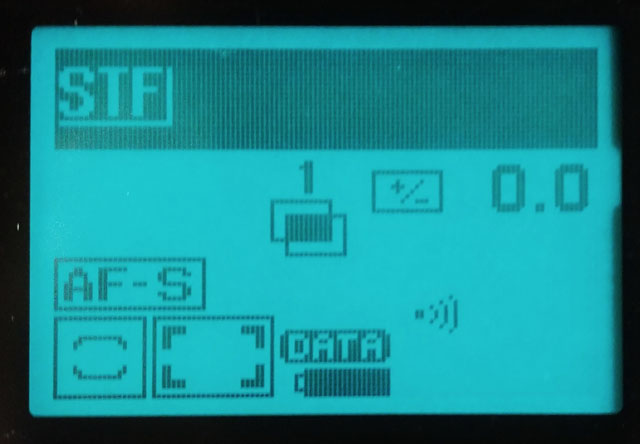
Once this is done selecting number 3 on the mode dial will put the camera into STF mode.
Pressing the shutter now will result in 7 images being rapidly taken as the camera changes the aperture between them. So you had better have the camera mounted on a solid tripod.
I had the opportunity to borrow a Minolta Maxxum 7 recently. What a fantastic camera. It’s now nearly a 20 years old model but many of the controls and features remain familiar today on high end interchangeable lens cameras. Things such as front and back control dials for aperture and shutter settings, an exposure compensation dial and even a flash compensation dial. The stand out feature though has to be the large LCD on the back that provides a myriad of information. It has enough area to display everything you need to know while your shooting. My favourite use of the LCD though has to be the ability to view what the 14 segment honeycomb metering system is measuring. This is performed by pressing the AE-lock button followed by the DISP button. Each segment is then displayed as one of three shades with addition information inside. If the segment is white it references positive EV above +1 and if its black it denotes -1 EV or lower in the middle is grey for values between those two. If the value in a segment exceeds +3 then it will just have a + sign and if it is below -3 it has a – sign. It really looks better and is more intuitive than I can describe so maybe a picture is better.
Now 14 segments may not constitute a full image but it is enough information to evaluate your exposure.
Another great use for that big LCD is for looking at the recorded shot data. Not just what you are currently up to but it retains the history of 11 parameters for up to 7 rolls of film. After I shot my two rolls of film I was able to go back and see what setting I had used for each shot. We take this for granted with digital cameras but its a fantastic feature for use with film. I rarely have the patience to record exposure details manually.
There are many more controls I won’t be going over, there is always a manual for that but a few interesting things are located when you flip down the cover below the LCD and press the custom button. This brings you into the menu for those features that are needed less frequently such as whether to leave the film leader out after the roll rewinds among other things. Its Custom function 25 though that is interesting and unique to this camera, it allows you to set the user preset 3 to one of two purposes. The first being a user present obviously but it can also be changed to STF mode. Despite this menu being in plain language I realize that STF may not be overly descriptive so I will give you a moment to guess what it stand for….times up it stands for Smooth Transition Focus. Okay great but what is that Wallace? you may be asking to which I will say that is worthy of its own blog post at a later date.
I have been using the camera with the battery grip and ergonomically speaking it feels great. Every control has a unique feel and placement such that you can operate the camera completely by feel in the dark with a little practice. Did I mention that the LCD on the back has a nice indigo backlight? I did now. In contrast though there is a tiny little LCD on the top plate that provides shutter and aperture information. This might be okay when working on a tripod in good light but its a little limited. I felt that I needed to say at least one negative thing about the camera, done.
The camera has a fantastic multiple exposure implementation. Unlike many other cameras all you need to do with the Maxxum 7 is set the drive mode to the red multiple exposure setting and that’s it. Each time you press the shutter it takes another exposure without advancing the film. Additionally it keeps a tally and displays how many exposures you’ve done up to 9. You can keep exposing after those 9 but the camera no longer will keep count. You can even turn the camera off and on during a multiple exposure sequence. Of course you don’t want to forget it in that mode or you will end up with some unintended results.
The shutter reaches a fast 1/8000 of a second and it can fire off up to 4 frames per second. I’ve covered some of the highlights of the Maxxum 7 but to sum it up its a feature rich camera with excellent controls that feels fantastic in the hand. I do prefer it with the VC-7 grip which has the added benefit of allow the use of AA batteries instead of expensive lithium ones in the main body. Having also borrowed a Nikon F5 which is a tank of a camera I can say that the Maxxum 7 has more features and is better laid out and easier to use. The F5 though feels like you can use it to hammer nails. I will finish off with some images and mention again that I will be doing a separate post about the Smooth Transition Focus feature. (If I have already posted it when you read this you will find the link here ————–)
The MT11 should have been a good camera but this one failed to rewind the film at the end of the roll. This forced me to extract the film in my film loading bag. I did recover some shots from the expired film but because of this rewind faux pas it was also the last roll I put through my already mostly depleted chemistry. Let that be a lessen to my other cameras that don’t behave. Not only will I disassemble you for your little innards I will treat your film with the same level of care.
Its a shame because the MT-11 was the best of the three levels of cameras Konica made in this line. The MT-7 had a 36mm F4 lens, the MT-9 had a 35mm F3.5 and the MT-11 sported a 35mm F2.8 4 element lens. You can’t really evaluate its performance from the image gallery but it did seem to focus well and if I ever come across another one I will give the model another go after I show it this picture.