May
11
2012
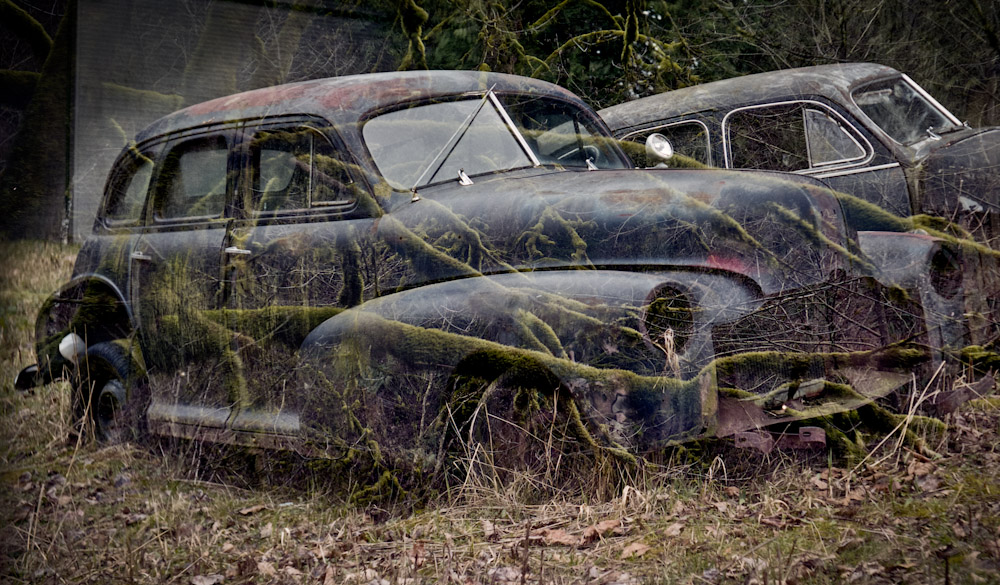
Just as I seem to be able to cause light leaks through mind power, I’m also able to cause double exposures. This picture was taken with my Wester Autorol and even though it has a frame advance that “should” prevent double exposure it was no match for my powers. OK what likely happened is that I forgot whether I had advanced the film or not and cocked the shutter again and the mechanism that is supposed to prevent the double exposure is simply over riden by knocking the small lever at the back which could happen in my camera bag or by me thinking I had already advanced the film. Two frames wasted, or not, as I sort of like the effect that happened on the body of the car. Other images didn’t pan out quite as I had hoped either one has some camera shake despite my use of a support, I blame that one on the security guard shouting at me (that’s loudly yelling not shooting). Several others overlap at the edges but there are also images that did turn out thankfully and I am quite pleased with them.
I should also mention that when I use cameras like this I don’t mind the errors and accidents as I’m having fun, which is when photography is the best, oh and I most often have a digital camera with me too.
While I’m on the subject of double exposures I need to try out the Canon Sure Shot Tele from 1986 which actually has a provision for purposefully doing them. It also has a built in soft focus filter, oh man I can just see the acid wash jeans and big hair already.
2 comments | tags: exposure, film | posted in Cameras, Photography
May
9
2012

P.S. where is the spell check on this thing?
no comments | tags: printing | posted in Art observations
May
7
2012

I’ve posted previously about creating infrared images with the Sony DSC-V3 but never shown the actual contrivance that I use to do it. In an ideal world I wouldn’t need all the step rings but I’ve tried to use only what I have available to me and as the infrared filter is the most expensive item everything else must revolve around that, literally.
Starting at the camera side is what would appear to be an extraneous item a 48mm extension ring however what this does is, through having less threads than the extension tube, over ride the cameras sensor for detecting the extension tube. This allows you a limited amount of zoom which would other wise be locked at its maximum. The next thing is the extension tube itself which places the rest of the filters out of the way of the cameras lens. Ignoring the step rings the next important item is the Rodenstock RG715 filter. Within its name is a clue to its function, the 715 refers to the wavelength of light that it allows through. The RG715 blocks light bellow 715nm and passes the near infrared above this. As visible light is defined as between 390 and 750nm you can see that most of the light we see with our eyes is blocked. After the IR filter I use neutral density filters to cut down the total amount of light coming in. When the camera is in “Night Shot” mode in daylight the sensor is overwhelmed and the image is completely washed out. This happens because the camera locks out all user adjustment in this mode forcing the shutter speed to 1/30sec and bellow.

And of course the camera itself needs to be set to Night Shot mode. What happens in this case is the camera flips it’s small internal infrared filter out of the way allowing those higher wavelengths of light to fall on the sensor. Normally this extra light would be unwanted and be detrimental to the image but this is the light I am after. The results are mixed, yes you get a near infrared image but the overall image quality is lower than the camera can produce in normal operation and without being able to control the exposure that too can be hit and miss. I’m not aware of any current cameras that have provisions for IR photography without actually modifying the camera but a modified DSLR would give better results for sure.

no comments | tags: camera, Digital, IR, Sony | posted in Cameras, Photography, Processing
May
5
2012
There is no doubt that digital photography has killed film for the majority of people, making it really a niche for those wanting to do something different from the pack or create a certain look. There are areas that digital technology needs to improve though. Many people right now seem to be focused on the ability to capture images without noise in low light and manufacturers are obliging us by placing a lot of their engineering towards that. For me personally I wish they would more directly address dynamic range instead of as a side effect of this noiseless pursuit. What I mean is that with the chemical process of film it behaves differently around highlights and shadows. Specifically film allows you to expose a scene with dark shadows and highlights without clipping the highlights into just pure white. This happens because of films non linear response to exposure.

The image here is a comparison of a film capture with Ektar 100 and my Pentax K-7. What you can’t see is the fact that I needed to under expose the digital capture to preserve the highlights and then adjust the image post capture to try and brighten it overall, none of this was necessary with the film. While I recognize that the sensor on my K-7 has a dynamic range of around 11 stops and newer models have improved on this they still behave in a linear way and clip highlights while the film trails off it’s response still recording detail far furthur into over exposure.
2 comments | tags: Digital, film, Photography | posted in Photography, Processing
Apr
30
2012
1 comment | posted in Cameras, Photography
Apr
28
2012
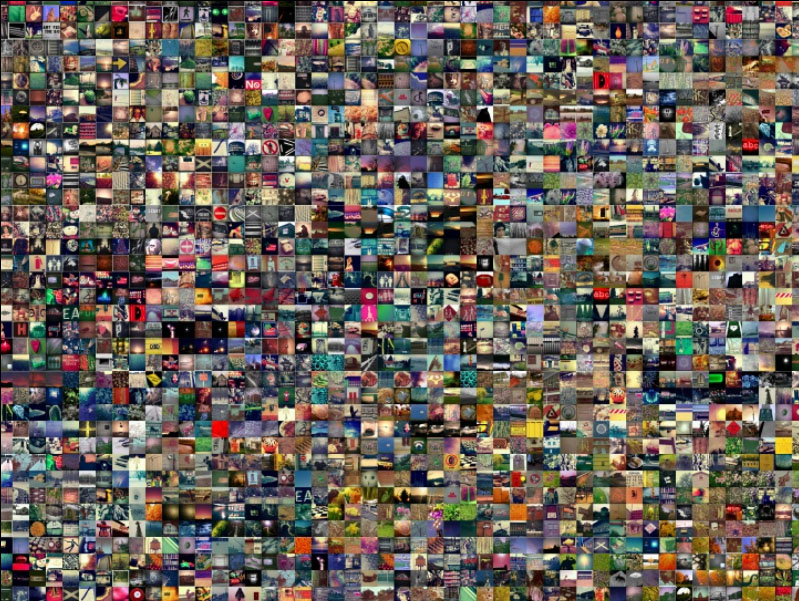
I’ve reached another milestone in my cell phone image postings. I have gone past 2000 images and have many more to go. One unfortunate side effect of my work-flow is that it generates duplicates. My solution to this was to export all the images to a thumb-drive and to then run a piece of software called Visipics. What this software does is find all the duplicates and provide the option of deleting the second copy. The reason for the thumb-drive relates to my not wanting to run the software on the original files until I fully understood the software. It did an amazing job as I ran it several times while adjusting settings, each time allowing the software to look deeper at the images for duplicates with minor variations. You do need to use some caution as if you use too lenient a setting it can pair images that are very similar but still unique. You can see the result of my cell phone image progress here. Cell zoom I still need to add a few more to create an even 2400 and to replace some with better images. The most difficult part will be locating any remaining duplicates as this is like a giant game of Memory, fortunately the cards are turned over.
4 comments | posted in Photography
Apr
24
2012
Here are some of the recent images taken with the Yashica Electro 35 GT and Kodak Ektar 100. For more information about the camera you can see these posts October 2010 and the more detailed April 2012 Yashica Electro 35GT
2 comments | tags: film, Photography, Yashica | posted in Cameras, Photography
Apr
22
2012
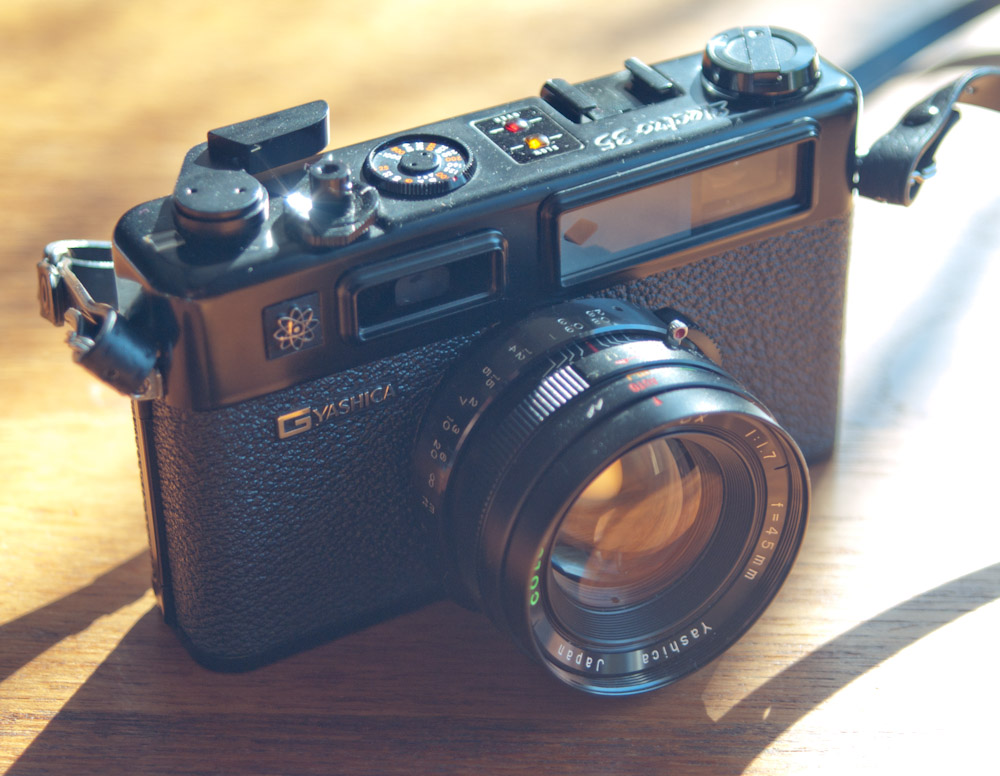
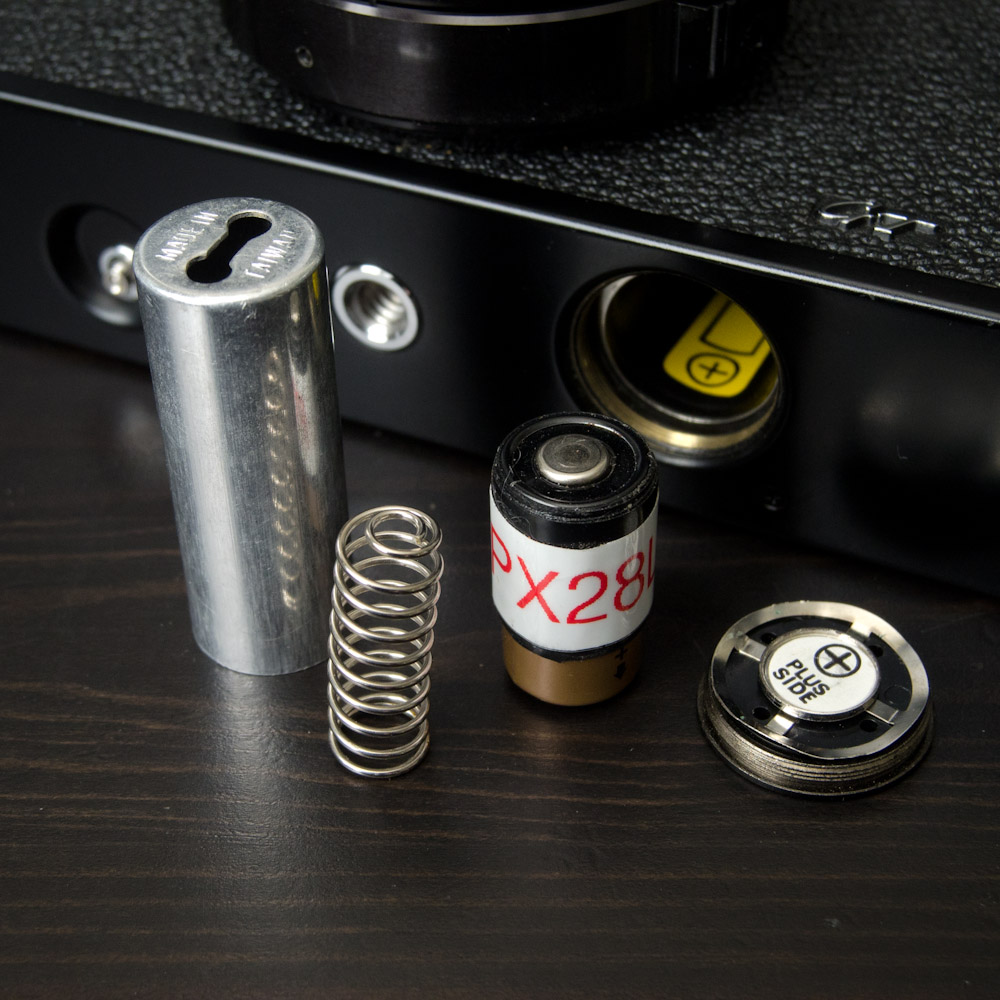
I’ve owned several Yashica Electro 35 models but I’ve pared them down leaving me with the Electro 35 GT and GX. The GT stands out in the Electro line with it’s all black body. It is a great looking camera as well as performing. The lens of the 35 GT is a 45mm f1.7 stated to be 6 elements in 4 groups. It’s strictly aperture priority with no shutter speed indication beyond the slow speed or over exposure warning arrows. The shutter speed is determined electronically during the exposure rather than being predetermined. In practice this means that during longer exposures the camera reacts to changing light conditions, extending or shortening the exposure time.
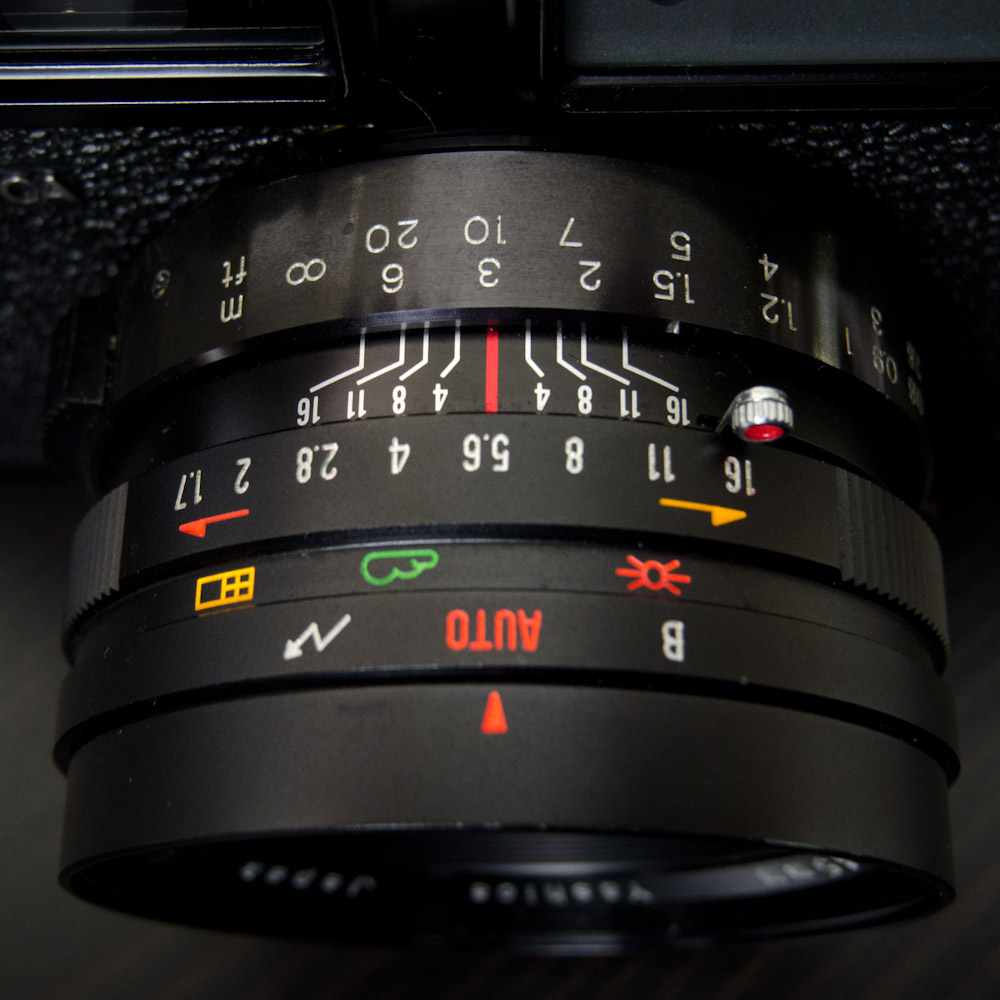
Originally when the camera was released in 1969 batteries containing mercury were prevalent with there characteristic of maintaining a constant voltage throughout there discharge life. Now mercury batteries are unavailable so an alternative is required. My solution was to use a 6V alkaline battery with a home made adapter of a similar size to the original TR164 battery. This difference in voltage is likely to cause some variability in the exposure but as I shoot colour negative film with a large latitude and the fact that I scan all my film rather than printing optically I don’t really see it.
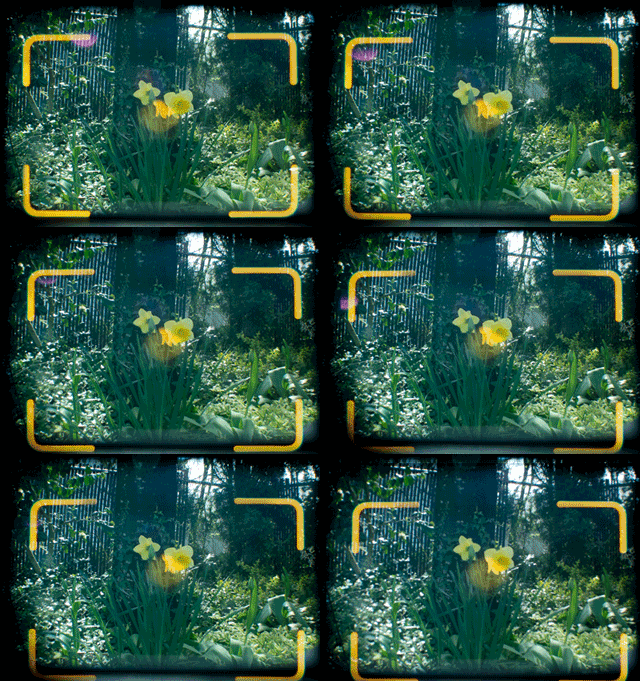
Being a rangefinder the camera has a small diamond shaped focus patch. A rangefinder works by linking the focus of the lens to the position of the patch relative to the main viewfinder, so as you change the focus of the lens the rangefinder patch moves horizontally. When the item in the main viewfinder and the patch are horizontally aligned the lens is focused to that distance. This works well with views that have vertical elements but can be difficult with small repeating patterns or horizontal lines. A field of flowers can be a difficult thing to focus within because of all the similar elements. Here is an animated view through my Yashica Electro 35 GT however because you are able to actually place your eye closer there is a lot more area around the frame lines that would be visible. You can also see the built in parallax correction as the frame-lines move down to compensate for closer focusing.
2 comments | tags: camera, film, Yashica | posted in Cameras, Photography
Apr
19
2012
I wanted to see just how far I could edit an image in Lightroom and whether I could achieve the effect I wanted without the need to go into a more advanced editing program and this is the resulting image.
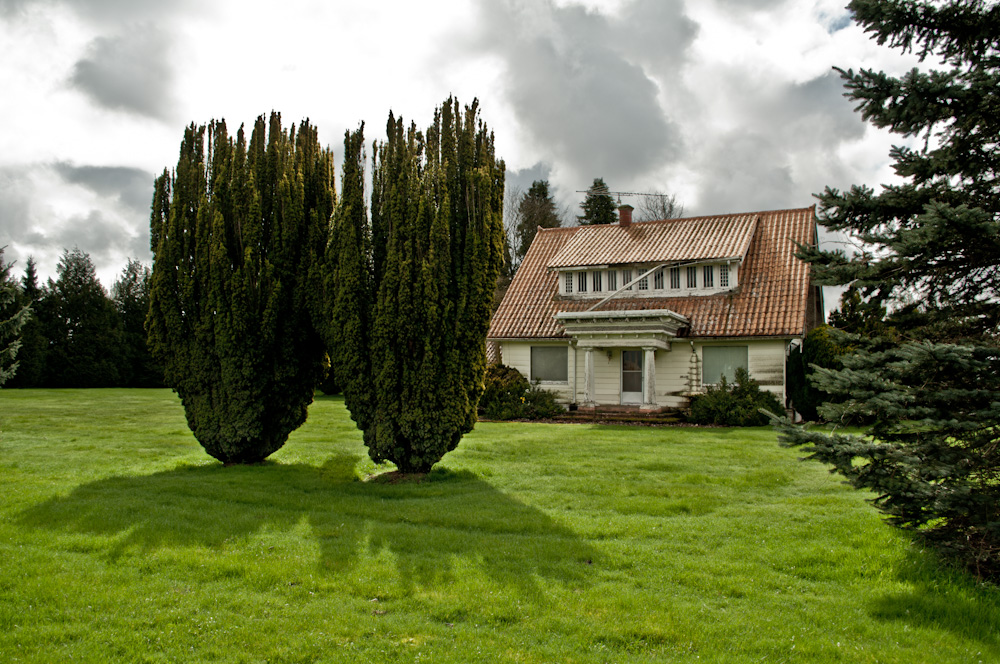
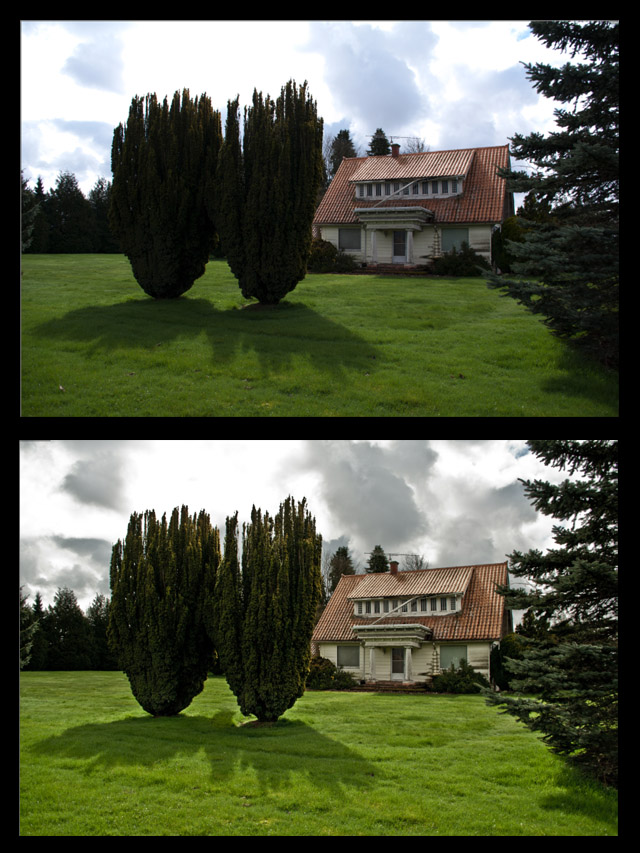
Whether what I did was good or not is not the point, the point is that by using local adjustments, the healing brush, graduated filters and overall image adjustments I was able to create the image I wanted without leaving Lightroom. There are definitely areas within the software that could stand improvement but I don’t think Adobe has much appetite for that as they won’t want to create a situation where people feel Lightroom is all they need and have them forgo buying the much more expensive Photoshop.
Here is the before and after, hopefully most of my edits will be unnoticed except for the most obvious one of course.
no comments | tags: Digital, editing | posted in Photography, Processing
Apr
17
2012
Even if you have nothing more than 10 minutes to spare, there is no reason not to pop in to the Reach Gallery Museum in Abbotsford and take in this exhibition. The exhibit is comprised of works from the permanent collection of the Vancouver Art Gallery and is a mix of works on paper and photographs. Specific to photographs and the reason that I think any photographer in the area with a moment to spare should stop by is the inclusion of works by historically important photographers, such as Robert Frank, Margaret Bourke-White, Robert Capa and others. It covers documentary to conceptual photography but for me the one image that I’m drawn to most is the monumental Edward Burtynsky Three Gorges Dam Project, Wan Zhou #6, Yangtze River, China 2002 . It depicts life literally on the edge as the people recover the building materials around them. There is just so much going on in that image. You know it’s real despite it’s depiction of a separate existence so different from our own sense of how life is lived.
While it is a small exhibition it does provide an opportunity to look at images from some photographic masters, The exhibit runs until June 10, 2012 and is free as always at the Reach.
no comments | tags: gallery, Photography | posted in Photography