May
17
2012
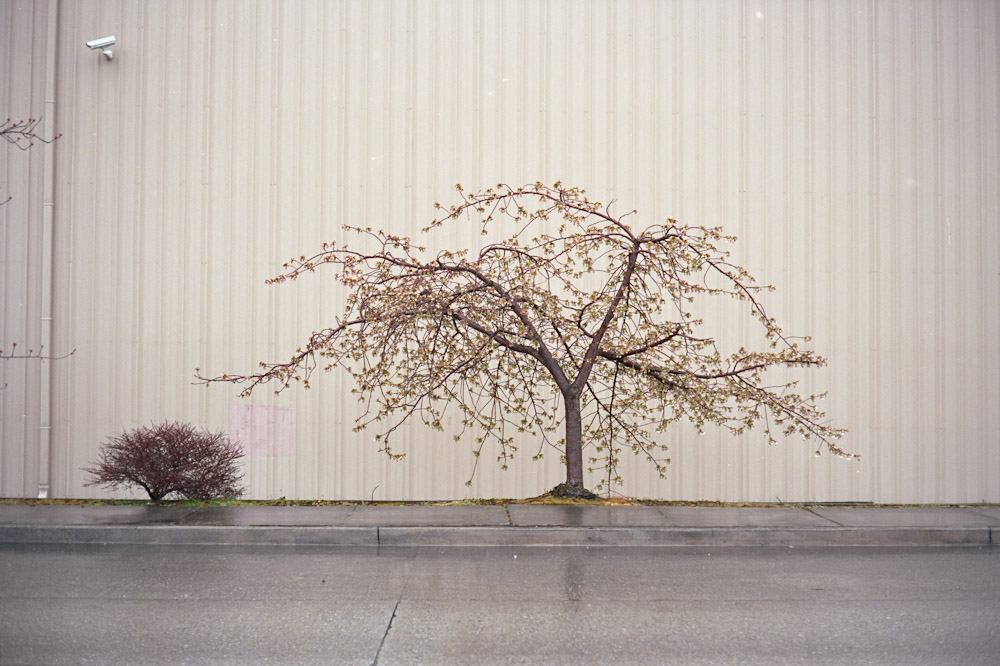
The Canon Sure Shot Tele of 1986 was an attempt by Canon to make a fun camera. And by fun I mean the ability to do multiple exposures and have a built in soft focus filter, what merriment. OK that is more than just take pictures so they should be retro-plauded (Yes I just made that up, the fun is contagious). When I think of soft focus filters I immediately think of the 1980’s so I suppose Canon was right on the money with this one.

The camera has an interesting lens, primarily a 40mm f2.8 and rather than an actual zoom the tele function is a secondary element group that swings into place internally to provide a 70mm f4.9 arrangement. When this happens the front of the camera extends in a manner more reminiscent of a travel trailer room expansion than a camera lens zooming (It’s also slightly noisier). The multiple exposure is implemented by pressing the ME button beside the lens while half pressing the shutter, now when you take the picture the film will not advance. You can repeat this procedure to get multiple multiple exposures and then when you fire the shutter without pressing the ME button the film will advance after that exposure. Did you get that, fun yes?

Two image multiple exposure
Now for the coup de grâce, the soft focus filter. This requires even more dexterity as you need to fully deploy the filter against the spring who’s sole job is to swing it back on you. Once you have fought the filter into place you are ready to permanently obscure your subject, in that 80’s glow. The camera also has back-light compensation and manual flash override and the images are OK but with quite a bit of vignetting. It’s also very noisy in all aspects, noisy like hey look out your about to be hit by a travel trailer! However if soft focus filters and multiple exposures are your idea of fun then this camera is for you and your big hair.

Soft Focus filter
no comments | tags: camera, Canon, film | posted in Cameras, Photography
May
13
2012

The Sillette Record is now almost 50 years old so it somewhat amazes to me that the selenium meter works as well as it does. I kept comparing it’s measurements against my Nikon P7000 and it came to a point where I felt I could just trust the meter in this camera and dispense with the double check. The meter itself has no effect on the shutter speed or aperture but by centering the needle either on the top plate window or through the nice viewfinder display you will have a correct exposure.


The focus though is of the zone variety which requires too much thinking I think. Zone focusing works to a degree when you use smaller apertures that give enough depth of field to hide errors in your ability to guess distances but when you use large apertures such as the cameras maximum f2.8 it is unforgiving. Of course you can select distances other than the preset icon distances but it requires turning the camera over to look at the scale on the bottom of the lens, not a quick way to focus and this still relies on your ability to guess the actual distance. The location of the shutter release is also unusual as it is on the side of the lens which forces a different grip compared to the more traditional top right location.

The lens is not that great when shooting wide open but is adequate when stopped down to about f5.6. The out of focus areas in images are rendered quite busily so I think this cameras greatest asset is its utilitarian design, I do like the way it looks. One final point is the film mask has rounded corners as you can see in this scan it’s one more thing that makes shooting with a camera like this so unique.

no comments | tags: Agfa, camera, film | posted in Cameras, Photography
May
11
2012

Just as I seem to be able to cause light leaks through mind power, I’m also able to cause double exposures. This picture was taken with my Wester Autorol and even though it has a frame advance that “should” prevent double exposure it was no match for my powers. OK what likely happened is that I forgot whether I had advanced the film or not and cocked the shutter again and the mechanism that is supposed to prevent the double exposure is simply over riden by knocking the small lever at the back which could happen in my camera bag or by me thinking I had already advanced the film. Two frames wasted, or not, as I sort of like the effect that happened on the body of the car. Other images didn’t pan out quite as I had hoped either one has some camera shake despite my use of a support, I blame that one on the security guard shouting at me (that’s loudly yelling not shooting). Several others overlap at the edges but there are also images that did turn out thankfully and I am quite pleased with them.
I should also mention that when I use cameras like this I don’t mind the errors and accidents as I’m having fun, which is when photography is the best, oh and I most often have a digital camera with me too.
While I’m on the subject of double exposures I need to try out the Canon Sure Shot Tele from 1986 which actually has a provision for purposefully doing them. It also has a built in soft focus filter, oh man I can just see the acid wash jeans and big hair already.
2 comments | tags: exposure, film | posted in Cameras, Photography
May
7
2012

I’ve posted previously about creating infrared images with the Sony DSC-V3 but never shown the actual contrivance that I use to do it. In an ideal world I wouldn’t need all the step rings but I’ve tried to use only what I have available to me and as the infrared filter is the most expensive item everything else must revolve around that, literally.
Starting at the camera side is what would appear to be an extraneous item a 48mm extension ring however what this does is, through having less threads than the extension tube, over ride the cameras sensor for detecting the extension tube. This allows you a limited amount of zoom which would other wise be locked at its maximum. The next thing is the extension tube itself which places the rest of the filters out of the way of the cameras lens. Ignoring the step rings the next important item is the Rodenstock RG715 filter. Within its name is a clue to its function, the 715 refers to the wavelength of light that it allows through. The RG715 blocks light bellow 715nm and passes the near infrared above this. As visible light is defined as between 390 and 750nm you can see that most of the light we see with our eyes is blocked. After the IR filter I use neutral density filters to cut down the total amount of light coming in. When the camera is in “Night Shot” mode in daylight the sensor is overwhelmed and the image is completely washed out. This happens because the camera locks out all user adjustment in this mode forcing the shutter speed to 1/30sec and bellow.

And of course the camera itself needs to be set to Night Shot mode. What happens in this case is the camera flips it’s small internal infrared filter out of the way allowing those higher wavelengths of light to fall on the sensor. Normally this extra light would be unwanted and be detrimental to the image but this is the light I am after. The results are mixed, yes you get a near infrared image but the overall image quality is lower than the camera can produce in normal operation and without being able to control the exposure that too can be hit and miss. I’m not aware of any current cameras that have provisions for IR photography without actually modifying the camera but a modified DSLR would give better results for sure.

no comments | tags: camera, Digital, IR, Sony | posted in Cameras, Photography, Processing
Apr
30
2012
1 comment | posted in Cameras, Photography
Apr
24
2012
Here are some of the recent images taken with the Yashica Electro 35 GT and Kodak Ektar 100. For more information about the camera you can see these posts October 2010 and the more detailed April 2012 Yashica Electro 35GT
2 comments | tags: film, Photography, Yashica | posted in Cameras, Photography
Apr
22
2012

I’ve owned several Yashica Electro 35 models but I’ve pared them down leaving me with the Electro 35 GT and GX. The GT stands out in the Electro line with it’s all black body. It is a great looking camera as well as performing. The lens of the 35 GT is a 45mm f1.7 stated to be 6 elements in 4 groups. It’s strictly aperture priority with no shutter speed indication beyond the slow speed or over exposure warning arrows. The shutter speed is determined electronically during the exposure rather than being predetermined. In practice this means that during longer exposures the camera reacts to changing light conditions, extending or shortening the exposure time.

Originally when the camera was released in 1969 batteries containing mercury were prevalent with there characteristic of maintaining a constant voltage throughout there discharge life. Now mercury batteries are unavailable so an alternative is required. My solution was to use a 6V alkaline battery with a home made adapter of a similar size to the original TR164 battery. This difference in voltage is likely to cause some variability in the exposure but as I shoot colour negative film with a large latitude and the fact that I scan all my film rather than printing optically I don’t really see it.

Being a rangefinder the camera has a small diamond shaped focus patch. A rangefinder works by linking the focus of the lens to the position of the patch relative to the main viewfinder, so as you change the focus of the lens the rangefinder patch moves horizontally. When the item in the main viewfinder and the patch are horizontally aligned the lens is focused to that distance. This works well with views that have vertical elements but can be difficult with small repeating patterns or horizontal lines. A field of flowers can be a difficult thing to focus within because of all the similar elements. Here is an animated view through my Yashica Electro 35 GT however because you are able to actually place your eye closer there is a lot more area around the frame lines that would be visible. You can also see the built in parallax correction as the frame-lines move down to compensate for closer focusing.

2 comments | tags: camera, film, Yashica | posted in Cameras, Photography
Apr
15
2012
Great naming Nikon very descriptive you should have thrown in AS for the apherical elements though that would have really capped it off and then you could have saved on paper by not even writing the specifications. Except I have no idea what Lite Touch means in this context, and I’m frankly afraid to Google it. You can also tell this is a good camera by the gold coloured trim (sarcasm).

So the lens as described has ED, (no not difficulty extending) extra low dispersion glass elements and also aspherical molded glass elements, but what this really means beyond the marketing is that the lens will tend to have better correction for distortions. And I think the results bear this out, I was quite pleased with the quality of the images from this camera and its several useful controls, I particularly like the infinity focus setting. Of course the lens may provide decent image quality but some of that may also be the conservative nature of it’s range. 38-120mm is neither that wide nor that long and the maximum aperatures of 5.3 to 10.5 aren’t just not fast but are slow (yes I know I could have written that clearer but Nikon could have made the lens faster and then I wouldn’t have had too).

Three later models took the zoom out to 130,140 and 150 mm before Nikon stopped developing new point and shoot 35mm film cameras around 2002.

One final point, don’t you miss the ability to irrevocably imprint the date on your images, I know I do. This is the true embedded data forget EXIF.

no comments | tags: camera, film, Nikon | posted in Cameras, Photography
Apr
11
2012

There is plenty of good information about the Olympus OM-1 and the other cameras in this series on the Internet so I don’t feel that I need to cover that ground. I will however take a moment to discus the metering and how it is measured and presented to the user.
The OM-1 has TTL metering (Through the lens) that is provided by two Cds cells placed internally around the eyepiece. A certain portion of the light passing through the viewfinder prism falls on these cells causing their internal resistance to drop. This effects the circuit causing the meter needle to move. Other parts of this circuit are the ASA dial, on off switch and of course the shutter speed and aperture linkage. All these variables contribute to the position of the meter needle. This meter requires batteries to operate but the camera it self is entirely mechanical allowing you to shoot without the meter.
The meter itself is located on the left hand side of the viewfinder and gives an indication of proper exposure for an average scene. As you make changes to the aperture and shutter the needle moves correspondingly. As the lens remains at it’s maximum aperature prior to actually taking a picture these changes are transferred from the lens to the camera via a mechanical linkage. In addition to centering the needle you can determine +-1 EV of adjustment in half stops by comparing the needle to the markings in the viewfinder. I’ve created this animation to show these.

My camera has an interesting focus screen that does not have the standard central focus micro-prisms or split image but is essentially a matte screen with a finer circular matte at the center and frame lines that are well within the image. I believe this was the all matte type that someone has customized with frame lines for either astrophotography or as Ted Samzadeh of Omnilargess has suggested for medical imaging. In any case the fine matte screen provides an exceptionally clear and unobstructed view.

Here are some of my ubiquitous sample images from my OM-1 taken with the Zuiko 35-70 F3.6 or the 28mm F 3.5 Zuiko as these are the only two lenses I currently own. Duncan Turner of DLT Photographic has now lent me a Vivitar 55mm macro in OM mount so that should be an interesting lens to try out with this camera.
3 comments | tags: camera, film, Meter, olympus, OM1, viewfinder | posted in Cameras, Photography
Apr
5
2012
 Every once and a while with film cameras I seem to inadvertently cause the back to open no matter what ingenious locking mechanism they had devised. The results are completely unpredictable but also completely of film. You can imagine that if exposing a piece of film at 1/250 of a second through a lens creates an image that it doesn’t take much inadvertent light to completely over-expose it. Here are some examples of light striking film, some of them come from the fact that I sometimes start shooting the first frame knowing that it will likely have been exposed during film loading.
no comments | tags: film, Photography | posted in Cameras, Photography